
Related Manuals for Philips WALITA HTS3576


Summary of Contents for Philips WALITA HTS3576
- Page 1 Registre o produto e obtenha suporte em www.philips.com/welcome HTS3576 Manual do Usuário...
- Page 2 E BEM VINDO À FAMÍLIA PHILIPS. a uma distância de 60 cm Agradecemos pela sua confi ança na Philips e temos a OS RUÍDOS ABAIXO PODEM SER PERIGOSOS certeza de que seu HTS3576 lhe trará muitos EM CASO DE EXPOSIÇÃO CONSTANTE...
-
Page 3: Table Of Contents
Insert the remote control batteries Find the correct viewing channel 11 Troubleshooting Select menu display language Turn on Progressive Scan 12 Glossary Change speaker settings Use Philips EasyLink Select a play source 5 Play Play a disc Play video Play music Play photo... -
Page 4: Important
1 Important Copyright notice Safety and important notice This product incorporates copyright Warning protection technology that is protected by method claims of certain U.S. patents • Risk of overheating! Never install the Home and other intellectual property rights Theater System in a confi ned space. Always owned by Macrovision Corporation and leave a space of at least 4 inches around the Home Theater System for ventilation. -
Page 5: Trademark Notice
Trademark notice Windows Media and the Windows logo are trademarks, or registered trademarks of Microsoft Corporation in the United States and/or other countries. Manufactured under license from Dolby Laboratories. Dolby, Pro Logic and the double-D symbol are trademarks of Dolby Laboratories. -
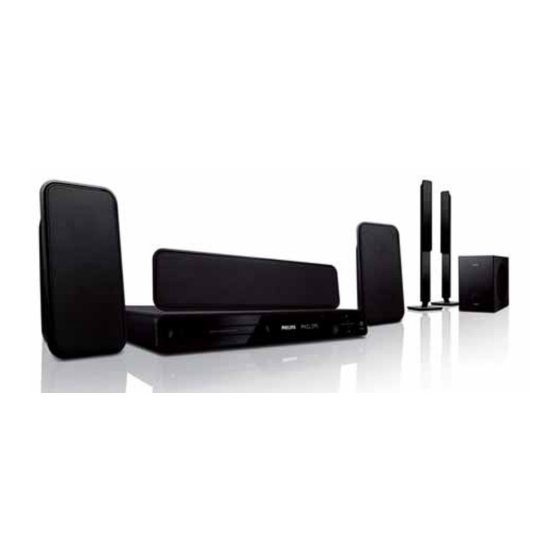
Page 6: Your Home Theater System
LINK jack to enjoy the music play in superb sound quality. Congratulations on your purchase, and welcome to Philips! To fully benefi t from the Sync the audio output with the video play support that Philips offers, register your product Synchronise audio and video by delaying the at www.philips.com/welcome. -
Page 7: Product Overview
g Play/Pause , Stop , Fast Reverse / Fast Product overview Forward ( Play/Pause ) • Main unit • Starts, pauses or resumes disc play. • In radio mode, automatically tunes radio stations during fi rst-time setup. ( Stop ) •... - Page 8 c PROGRAM / REPEAT Remote Control • In radio mode, resets the list of preset stations: press to manually reset; press and hold to automatically reset. • Selects or turns off repeat or shuffl e mode. SETUP • Accesses or exits the setup menu. ( Navigation buttons ) •...
- Page 9 k Numeric buttons v ZOOM / CREATE MP3 • Selects an item to play. • Zooms in or out of the picture. • Accesses the menu to create MP3. l SUBTITLE w KARAOKE • Select DVD or DivX subtitle languages. •...
-
Page 10: Connect
TV, depending on availability and your needs. A comprehensive interactive guide to help you connect your product is available at www.connectivityguide.philips.com. • To avoid magnetic interference or unwanted noise, never place this Home Theater System... -
Page 11: Connect Video Cables
• If your device supports HDMI CEC, you can control compliant devices with a single remote mode. (see ‘Get started’ > ‘Turn on control. (see ‘Get started’ > ‘Use Philips Progressive Scan’). EasyLink’). Note •... -
Page 12: Connect Speaker Cables To Speakers
Option 3: Connect to the Video Connect speaker cables to (CVBS) jack speakers For the rear speakers only VIDEO VIDEO OUT VIDEO IN Connect the speaker cables to the matching colour jacks on the speakers (or speaker stands). Connect a composite video cable to the VIDEO jack on this Home Theater System and the VIDEO input jack on the Connect speaker to speaker... -
Page 13: Connect Speakers And Subwoofer
Connect speakers and Connect radio antenna subwoofer ANTENNA FM (75 Ω) Connect the FM antenna to the FM75 jack on this Home Theater System (for some models, this cable is already connected). Extend the FM antenna and fi x its ends to the wall. -
Page 14: Connect Audio Cables/Other Devices
Connect audio from cable box/ Connect audio cables/other recorder/game console devices You can choose to connect to analogue Route the audio from other devices to this or digital jacks depending on the device Home Theater System to enjoy audio play with capabilities. - Page 15 Connect to coaxial jack Connect to optical jack OPTICAL DIGITAL IN OPTICAL DIGITAL OUT Connect an optical cable (not supplied) to the OPTICAL DIGITAL-IN jack Connect a coaxial cable (not supplied) on the Home Theater System and the to the COAXIAL DIGITAL-IN jack OPTICAL/SPDIF output jack on the on the Home Theater System and the device.
-
Page 16: Connect Power Cord
Connect portable media player Connect power cord Warning • Risk of product damage! Ensure that the power supply voltage corresponds to the voltage printed on the back or the underside of the Home Theater System. • Before connecting to a socket, set the voltage selector (at the rear or bottom of this Home Theater System) to the local power line Connect a 3.5mm stereo audio cable (not... -
Page 17: Get Started
4 Get started Control a play source Press RADIO , USB or DISC button to select the source you wish to control. Insert the remote control Select the desired function (for example batteries Navigate through the menu Point the remote control directly at the remote sensor on the Home Theater System and select the desired function. -
Page 18: Find The Correct Viewing Channel
General Setup • Go to the lowest channel on your TV, then press the Channel Down Auto EasyLink Setup button until you see the Philips Disc Lock English screen. Display Dim Español SOURCE button •... -
Page 19: Turn On Progressive Scan
Press SETUP to exit the menu. Turn on Progressive Scan You can now turn on the progressive scan mode on the TV. If the TV supports progressive scan output, you can connect this Home Theater System and the Note TV using component video connection. (see ‘Connect video cables’... -
Page 20: Change Speaker Settings
Press to change the volume level, Change speaker settings then press OK . The test tone is emitted from the » Ideally, the distance between listening position speaker. and all the speakers should be the same. If not, • Repeat the above setting for other change the speaker settings based on their speakers until all the speakers’... -
Page 21: Use Philips Easylink
You can turn off or turn on all EasyLink features. Your Home Theater System supports One-touch play Philips EasyLink, which uses the HDMI CEC When you connect your Home Theater (Consumer Electronics Control) protocol. System to devices that support one-touch... - Page 22 For example, if the TV audio is Map the audio inputs to the connected to the AUX1 jack on this connected devices Home Theater System, select [Aux1] and map with the TV (brand name) at Note the right panel. • Before you start, ensure that the audio output Select the audio input of this Home of the HDMI TV and other HDMI devices have...
-
Page 23: Select A Play Source
On the remote control Select a play source On the main unit AUDIO SOURCE repeatedly to • Press switch to the connected audio source: Display Device connected to AUX 1 AUDIO IN-AUX1 jacks AUX 2 AUDIO IN-AUX2 jacks • Press SOURCE button repeatedly to COAX IN COAXIAL DIGITAL IN... -
Page 24: Play
5 Play Play video Note Play a disc • For video disc, playback always resumes from the point where it was last stopped. To start Caution play from the beginning, press while the message is displayed. • Never place any objects other than discs into the disc compartment. - Page 25 Change video play Access DVD menu Play a title. Use the remote control to change the video play. Button Action AUDIO Selects an audio language or SYNC channel on a disc. SUBTITLE Selects the subtitle language on Press DISC to access disc main menu. a disc.
- Page 26 Access VCD menu or preview menu Sync audio output with video play The PBC (Playback Control) for VCD is If the video play is slower than the audio activated by default in the factory. When you output (sound does not match with the load a VCD, the contents menu is displayed.
- Page 27 Repeat play a specifi c section Play DivX® video During playback, press INFO . DivX video is a digital media format that The disc status menu is displayed. retains high quality despite a high rate of » compression. You can enjoy DivX video on Select [Repeat] in the menu, then press this DivX®...
-
Page 28: Play Music
Play MP3/WMA music Play music MP3/WMA is a type of highly compressed audio fi le (fi les with .mp3 or .wma extensions). Control audio track play Insert a disc or USB that contains the Play a track. MP3/WMA music. Use the remote control to control the Press DISC or USB . -
Page 29: Play Photo
Play photo Note • You may require longer time to display the disc content on the TV due to the large number of Play photo as slideshow songs/photos compiled onto one disc. • If the JPEG photo is not recorded with an ‘exif ’ This Home Theater System can play JPEG type fi... -
Page 30: Play From Usb Device
Play musical slideshow Play from USB device Play MP3/WMA music fi les and JPEG This Home Theater System plays/views MP3, photo fi les simultaneously to create musical WMA, DivX (Ultra) or JPEG fi les on the slideshow. The MP3/WMA and JPEG fi les following USB devices: must be stored on the same disc or USB •... -
Page 31: Play From Portable Media Player
Play from portable media Play from radio player Check if the FM antenna has been connected to this Home Theater System. If not, connect Simply connect your portable media player (e.g. the supplied FM antenna to the FM75 jack MP3 player) to this Home Theater System to and fi... - Page 32 Listen to radio Search and store radio stations individually Press RADIO . Press RADIO . Use the remote control to control the radio. Press It starts searching until a radio station » Button Action is detected. Selects a preset radio station. Repeat step 2 until you tune to the radio Tunes the radio frequency up or station you wish to store.
-
Page 33: Advanced Features
6 Advanced Press to access the [TRACK] panel. Select the audio track, then press OK . features • To select another track, repeat step [Select • To select all tracks, select All] in the menu and press OK . Create MP3 audio fi les •... -
Page 34: Adjust Sound
7 Adjust sound Select a preset sound Control the volume Press VOL +/- to increase or decrease the volume. Press SOUND repeatedly to select the • To mute, press sound effect that most suitable for the • To restore the volume, press again video or music you play. -
Page 35: Adjusting Microphone Volume Level
[Mic] Adjusting microphone volume Turns microphone output on and off. level • [On] – Turns microphone on. [Off] – Turns microphone off. • [Echo Level] Press to set the echo level. [Key] Press to set the pitch level that matches your voice. -
Page 36: Adjust Settings
8 Adjust settings General setup General Setup You can customise various kinds of settings as you prefer. Refer to the following instructions to EasyLink Setup navigate through the setup menus. Disc Lock Display Dim Symbol Options OSD Language Screen Saver [General Setup] Sleep Timer DivX(R) VOD Code... - Page 37 TV/devices before you can enjoy the connected devices can respond to the EasyLink controls. See the TV/devices manual following commands simultaneously: for details. • Philips does not guarantee 100% Option Description interoperability with all HDMI CEC compliant devices. [EasyLink] Turns off or on all EasyLink features.
-
Page 38: Audio Setup
[Sleep Timer] Audio setup Switches to standby automatically after the preset time. [15 mins] , [30 mins] , [45 mins] , [60 mins] • Audio Setup – Selects the count down time before Speakers Volume the Home Theater System switches to Speakers Delay standby. - Page 39 [Speakers Volume] [CD Upsampling] Sets the volume level of each speaker to get Converts the music CD to a higher sampling the ideal audio balance. rate using sophisticated digital signal processing for better sound quality. 1) To start, press OK . [Off] –...
-
Page 40: Video Setup
[TV Display] Video setup Selects one of the following display formats: Video Setup TV System 4:3 Pan Scan (PS) 4:3 Letter Box (LB) 16:9 (Wide Screen) TV Display Screen Fit • [4:3 Pan Scan] – For 4:3 screen TV: full- Picture Setting height display with the trimmed sides. - Page 41 [HDMI Setup] [Closed Caption] Selects the HDMI video setting when you Turns off or on display captions. connect this Home Theater System and the • [On] – Shows the sound effects in TV with a HDMI cable. subtitles. Applicable only to discs with Closed Caption information included and the TV supports this feature.
-
Page 42: Preferences
[Audio] Preferences Selects the default audio language for disc play. [Subtitle] Note Selects the default subtitle language for disc • Stop disc play before you can access play. [Preferences] . [Disc Menu] Selects the language for disc menu. Preferences Audio Note Subtitle •... - Page 43 This information is required when you want to fi nd out if a newer software version is available Note at the Philips website that you may download and install on this Home Theater System. • If you forget the password, enter ‘136900’...
-
Page 44: Additional Information
OK . Write down the version number, then SETUP to exit the menu. press Go to www.philips.com/support to check the latest software version available for this Home Theater System. If the latest software version is higher than the software version of this Home Theater System, download it and store onto a CD-R or USB fl... -
Page 45: Specifications
10 Specifications Radio • Tuning range: FM 87.5-108 MHz (50/100 kHz) • 26 dB quieting sensitivity: FM 22 dBf • IF rejection ratio: FM 60 dB Note • Signal-to-noise ratio: FM 50 dB • Harmonic distortion: FM 3% • Specifi cation and design are subject to change without notice •... - Page 46 Subwoofer • Impedance: 3 ohm • Speaker drivers: 203 mm (8”) woofer • Frequency response: 40 Hz ~ 150 Hz • Dimensions (WxHxD): 242 x 352 x 360 (mm) • Weight: 5.76 kg Laser specifi cation • Type: Semiconductor laser GaAIAs (CD) •...
-
Page 47: Troubleshooting
If you have changed the welcome. setting, switch back to default mode: 1) Press to open the disc compartment. If you contact Philips, you will be asked for the 2) Press . model and serial number of your Home Theater 3) Press SUBTITLE . - Page 48 Sound Play No sound. DivX video fi les cannot be played. • • Ensure that the audio cables are Ensure that the DivX fi le is encoded connected and press the correct input according to the ‘Home Theatre Profi le’ source (for example, AUDIO SOURCE , with the DivX encoder.
-
Page 49: Glossary
12 Glossary HDMI High-Defi nition Multimedia Interface (HDMI) is a high-speed digital interface that can transmit uncompressed high defi nition video and digital multichannel audio. It delivers high quality picture and sound quality, completely Aspect ratio free from noise. HDMI is fully backward- Aspect ratio refers to the length to height compatible with DVI. - Page 50 Playback Control. A system where you navigate through a Video CD/Super VCD with on-screen menus that are recorded onto the disc. You can enjoy interactive playback and search. Pulse Code Modulation. A digital audio encoding system. Progressive scan The progressive scan displays twice as many frames per second as an ordinary TV system.
- Page 52 ISTA DE ERVIÇO UTORIZADO - BRASIL ACRE CARIACICA 27 3336-0574 DIVINOPOLIS 37 3213-5278 IPORA 44 3652-1126 RIO BRANCO 68 3224-0558 COLATINA 27 3721-3272 DORES DO INDAIA 37 3551-1094 IRATI 42 3422-1337 GUARAPARI 27 3261-3656 FORMIGA 37 3321-1998 LARANJEIRAS SUL 42 3635-3288 ALAGOAS LINHARES 27 3372-2000...
- Page 53 ISTA DE ERVIÇO UTORIZADO - BRASIL RIO DE JANEIRO 21 2527-9532 URUGUAIANA 55 3411-4343 CAMPINAS 19 3234-8163 SAO JOSE CAMPOS 12 3942-8056 RIO DE JANEIRO 21 2545-7526 VACARIA 54 3231-1396 CAMPOS DO JORDAO 12 3662-3899 SAO JOSE DO RIO PARDO 19 3681-3662 RIO DE JANEIRO 21 2558-3109...
- Page 54 Language code Abkhazian 6566 Inupiaq 7375 Pushto 8083 Irish 7165 Russian 8285 Afar 6565 Afrikaans 6570 Íslenska 7383 Quechua 8185 Amharic 6577 Italiano 7384 Raeto-Romance 8277 Arabic 6582 Ivrit 7269 Romanian 8279 Japanese 7465 Rundi 8278 Armenian 7289 Assamese 6583 Javanese 7486 Samoan...
- Page 56 Seja Responsável Respeite os direitos autorais sgpjy_0915/78x_01...
Need help?
Do you have a question about the WALITA HTS3576 and is the answer not in the manual?
Questions and answers