Table of Contents
Advertisement
Available languages
Available languages
Quick Links
TENTS & EQUIPMENT
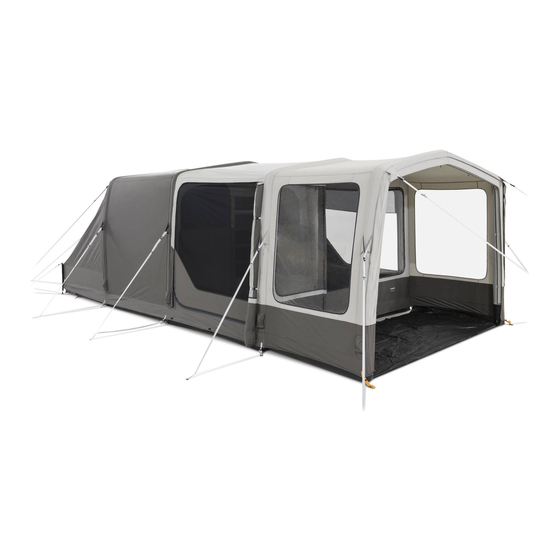
Rarotonga DA FTT 401 TC LH/RH, Rarotonga DA FTT 401 LH/RH
Awning tent
EN
Operating manual . . . . . . . . . . . . . . . . . . . 7
Vorzelt
DE
Bedienungsanleitung . . . . . . . . . . . . . . . .10
Auvent
FR
Notice d'utilisation . . . . . . . . . . . . . . . . . .14
Avancé
ES
Instrucciones de uso . . . . . . . . . . . . . . . . .18
Avançado
PT
Manual de instruções . . . . . . . . . . . . . . . .21
Veranda
IT
Istruzioni per l'uso. . . . . . . . . . . . . . . . . . 24
Voortent
NL
Gebruiksaanwijzing . . . . . . . . . . . . . . . . 28
Fortelt
DA
Betjeningsvejledning . . . . . . . . . . . . . . . .31
Förtält
SV
Bruksanvisning . . . . . . . . . . . . . . . . . . . . 34
FTT
NO
Bruksanvisning . . . . . . . . . . . . . . . . . . . . .37
FI
Käyttöohje. . . . . . . . . . . . . . . . . . . . . . . . .40
PL
Instrukcja obsługi . . . . . . . . . . . . . . . . . . .43
SK
Návod na obsluhu . . . . . . . . . . . . . . . . . .47
CS
Návod k obsluze . . . . . . . . . . . . . . . . . . . .50
HU
Használati utasítás . . . . . . . . . . . . . . . . . .53
Advertisement
Table of Contents

Related Manuals for Dometic FTT Series


Summary of Contents for Dometic FTT Series
-
Page 1: Table Of Contents
TENTS & EQUIPMENT Rarotonga DA FTT 401 TC LH/RH, Rarotonga DA FTT 401 LH/RH Awning tent Fortelt Operating manual ....7 Bruksanvisning .....37 Vorzelt Etuteltta Bedienungsanleitung . - Page 2 © 2022 Dometic Group. The visual appearance of the contents of this manual is protected by copyright and design law. The underlying technical design and the products contained herein may be protected by design, patent or be patent pending. The trademarks mentioned in this manual...
- Page 3 2250 6050 850 × 470 × 460 mm 35.3 kg 2850 1900 1300 1000 × 540 × 470 mm 43.5 kg Connection Width: 2500 3100 90° 90° 90° 90° 4445103802...
- Page 4 4445103802...
- Page 5 4. 4. X = 2 × a 4445103802...
- Page 6 4445103802...
-
Page 7: Operating Manual
Ensure you know the fire precaution arrangements on the • Use for purposes other than those described in this manual site. Dometic reserves the right to change product appearance and product • Do not cook inside the awning tent or use open flames. specifications. - Page 8 4. Clear the site of sharp stones and debris to avoid damaging the 9. Remove the four corner pegs. groundsheet. 10. Fold/roll the tent towards the valves to expel more air. 5. Set up the product with the doors facing away from the wind. 11.
- Page 9 The statutory warranty period applies. If the product is defective, please contact your retailer or the manufacturer's branch in your country (see dometic.com/dealer). For repair and warranty processing, please include the following docu- ments when you send in the product: •...
-
Page 10: Bedienungsanleitung
• Stellen Sie sicher, dass die Belüftungsöffnungen jederzeit geöffnet sind, um Ersticken zu verhindern. Dometic behält sich das Recht vor, das Erscheinungsbild des Produkts und dessen technische Daten zu ändern. VORSICHT! Nichtbeachtung dieser Hinweise kann zu leichten bis mittelschweren Verletzungen führen. - Page 11 Vor dem ersten Gebrauch Stellen Sie das Vorzelt wie folgt auf: 1. Um das Vorzelt vor Schmutz und Beschädigungen zu schützen, legen Machen Sie sich mit dem Produkt vertraut, indem Sie einen Testaufbau Sie vor dem Auspacken eine Bodenplane oder Unterlage aus. durchführen, bevor Sie das Produkt zum ersten Mal verwenden.
- Page 12 Es gilt die gesetzliche Gewährleistungsfrist. Sollte das Produkt defekt sein, wenden Sie sich bitte an Ihren Fachhändler oder die Niederlassung HINWEIS des Herstellers in Ihrem Land (siehe dometic.com/dealer). Informationen zur Reparatur von AirPoles (Abb. b, Seite 6). Bitte senden Sie bei einem Reparatur- bzw. Gewährleistungsantrag fol-...
- Page 13 Technische Daten Rarotonga DA FTT Rarotonga DA FTT 401 TC Abb. 1, Seite 3 Abmessungen Technische Baumwolle Material des Vorzelts Polyester 150D (Technical Cotton) Bruttogewicht, in kg 46,2 37,5 Nettogewicht, in kg 43,5 35,3 4445103802...
-
Page 14: Notice D'utilisation
Gardez les voies de passage libres. et avertissements, ainsi que la documentation associée peuvent faire l’objet de modifications et de mises à jour. Pour obtenir des informations actualisées sur le produit, veuillez consulter le site documents.dometic.com, dometic.com. Contenu de la livraison... - Page 15 Avant la première utilisation 3. Séparez et identifiez les différents composants. Familiarisez-vous avec le produit en effectuant un test de mise en place Procédez comme indiqué pour installer l’auvent avant la première utilisation du produit. Vérifiez que le contenu de la livrai- (fig.
- Page 16 Condensation Problème Solution Tous les auvents subissent des effets de condensation interne si une ou ➤ Vérifiez que la valve est entièrement vissée L’auvent ne se gonfle plusieurs des conditions suivantes s’appliquent : qu’avec difficulté dans le tube d’air. ➤ Vérifiez si le tube gonflable est plié au niveau de •...
- Page 17 Caractéristiques techniques Rarotonga DA FTT Rarotonga DA FTT 401 TC fig. 1, page 3 Dimensions Matériau de l’auvent Coton technique Polyester 150D Poids brut, en kg 46,2 37,5 Poids net, en kg 43,5 35,3 4445103802...
-
Page 18: Instrucciones De Uso
Uso con una finalidad distinta de la descrita en las instrucciones • No cocine ni encienda fuego en el interior del avancé. Dometic se reserva el derecho de cambiar la apariencia y las especificacio- Peligro de asfixia nes del producto. - Page 19 2. Elija un lugar sombreado para evitar la degradación de la tela por los 3. Cierre todas las puertas y aperturas. rayos UV. 4. Si el tubo de la carpa está instalado, empújelo para extraerlo de la 3. Evite acampar bajo los árboles, ya que las ramas, la resina, etc. pue- funda;...
- Page 20 9. Utilice cinta adhesiva y solución de reparación para sellar el agujero. cante en su país (visite dometic.com/dealer). 10. Vuelva a colocar el tubo inflable en la funda protectora.
-
Page 21: Manual De Instruções
Certifique-se de que conhece as disposições de preven- manual ção de incêndios em vigor no local. A Dometic reserva-se o direito de alterar o design e as especificações do • Não cozinhe nem utilize chamas abertas no interior do produto. - Page 22 2. Escolha um local com sombra para evitar que a lona se degrade por 2. Feche todas as persianas das janelas ou retire as cortinas. efeito dos UV. 3. Feche todas as portas e aberturas. 3. Evite montar o para-vento por baixo de árvores, uma vez que a queda 4.
- Page 23 Reparar um furo na vareta de ar Eliminação Se a vareta de ar perder ar, proceda da seguinte forma: 1. Abra o fecho-éclair da manga exterior que suporta a vareta de ar. ➤ Sempre que possível, coloque o material de embalagem no 2.
-
Page 24: Istruzioni Per L'uso
• Impiego per scopi diversi da quelli descritti nel presente manuale Pericolo di asfissia Dometic si riserva il diritto di modificare l’aspetto e le specifiche del pro- • Assicurarsi che le aperture di ventilazione siano sempre dotto. aperte per evitare il soffocamento. - Page 25 Scelta del luogo Smontaggio della tenda Scegliere un luogo pianeggiante e protetto dal vento: AVVISO! Danni materiali Smontare la tenda senza usare troppa forza. Altrimenti si 1. Se necessario, usare un frangivento. potrebbe danneggiare qualsiasi materiale. 2. Scegliere un luogo ombreggiato per evitare il degrado dai raggi UV del tessuto.
- Page 26 Vale il termine di garanzia previsto dalla legge. Se il prodotto è difettoso, contattare il rivenditore di fiducia o la filiale del fabbricante nel proprio Paese (vedi dometic.com/dealer). Per la gestione della riparazione e della garanzia è necessario inviare la seguente documentazione insieme al prodotto: •...
- Page 27 Specifiche tecniche Rarotonga DA FTT Rarotonga DA FTT 401 TC fig. 1, pagina 3 Dimensioni Materiale della Cotone tecnico Poliestere 150D veranda Peso lordo, in kg 46,2 37,5 Peso netto, in kg 43,5 35,3 4445103802...
-
Page 28: Gebruiksaanwijzing
• Gebruik de voortent niet om in te koken en gebruik er Dometic behoudt zich het recht voor om het uiterlijk en de specificaties geen open vuur. van het product te wijzigen. Gevaar voor verstikking •... - Page 29 Een plaats kiezen De tent afbreken Kies een vlakke plaats die uit de wind ligt: LET OP! Materiële schade Gebruik geen kracht bij het afbreken van de tent. Anders 1. Gebruik indien nodig een windscherm. kunt u materiaal beschadigen. 2. Kies een schaduwrijke plaats om uv-aantasting van het doek te voor- komen.
- Page 30 5. Rits de beschermhoes open om de opblaasbare buis bloot te leggen. in uw land (zie dometic.com/dealer). 6. Pomp wat lucht in de opblaasbare buis. Stuur voor de afhandeling van reparaties of garantie de volgende docu- menten mee: 7.
-
Page 31: Betjeningsvejledning
Der tages forbehold for eventuelle ændringer og opdateringer af denne produktvejledning samt anvisningerne, retningslinjerne og advarslerne samt den tilhørende dokumentation. Se documents.dometic.com, dometic.com for de nyeste produktinformationer. - Page 32 2. Vælg et sted med skygge for at undgå, at UV-strålerne nedbryder 5. Fjern alle barduner og bånd. stoffet. 6. Fjern alle pløkke mellem hjørnepløkkene. 3. Undgå opsætning under træer, da faldende grene, harpiks osv. kan 7. Åbn ventilerne på hver enkelt stang. beskadige produktet.
- Page 33 7. Neddyk slangen i vand. • En reklamationsgrund eller en fejlbeskrivelse. 8. Find hullet. Vær opmærksom på, at egne eller uprofessionelle reparationer kan har sikkerhedsmæssige konsekvenser og kan gøre garantien ugyldig. 9. Brug reparationstape og en reparationsopløsning for at tætne hullet. Garantien dækker produktionsfejl, materialer og dele.
-
Page 34: Bruksanvisning
Användning för andra ändamål än de som beskrivs i denna bruksanvis- Brandrisk ning. • Observera brandskyddsanordningarna på platsen. Dometic förbehåller sig rätten att ändra produktens utseende och specifi- • Laga inte mat i förtältet och använd inte öppen låga. kationer. Kvävningsrisk •... - Page 35 3. Undvik att sätta upp tältet under träd eftersom nedfallande grenar, 10. Vik/rulla tältet mot ventilerna för att släppa ut mer luft. kåda etc. kan skada tältet. 11. När tältet är helt tömt på luft, rulla ihop det så det passar i bärväskan. 4.
- Page 36 Garanti Den lagstadgade garantitiden gäller. Kontakta din återförsäljare eller till- verkarens avdelningskontor i ditt land (se dometic.com/dealer) om pro- dukten är defekt. Vid reparations- och garantiärenden ska följande dokument skickas med när du returnerar produkten: •...
-
Page 37: Fortelt
Bruk til andre formål enn det som er beskrevet i denne håndboken • Sørg for å kjenne tiltakene for brannsikkerhet på stedet. Dometic forbeholder seg rettigheten til å endre produktet ytre og pro- • Du må ikke tilberede mat eller bruke åpen ild i forteltet. - Page 38 1. Bruk vindskjerm om nødvendig. 5. Fjern alle linjer og stropper. 2. Velg et sted der det er skygge for å unngå UV-nedbrytning av teksti- 6. Fjern alle plugger mellom hjørnepluggene. len. 7. Åpne ventilene på hver stang. 3. Unngå å sette opp under trær, da grener som faller ned, kvae, osv. 8.
- Page 39 Garanti Lovmessig garantitid gjelder. Hvis produktet er defekt, ta kontakt med for- handleren eller produsentens filial i landet (se dometic.com/dealer). Ved henvendelser vedrørende reparasjon eller garanti, må du sende med følgende dokumentasjon: •...
-
Page 40: Etuteltta
Etuteltassa ei saa laittaa ruokaa eikä käyttää avotulta. • Käyttö muuhun kuin tässä ohjeessa ilmoitettuun tarkoitukseen Tukehtumisvaara Dometic pidättää itsellään oikeuden muutoksiin tuotteen ulkonäössä ja • Varmista, että ilmanvaihtoaukot ovat aina auki ja esteettö- spesifikaatioissa. mät, jotta tukehtuminen voidaan välttää. - Page 41 2. Valitse varjoinen paikka, jotta UV-säteily ei saa kangasta ikääntymään. 7. Avaa jokaisen kaaren venttiilit. 3. Vältä pystyttämistä puiden alle, koska putoavat oksat, pihka jne. voivat 8. Odota, kunnes suurin osa ilmasta on poistunut. vahingoittaa tuotetta. 9. Ota neljä kulmakiilaa pois. 4.
- Page 42 Takuu Tuotetta koskee lakisääteinen tuotevastuuaika. Jos tuote on viallinen, ota yhteyttä jälleenmyyjään tai valmistajan toimipisteeseen omassa maassasi (ks. dometic.com/dealer). Jos lähetät tuotteen korjattavaksi, liitä korjaus- ja takuukäsittelyä varten mukaan seuraavat asiakirjat: • Kopio kuitista, jossa näkyy ostopäivä...
-
Page 43: Przedsionek
Użytkowanie w celach innych niż opisane w niniejszej instrukcji Ryzyko uduszenia obsługi • Uważać, aby otwory wentylacyjne były przez cały czas Firma Dometic zastrzega sobie prawo do zmiany wyglądu i specyfikacji otwarte, aby uniknąć uduszenia. produktu. OSTROŻNIE! Nieprzestrzeganie tych uwag może pro- wadzić do lekkich lub umiarkowanych obrażeń. - Page 44 Przed pierwszym użyciem 2. Rozpakować przedsionek. 3. Posegregować i zidentyfikować poszczególne elementy. Przed pierwszym użyciem produktu zapoznać się z nim poprzez jego 4. Przedsionek należy rozkładać w zilustrowany sposób (rys. 2, próbne rozłożenie. Sprawdzić, czy w zestawie znajdują się wszystkie ele- strona 3 do rys.
- Page 45 Gwarancja Obowiązuje ustawowy okres gwarancji. W przypadku stwierdzenia Usuwanie usterek uszkodzenia produktu należy skontaktować się z jego sprzedawcą lub z oddziałem producenta w danym kraju (patrz dometic.com/dealer). WSKAZÓWKA W celu naprawy lub realizacji gwarancji konieczne jest przesłanie wraz • Podczas pierwszego kontaktu z wodą na szwach może z produktem następujących dokumentów:...
- Page 46 Dane techniczne Rarotonga DA FTT Rarotonga DA FTT 401 TC rys. 1, strona 3 Wymiary Materiał przedsionka bawełna techniczna poliester 150D Masa brutto, w kg 46,2 37,5 Masa netto, w kg 43,5 35,3 4445103802...
-
Page 47: Prístrešok
Nevarte ani nepoužívajte otvorený plameň vnútri prí- • Použitím na iné účely než na účely opísané v návode strešku. Spoločnosť Dometic si vyhradzuje právo na zmenu vzhľadu a technických Nebezpečenstvo udusenia parametrov výrobku. • Zaistite, aby boli vetracie otvory stále otvorené, aby nedo- šlo k zaduseniu. - Page 48 Výber miesta 1. Odstráňte všetky nečistoty z vonkajšej strany. 2. Zatvorte všetko okenné rolety alebo odoberte závesy. Vyberte rovné miesto chránené pred vetrom: 3. Zatvorte všetky dvere a otvory. 1. v prípade potreby použite vetrolam. 4. Vytlačte tyčku baldachýnu z puzdra, ak je namontovaná. Neťahajte ju. 2.
- Page 49 Platí zákonom stanovená záručná lehota. Ak je výrobok poškodený, 8. Nájdite miesto prepichnutia. obráťte sa na svojho predajcu alebo pobočku výrobcu vo svojej krajine (pozri dometic.com/dealer). 9. Použite pásku a roztok na opravu na utesnenie prepichnutia. 10. Nafukovaciu trubicu zazipsujte späť do ochranného puzdra.
-
Page 50: Předstan
Změna výrobku bez výslovného souhlasu výrobce za následek smrt nebo vážné zranění. • Použití k jiným účelům, než jsou popsány v tomto návodu Nebezpečí požáru Společnost Dometic si vyhrazuje právo změnit vzhled a specifikace • Ujistěte se, že znáte protipožární opatření na místě. výrobku. •... - Page 51 3. Vyvarujte se stavění zástěny pod stromy, protože padající větve, pry- 8. Počkejte, až se vypustí převážné množství vzduchu. skyřice atd. mohou výrobek poškodit. 9. Odstraňte čtyři rohové kolíky. 4. Z místa odstraňte ostré kameny a nečistoty, aby nedošlo k poškození 10.
- Page 52 Na výrobek je poskytována záruka v souladu s platnými zákony. Pokud je výrobek vadný, obraťte se na svého prodejce nebo na pobočku výrobce ve vaší zemi (viz dometic.com/dealer). K vyřízení opravy a záruky nezapomeňte spolu s výrobkem odeslat násle- dující dokumenty: •...
-
Page 53: Elősátor
• Az útmutatóban leírt céloktól eltérő felhasználás Tűzveszély A Dometic fenntartja a termék megjelenésének és specifikációjának • Ismerje meg a helyszíni tűzvédelmi intézkedéseket. módosítására vonatkozó jogát. • Az elősátorban tilos főzni, vagy nyílt lángot használni. - Page 54 4. A sátoraljzat sérülésének elkerülése érdekében tisztítsa meg a terüle- 4. Ha van ilyen, tolja ki a védőtető rudat a zsákból, ne húzza. tet az éles kövektől és a hulladékoktól. 5. Távolítsa el az összes zsinórt és hevedert. 5. Úgy állítsa fel a terméket, hogy az ajtók a széllel ellentétes oldal felé 6.
- Page 55 A termékre a törvény szerinti szavatossági időszak érvényes. Amennyiben 5. A felfújható cső szabaddá tételéhez cipzárazza ki a védőzsákot. a termék meghibásodott, lépjen kapcsolatba a kiskereskedővel, vagy a gyártó helyi képviseletével (lásd: dometic.com/dealer). 6. Fújjon némi levegőt a felfújható csőbe. 7. Nyomja víz alá a csövet.
- Page 56 YOUR LOCAL YOUR LOCAL DEALER SUPPORT SALES OFFICE dometic.com/dealer dometic.com/contact dometic.com/sales-offices A complete list of Dometic companies, which comprise the Dometic Group, can be found in the public filings of: DOMETIC GROUP AB • Hemvärnsgatan 15 • SE-17154 Solna • Sweden...
Need help?
Do you have a question about the FTT Series and is the answer not in the manual?
Questions and answers