Table of Contents
Advertisement
Quick Links
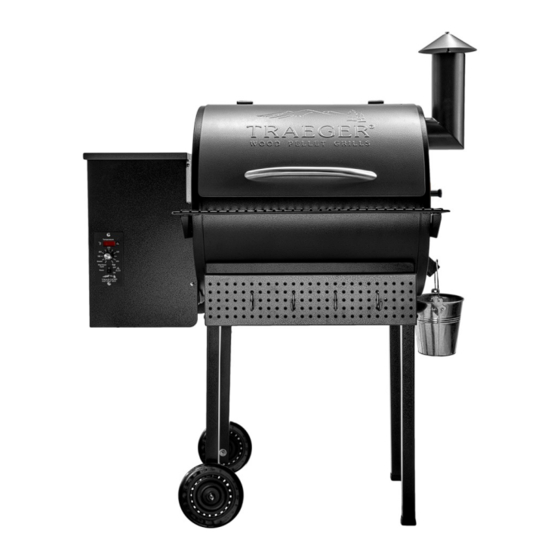
OWNER'S MANUAL
TFB52QPB
RESIDENTIAL PELLET GRILL
FOR OUTDOOR USE ONLY!
"TASTE THE DIFFERENCE"
Please read this entire manual before assembly, installation of your Traeger Pellet Grill.
Failure to follow these instructions could result in property damage, bodily injury or even
death. Contact your local building or fire official about restrictions and installation
inspection requirements in your area.
SAVE THESE INSTRUCTIONS
Advertisement
Table of Contents

Related Manuals for Traeger TFB52QPB


Summary of Contents for Traeger TFB52QPB
- Page 1 FOR OUTDOOR USE ONLY! “TASTE THE DIFFERENCE” Please read this entire manual before assembly, installation of your Traeger Pellet Grill. Failure to follow these instructions could result in property damage, bodily injury or even death. Contact your local building or fire official about restrictions and installation inspection requirements in your area.
- Page 2 WARNING! Use ONLY TRAEGER BRAND BBQ WOOD PELLETS, which are specifically made to work in our Grills. Traeger wood pellets are rated for 8500 BTU per LBS with an ash content of 2%. CAUTION! Always store wood pellets in a dry location, away from heat-producing appliances and other fuel containers.
- Page 3 INTRODUCTION Congratulations on your purchase of this Traeger Wood Pellet Grill, Model TFB52QPB. With proper set-up, operation and maintenance, the Grill will provide you with delicious food and years of cooking enjoyment. NOTE: NUMBERS FOLLOWING PART NAMES REFER TO THE COMPONENT DIAGRAM FOUND NEAR THE END OF THIS MANUAL.
-
Page 4: Section One: Assembly Instructions
SECTION ONE: ASSEMBLY INSTRUCTIONS MOUNTING THE LEGS AND PEGBOARD: 1) Carefully lay the Grill on its back on a non-abrasive surface. 2) Use the Black Bolts (A), Washers (E, G) and Nuts (C) supplied in the hardware kit to install the Leg Assemblies (99) on the right end of the Grill and the Wheel Leg Assemblies (104) on the left end of the Grill, as shown in the diagram below. - Page 5 ATTACHING THE CHROME DOOR HANDLE: 1) Insert the bolt (J), flat washer (K) into the slot in the door and thread into the handle (143). Repeat the process on the other side. 2) Do not over tighten the bolts to the handle ATTACHING THE FLUE PIPE AND CHIMNEY CAP ASSEMBLY: 1) Align the holes in the Flue Pipe (113) with the holes in the Flue Pipe Gasket (126), which fits between the right end of the Grill and the Flue Pipe (113).
-
Page 6: Positioning The Heat Baffle
WARNING! Many parts of the Grill will become very hot during operation. Care must be taken to avoid burns, both during operation and afterwards, while the Grill is still hot. It should never be left unattended when young children are present. Never move the Grill when it is operating. - Page 7 POSITIONING THE PORCELAIN GRILLS: 1) Position the Porcelain Grill (147) on the Grill Supports that run the length of the cooking area. Position warming shelf (155) onto holes in warming shelf supports. INSTALLING THE FRONT SHELF: 1) Insert the Front Shelf (156) onto the grill aligning the slots with the 4 holes located on both sides of the grill.
- Page 8 HANGING THE GREASE BUCKET: 1) Locate the Grease Drain Tube, extending from the Grill below the Smoke Stack on the right end. Hang the Grease Bucket (112) on the Bucket Hook. HANGING THE GRILL HOOKS TO PEGBOARD: 1) Insert Grill Hooks (158) onto pegboard by tilting the hook at an angle and inserting the top of the hook into desired hole.
-
Page 9: Section Two: Initial Firing Instructions
Look to see if the Hot Rod is getting hot (it will start to turn red). CAUTION! Do not touch it. Turn the Temperature/dial to SHUT DOWN CYCLE. 4) Fill the Pellet Hopper with TRAEGER BBQ PELLETS. WARNING! Use only TRAEGER BRAND BBQ PELLETS, which are specifically made to work in our Grills. -
Page 10: Section Three: Subsequent Start-Up
Once the Hot Rod is disconnected, replace the Hopper Bottom Panel and plug the Power Cord back into an appropriate, grounded electrical outlet. 2) Open the Pellet Hopper and fill with TRAEGER BBQ PELLETS. WARNING! USE ONLY TRAEGER BRAND BBQ WOOD PELLETS, which are specifically made to work in our Grills. - Page 11 3) Remove the Porcelain Grill, Grease Drain Pan and Heat Baffle to expose the Firepot In the bottom of the Grill. 4) Pour 1/2 cup of TRAEGER BBQ PELLETS into the Firepot. 5) Squirt 2 tablespoons of Alcohol Gel fire lighter into the Firepot on top of the Pellets.
-
Page 12: Section Four: Operating Tips
SMOKE setting can also be used to “hold” foods at approximately 180 to 200 degrees F. 2) WARNING! Your Traeger Pellet Grill should never be moved while it is hot. If you are transporting your Grill in a vehicle after cooking on it, make sure the fire is completely out and the Grill is cold before placing it in any vehicle. -
Page 13: Carbon Monoxide
WARNING! If the fire in the Firepot goes out while smoking, when sufficient Pellets are still in the Pellet Hopper, it is important to follow these steps. Failure to do so may cause a hazardous “over-firing” of your grill due to an excess of unburned pellets in the Firepot. -
Page 14: Section Five: Maintaining Your New Grill
SECTION FIVE: MAINTAINING YOUR NEW GRILL 1) CREOSOTE AND GREASE: Formation and need for removal. When wood pellets are burned slowly, they produce tar and other organic vapors that combine with expelled moisture to form creosote. The creosote vapors condense in the relatively cool flue exhaust of a slow burning fire. - Page 15 Pellet Hopper. Wood pellets, when wet, expand greatly and will jam your Auger. A Traeger Grill Cover to protect the Grill is highly recommended! Covers are available from your Traeger Dealer, or log on to our Web Site –...
-
Page 16: Disposal Of Ashes
Remove the Porcelain Grill, Grease Drain Pan and Heat Baffle to provide access to the Firepot and the interior of the Grill. Much of the ash outside of the Firepot can be swept to the open area at the right of the Firepot using a small whisk broom. It can be removed from the Grill with a small metal fireplace shovel or other similar tool. -
Page 17: Section Six: Frequently Asked Questions
If the Auger Drive Motor is operating (check the small fan blade on the back of the motor), the problem is in the Three Speed or Digital Control, which will need to be replaced. Contact your Traeger Dealer or the Traeger Parts Department (Section Seven) to place an order. - Page 18 Contact your Traeger Dealer or the Traeger Parts Department (Section Seven) to place an order. c) If the fan blade turns a bit and then stops, continue watching and turn the Switch OFF (o). If the fan blade UNWINDS slightly, this indicates a jam in the Auger system which will need to be cleared.
- Page 19 WHERE CAN I GET A NEW PART FOR MY GRILL? Check with your Traeger Dealer. They may have the part in stock or can order the part for you. Or you can contact the Traeger Parts Department (Section Seven) to place an order.
-
Page 20: Section Seven: Traeger Support
Parts are identified by number on the following COMPONENT DIAGRAM PAGE. To order parts: Call, E-mail or write to your Traeger Dealer or Traeger Pellet Grills. Please provide your name, phone number, address, Model and Serial Number of the Grill (located on a label inside the Hopper Lid), along with the part identification number from the Component Diagram. - Page 21 TFB52QPB COMPONENT LIST...
- Page 22 TFB52QPB PARTS LIST Item Description Item Description Grill Frame Assembly SUB838 Nut 3/8-16 Acorn HDW132 Washer .300 x .600 Zinc HDW271 Grease Bucket HDW152 Hopper Burner Assembly SUB897 Flue Pipe Assembly FAB309 Burner Box Assembly SUB002 Chimney Cap Assy Graphite...
Need help?
Do you have a question about the TFB52QPB and is the answer not in the manual?
Questions and answers