Subscribe to Our Youtube Channel
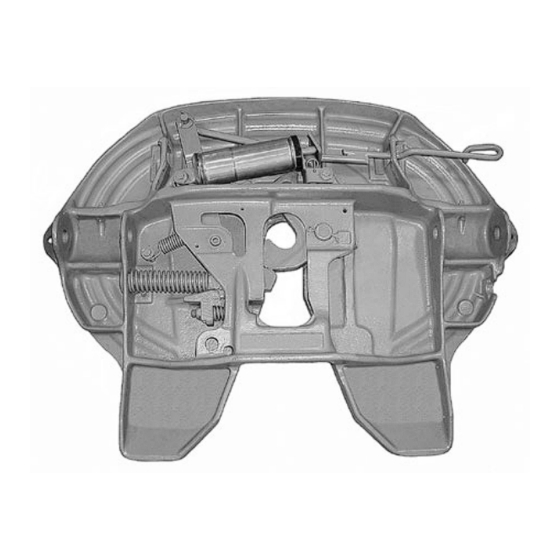
Summary of Contents for SAF-HOLLAND FleetMaster Air FW8 Series
- Page 1 OWNER’S MANUAL XA-201-A-80-L FleetMaster Air Release Fifth Wheel Installation, Operation, Maintenance Procedures and Comprehensive Warranty Questions or Comments? 1-888-396-6501 Call www.safholland.us XL-FW501 Rev C...
-
Page 2: Installation Instructions
2. For on-highway hauling applications. 3. Within the capacities stated in SAF-HOLLAND literature. 4. As recommended in SAF-HOLLAND literature (available from www.safholland.us). Holland Fifth Wheels are NOT Designed or Intended For: 1. Use with non-SAE kingpins, such as kingpins which are bent, improper size or dimensions, not secured to maintain SAE configuration, or which are installed in warped trailer bolster plates. - Page 3 13. Trailer pick-up ramps are recommended at the rear of the truck-tractor frame. 14. When mounting to aluminum frames, follow the tractor manufacturer’s recommendations. SAF-HOLLAND has available a stationary mounting angle intended for use with aluminum frames. Contact SAF-HOLLAND or distributors of Holland brand products for availability.
- Page 4 INSTALLATION INSTRUCTIONS continued NOTE: The full length of the fifth wheel mounting angle should seat flush on the truck frame to prevent flexing of mounting angle and to give uniform weight distribution along truck frame rail. Stationary Fifth Wheel Installation Prior to proceeding with the installation of the stationary fifth wheel assembly, 5/8˝...
- Page 5 INSTALLATION INSTRUCTIONS continued Stationary Fifth Wheel Installation continued Bracket with Mounting Base FIFTH WHEEL FLAT MOUNTING SUPPORT BRACKET (See Figures 2A, 2B, and 2C): PLATE (See Table 1 for Attach the outboard angle to minimum thickness) 1. Holland brackets with mounting tractor frame with hardware base are intended for installation listed in Figure 1A.
- Page 6 INSTALLATION INSTRUCTIONS continued Sliding Fifth Wheel Installation - ILS Slider Prior to proceeding with the installation of the sliding fifth wheel assembly, carefully review the “General Safety Information” section on page 2. Inboard Angle Mounting (See Figures 3 and 4): 1.
- Page 7 INSTALLATION INSTRUCTIONS continued Sliding Fifth Wheel Installation - ILS Slider continued Outboard Angle Mounting (See Figure 5): 1. If angles are not installed, see “Installation: General Recommendations,” on page 3, for thickness and material. Use 3˝ minimum horizontal and 3-1/2˝ minimum vertical leg size.
- Page 8 INSTALLATION INSTRUCTIONS continued Attachment of Air-Activated Slide Release – If Required 1. Mount the cab control valve in accordance with the instructions provided. It should be readily accessible to the driver, but protected to prevent accidental activation. 2. Attach an air line, using appropriate fittings to the “air” or “in” port of the valve. Use an air source recommended by the tractor manufacturer.
- Page 9 OPERATING INSTRUCTIONS You must read and understand the following instructions before operating your fifth wheel. These instructions apply to the proper operation of your fifth wheel only. There are other important checks, inspections, and procedures not listed here that are necessary, prudent, and/or required by law. Failure to follow all the operating procedures contained in these instructions may result in a hazardous condition or cause a hazardous condition to develop which, if not avoided, could result in death or serious injury.
- Page 10 OPERATING INSTRUCTIONS continued Coupling Procedures continued 7. Chock trailer wheels. 8. Connect brake lines and light cord. 9. Support slack in lines to prevent interference. 10. Set trailer brakes. 11. Adjust trailer height so fifth wheel will lift trailer. Trailer should contact fifth wheel 4˝...
- Page 11 OPERATING INSTRUCTIONS continued Coupling Procedures continued 15. Retract landing gear until pads come off the ground. 16. Follow instructions published SECURE CRANK separately for safe operation of the trailer to fully retract landing gear and secure crank handle. Do not operate the vehicle without fully retracting the landing gear.
- Page 12 OPERATING INSTRUCTIONS continued Uncoupling Procedures 1. Position tractor and trailer on firm, level ground clear of obstacles and persons. 2. Set trailer brakes. 3. Slowly back tractor tightly against trailer. 4. Set tractor brakes. 5. Chock trailer wheels. 6. Lower landing gear until pads just touch the ground.
- Page 13 OPERATING INSTRUCTIONS continued Fifth Wheel Slide Adjustment 1. Position tractor and trailer in a straight line on level ground. 2. Lock the trailer brakes. The trailer must be stopped and the trailer brakes locked to prevent damage to the tractor or trailer by uncontrolled sliding of the fifth wheel.
-
Page 14: Maintenance Procedures
MAINTENANCE PROCEDURES You must read and understand the following instructions before operating your fifth wheel. Failure to follow all the maintenance procedures contained in these instructions may result in a hazardous condition or cause a hazardous condition to develop, which, if not avoided, could result in death or serious injury. - Page 15 MAINTENANCE PROCEDURES continued Do not use any fifth wheel Inspection – Locking Mechanism that does not operate 1. Check the operation of the fifth wheel properly. If your fifth wheel does not locking mechanism using a Holland operate properly, DO NOT USE IT! Failure TF-TLN-5001 (2”...
- Page 16 MAINTENANCE PROCEDURES continued At this point, the fifth Adjustment – Locking Mechanism: wheel is OVERADJUSTED 1. Using ONLY a Holland TF-TLN-5001 and NOT useable. Using an improperly Lock Adjustment Tool, lock the fifth adjusted fifth wheel may separate while wheel. in use which, if not avoided, could result in death or serious injury.
- Page 17 XL-FW501 Rev C...
- Page 18 XL-FW501 Rev C...
-
Page 19: Warranty
WARRANTY XL-FW501 Rev C... - Page 20 888.396.6501 Fax 800.356.3929 519.537.3494 Fax 800.565.7753 Western Canada 604.574.7491 Fax 604.574.0244 Copyright © July 2008-SAF-HOLLAND, Inc. All information contained in this document was correct at time of copyright, and is subject to change without notice. All rights reserved. www.safholland.us XL-FW501 Rev C...


Need help?
Do you have a question about the FleetMaster Air FW8 Series and is the answer not in the manual?
Questions and answers