Subscribe to Our Youtube Channel
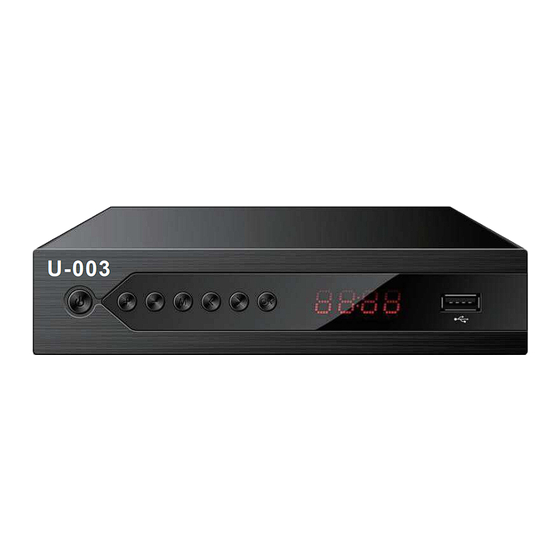
Summary of Contents for GPX U-003 TVTR149B v2279-01
- Page 1 U-003 Digital TV Tuner + Recorder User’s Guide for Model TVTR149B v2279-01 For the most up-to-date version of this User’s Guide, go to www.gpx.com...
- Page 2 Safety Instructions & Warnings Important Safety Instructions Battery Warnings • Read these Instructions. • WARNING: Do not ingest battery, Chemical Burn Hazard. • Keep these Instructions. • If the remote control supplied with this product contains a coin/button cell battery and the coin/button cell battery is • Heed all Warnings. swallowed, it can cause severe internal burns in just 2 hours • Follow all instructions. and can lead to death. • Do not use this apparatus near water. • Keep new and used batteries away from children. If the • Clean only with a dry cloth. battery compartment does not close securely, stop using the • Do not block any ventilation openings. Install in accordance product and keep it away from children. with the manufacturer’s instructions. • If you think batteries might have been swallowed or • Do not install near any heat sources such as radiators, heat placed inside any part of the body, seek immediate medical registers, stoves, or other apparatus (including amplifiers) attention.
- Page 3 • CAUTION: TO PREVENT ELECTRIC SHOCK, MATCH WARNING: To reduce the risk of electric CAUTION WIDE BLADE OF PLUG TO WIDE SLOT, FULLY RISK OF ELECTRIC SHOCK shock, do not remove cover (or back). No DO NOT OPEN INSERT. user-serviceable parts inside. Refer servicing ATTENTION • Mains plug is used as disconnect device and it should remain to qualified service personnel. RISQUE D' ÉLECTROCUTION NE PAS OUVRIR readily operable during intended use. In order to disconnect the apparatus from the mains completely, the mains plug The exclamation point within an equilateral should be disconnected from the mains socket outlet triangle is intended to alert the user to completely. the presence of important operating and • CAUTION: Use of controls or adjustments or performance maintenance (servicing) instructions in the of procedures other than those specified may result in literature accompanying the appliance. hazardous radiation exposure. • WARNING: Changes or modifications to this unit not The lightning flash with arrowhead symbol, expressly approved by the party responsible for compliance within an equilateral triangle, is intended to...
-
Page 4: Table Of Contents
Table of Contents Overview Features - 5 Includes - 5 Overview Front - 6 Rear - 7 Remote Functions - 8 Batteries - 8 Setup Power - 9 Connecting Cable/TV Antenna to the Tuner - 9 HDMI - 10 Audio/Video Input & Output - 11 External Audio - 12 USB Storage Devices - 12 Using the Tuner... -
Page 5: Overview
Overview Features Includes • Supports 480p, 720p, 1080i, 1080p • Remote control: requires 2 AAA batteries • Native Resolution: 720 x 480/1080p HDMI (NOT Included) • Aspect Ratio: 16:9, 4:3 LB • RCA audio/video cable • Outputs: HDMI, AV, Component video, •... -
Page 6: Front
U-003... -
Page 8: Functions
(NOT Included). -
Page 9: Rear
Setup Power Plug the AC/DC power adapter (included) into a standard wall outlet and into the DC power input on the rear of the unit. After connecting the power, please allow approximately 5 seconds to pass before powering the unit ON. ANTENNA COAXIAL HDMI OUTPUT... -
Page 10: Hdmi
Connecting to Other Devices HDMI HDMI offers superior sound and picture quality, and is the easiest way to send media from the tuner to your TV or other display with an HDMI input. Requires an HDMI cable (not included) and a TV or display with an HDMI input. 1. -
Page 11: Audio/Video Input & Output
Audio/Video Input & Output Requires an RCA audio/video (yellow/red/white) cable (included), or a component video cable (green/blue/ red) and a RCA stereo (red/white) cable (not included). 1. Using an RCA audio/video cable, connect the audio/video output on the tuner to the audio/video input on your TV. - Page 12 U-003...
-
Page 13: Using The Tuner
Using the Tuner 1. Initial Setup 1. After connecting the tuner to your TV, power on the TV and the tuner. The tuner will then display the above options to configure the device. 2. Use the Arrow/OK buttons to select your preferred language and country. 3. -
Page 14: Channels Saved
Using the Tuner 3. Channels Saved 1. When finished, the tuner will display all saved channels available to view. 2. Use the Arrow/OK buttons to select a channel. You can also use the Channel -/+ buttons to switch to different channels, or press the List button on the remote to access the channels list at any time. Recording marker 4. -
Page 15: Playing Recorded Tv
5. Playing Recorded TV Note: The following steps also work for playing Music, Photos, and Movies via USB. 1. Press the USB button on the remote. 2. Use the Arrow/OK buttons to select PVR. 3. Use the Arrow/OK buttons to find and play the recorded selection. While playing, press the HOLD (yellow) button on the remote to enter full screen mode.


Need help?
Do you have a question about the U-003 TVTR149B v2279-01 and is the answer not in the manual?
Questions and answers