Table of Contents
Advertisement
Quick Links
• Updated information (the latest Instruction Manual, etc.) is available from
<http://www.kenwood.com/cs/ce/>.
Model name indication position
See "Removing the trim plate" (P.23)
Trim plate
Take the time to read through this instruction manual.
Familiarity with installation and operation procedures will help you obtain the best performance from your new
receiver.
For your records
Record the serial number, found on the back of the unit, in the spaces designated on the warranty card, and in the space
provided below. Refer to the model and serial numbers whenever you call upon your KENWOOD dealer for information or
service on the product.
Model DMX125BT Serial number
US Residence Only
Register your KENWOOD product at www.kenwood.com/usa/
© 2019 JVC KENWOOD Corporation
DMX125BT
MONITOR WITH RECEIVER
INSTRUCTION MANUAL
Register Online
B5A-3200-01 b EN (K)
Advertisement
Table of Contents

Related Manuals for JVC KENWOOD DMX125BT


Summary of Contents for JVC KENWOOD DMX125BT
- Page 1 Record the serial number, found on the back of the unit, in the spaces designated on the warranty card, and in the space provided below. Refer to the model and serial numbers whenever you call upon your KENWOOD dealer for information or service on the product. Model DMX125BT Serial number US Residence Only Register Online Register your KENWOOD product at www.kenwood.com/usa/...
-
Page 2: Table Of Contents
Contents Before use Before use ................. 2 Precautions How to read this manual ................... 2 Precautions ........................ 2 WARNING Getting Started ............... 3 Clock settings ......................3 Ñ To prevent injury or fire, take the Basics ..................4 following precautions: Functions of the Buttons on the Front Panel ........ -
Page 3: Getting Started
Getting Started [Bluetooth] Turn the ignition key of your car to ACC. Displays the Bluetooth Settings screen. (P.15) The unit is turned on. [Screen] Press the <8MENU> button. [Dimmer] Touch [ ]. Select the dimmer mode. “High” (Default) / “Mid” / “Low” [Demo] Select the demonstration mode. -
Page 4: Basics
Basics Basics Ñ Turning off the power Functions of the Buttons on the Front Panel Press and hold the <8MENU> button. Ñ Adjusting the volume Press the <+> or <–> button. 1 Remote Sensor • Receives the remote control signal. 2 8MENU •... -
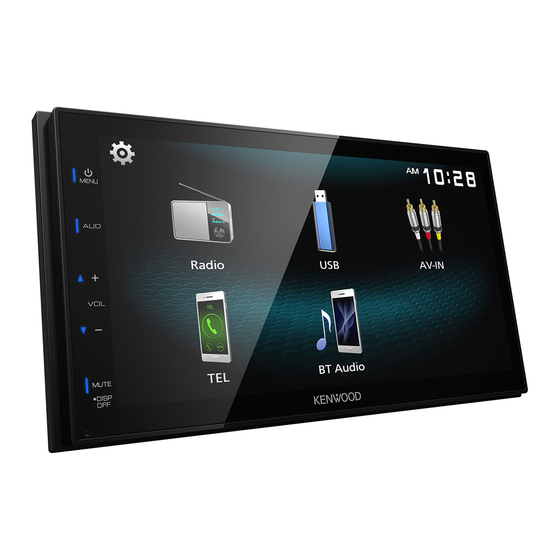
Page 5: Home Screen Descriptions
Basics HOME screen descriptions List screen There are some common function keys in the list Press the <8MENU> button. screens of most sources. HOME screen appears. You can change the page to display more items by pressing [R]/ [S]. 1 Clock display Touch to displays the Clock screen. -
Page 6: Radio
Radio Radio Radio Basic Operation Presetting stations Press the <8MENU> button. Ñ Auto memory Touch [Radio]. You can preset 6 stations for the current band (FM1/ FM2/FM3/AM1/AM2). Ñ Source control screen Touch [FM] or [AM] to select the band. Touch [ ]. -
Page 7: Radio Setup
Radio Radio Setup Touch [ ]. Set each item as follows. [Auto Store] Automatically searches and stores the 6 stations with the strongest signals for the selected band. “Auto Store” appears. [Area] “N.America”: For North/Central/South America, AM/ FM intervals: 10 kHz/200 kHz. [Local Seek] Tunes in only to the stations with sufficient signal strength. -
Page 8: Usb
Preparation Playback operations Ñ Connecting a USB device Ñ Control the music you are listening to on the source control screen. Remove the cap of the USB terminal. Connect the USB device with the USB cable. The unit reads the device and playback starts. Ñ... - Page 9 Ñ For Video playback Ñ Selecting a track in a list (Searches file) When the operation buttons are not displayed Touch [1]. on the screen, touch the display. Select whether you search by audio files [ ], video files [ ].
-
Page 10: Ipod/Iphone
iPod/iPhone iPod/iPhone Preparation Playback operations Ñ Connecting iPod/iPhone Ñ Control the music you are listening to on the source control screen. • For Lightning connector models: Use USB Audio cable for iPod/iPhone—KCA-iP103 (optional accessory). • For details about connecting iPod/iPhone, see page 25 . - Page 11 iPod/iPhone Ñ Selecting a content in a list Touch [1]. Touch desired item. When you touch a category its contents are displayed. Touch desired item from the content list. Playback starts. • Touch [6] to moves to the upper hierarchy. ✎...
-
Page 12: Mirroring
Mirroring Mirroring Preparation Mirroring operations You can display and control the App on the unit Ñ Mirroring Operation while your smartphone is connected to the USB terminal. Touch [Mirroring]. ✎ NOTE • Pair your smartphone with the unit via Bluetooth. See Register your smartphone to the unit (P.15) and Connect the Bluetooth device. -
Page 13: External Components
External Components External Components Using external audio/video players Rear view camera To use a rear view camera, the REVERSE lead Ñ Starting playback connection is required. For connecting a rear view camera. (P.24) Connect an external component to the AV-IN input terminal. -
Page 14: Learning Function Of Steering Remote
External Components Ñ To adjust the parking guidelines Learning function of steering remote ✎ NOTE • Install the rear view camera in the appropriate This function is available only when your vehicle position according to the instruction manual is equipped with the electrical steering remote supplied with the rear view camera. -
Page 15: Bluetooth
• A new device cannot be registered if there are 8 registered Bluetooth units. Delete unnecessary registration. (P.15) Turn on the Bluetooth function on your smartphone/cell-phone. Search the unit (“DMX125BT”) from your smartphone/cell-phone. If a PIN code is required, enter the PIN code (“0000”). •... -
Page 16: Receive A Phone Call
Bluetooth Receive a phone call Make a phone call Touch [Û]. Press the <8MENU> button. Touch [TEL]. See the table below for each operation method. • [Ý] : Reject an incoming call. Ñ Operations during a call Call by entering a phone number 1) Enter a phone number with number keys. -
Page 17: Playing Bluetooth Audio Device
Bluetooth Call by voice ✎ NOTE You can make a voice call using the voice • Operations and display indications may differ recognition function of the Bluetooth smartphone. according to their availability on the connected 1) Touch [ device. 2) Say the name registered in the Bluetooth * You can access the voice recognition function smartphone. -
Page 18: Controlling Audio
Controlling Audio Controlling Audio Equalizer Control You can adjust various settings such as audio balance or subwoofer level. Press the <AUD> button. Press the <AUD> button. Touch [Equalizer]. See the below for each operation method. Set each item as follows. Controlling General Audio 1 You can select frequency bar and adjust its level. -
Page 19: Speaker / X'over Setup
Controlling Audio Speaker / X’Over setup Listening Position / DTA Press the <AUD> button. Press the <AUD> button. Touch [Speaker / X’Over]. Touch [Position / DTA]. Touch the speaker to set up. Touch [Delay]. Touch [T] or [U] to adjust the delay time of the selected speaker. -
Page 20: Remote Control
Remote control This unit can be operated using the remote control KNA-RCDV331 (optional accessory). Ñ Switch the operation mode Turn its operation mode switch to “DVD.” • • • • Functions of the Remote control Buttons • Aim the remote control directly at the remote sensor on the faceplate. -
Page 21: Installation
Installation Installation Before Installation • Connect the speaker wires correctly to the terminals to which they correspond. The unit may be Before installation of this unit, please note the damaged or fail to work if you share the ¤ wires or following precautions. -
Page 22: Installing The Unit
Installation Ñ Supplied accessories for installation Installing the unit Ñ Non-Japanese cars (3 m) Bend the tabs of the mounting sleeve with a screwdriver or similar utensil and attach it in place. ✎ NOTE (M5 × 8 mm) (M5 × 6 mm) •... - Page 23 Installation Ñ Microphone unit Ñ Removing the unit 1) Check the installation position of the microphone 1) Remove the trim plate by referring to step 1 in (accessory 4). “Removing the trim plate”. 2) Clean the installation surface. 2) Insert the extraction key (accessory 2) deeply into 3) Remove the separator of the microphone the slot as shown.
- Page 24 Installation Ñ Connecting wires to terminals Light Blue/Yellow (Steering remote control wire) Bright Green/Red ST REMOTE To steering remote Purple/Red INPUT 1 To use the steering wheel remote control feature, ST REMOTE Gray/Red INPUT 2 you need an exclusive remote adapter (not ST REMOTE Connect to vehicle’s steering remote supplied) matched to your car.
- Page 25 Installation Ñ Connecting an iPod/iPhone/Android Android smartphone Micro USB to USB cable M4x6 REAR OUT FRONT OUT AV IN 1 3 5 7 2 4 6 8 iPod/iPhone 1 3 5 7 Lightning connector 2 4 6 8 CAM IN VIDEO OUT VIDEO IN KCA-iP103 (0.8m) Accessory 5 Accessory 6...
-
Page 26: About This Unit
About this Unit About this Unit More information Troubleshooting What appears to be trouble is not always serious. Ñ Playable Audio files Check the following points before calling a service Audio format Bit rate/ Sampling center. (Bit count) frequency • For operations with the external components, refer also to the instructions supplied with the adapters MP3 (.mp3) 16 –... -
Page 27: Copyrights
• Turn on the video component if it is not on. trademarks owned by the Bluetooth SIG, Inc. and any • Connect the video component correctly. use of such marks by JVC KENWOOD Corporation is under license. Other trademarks and trade names are Ñ Bluetooth those of their respective owners. -
Page 28: Specifications
About this Unit – Redistributions in binary form must reproduce the Specifications above copyright notice, this list of conditions and the following disclaimer in the documentation and/or Ñ Monitor section other materials provided with the distribution. Neither the name of the Xiph.org Foundation nor the Picture Size names of its contributors may be used to endorse or : 6.75 inches (diagonal) wide... - Page 29 About this Unit Ñ Bluetooth section Ñ Audio section Technology Maximum Power (Front & Rear) : Bluetooth Ver.4.2 : 45 W × 4 Frequency Full Bandwidth Power (Front & Rear) : 2.402 – 2.480 GHz Full Bandwidth Power (at less than 1% THD) : 16 W ×...
- Page 30 – Increase the separation between the equipment Products: DIGITAL MEDIA RECEIVER and receiver. Model Name: DMX125BT – Connect the equipment into an outlet on a Responsible Party: JVCKENWOOD USA circuit different from that to which the receiver is CORPORATION 2201 East Dominguez Street, connected.
- Page 31 About this Unit For Argentina Ñ Información acerca de la eliminación de equipos eléctricos y electrónicos al final de la vida útil (aplicable a los países que hayan adoptado sistemas independientes de recogida de residuos) Los productos con el símbolo de un contenedor con ruedas tachado no podrán ser desechados como residuos domésticos.
Need help?
Do you have a question about the DMX125BT and is the answer not in the manual?
Questions and answers