Table of Contents
Advertisement
Quick Links
Advertisement
Table of Contents

Related Manuals for Absen AI BOX 410

Summary of Contents for Absen AI BOX 410
- Page 1 AI BOX 410 User manual of the control box User Manual version: V 1.0...
-
Page 2: Table Of Contents
2.2.2 Installation of infrared 5P extension line and indicator light board ..............24 2.3 Connection diagram of the AI BOX400 control box........................ 25 2.4 Use the Ai box 410 control box to debug the LED display screen ..................26 3. Operation and use of the conference screen system ......................... 28 3.1 Boot-up operation .................................... - Page 3 Read this manual carefully before installing, supplying power, running and commissioning this product. Follow the safety instructions on the manual and on the product. If you have any questions, please ask Absen for help. Beware of electric shock! To prevent electric shocks, the equipment must be properly grounded during installation.
- Page 4 Use the appropriate power cord. Please use appropriate power supply after budget power and current Line, and ensure that the power cord is not damaged, aging, damp, found any overheating phenomenon, please immediately renewal. For other questions, please consult with professionals. Beware of fire! To avoid fire due to overload of power cable, protect with circuit breaker or fuse.
-
Page 5: Product Introduction
1.2 Product Overview AI BOX 410 Control box is a 4K ultra HD control box, which is a meeting screen control box developed based on Android system. It integrates the functions of sending card and Android system card, and is compatible with OPS Windows function. - Page 6 6-way USB interface, used for multimedia material playback and function expansion. ⚫ -5 USB2.0 (2 items reserved) - 1×USB3.0。 The 16-road gigabit network port output. ⚫ 13.5mm audio output for external audio. ⚫ Support the display screen output screen playback. ⚫...
-
Page 7: Product Appearance
1.4 Product appearance 1.4.1 Aibox410 (front panel) order Key name explain number Open the key Control box switch Infrared receiver, can be used for remote control BL + The LED screen brightness increases The LED screen brightness is reduced VOL + The sound of the sound increased VOL- Sound sound reduction... -
Page 8: Product Dimension Drawing
function expansion USB3.0 Used to insert the U disk for multimedia playback and function expansion SPDIF Fiber-optic audio output interface HDMI 3-way HDMI 2.0 interface, which can input the HDMI signal source MINI USB Connect to the PC for the display configuration P OWER 220V AC power input, equipment power supply output interface... -
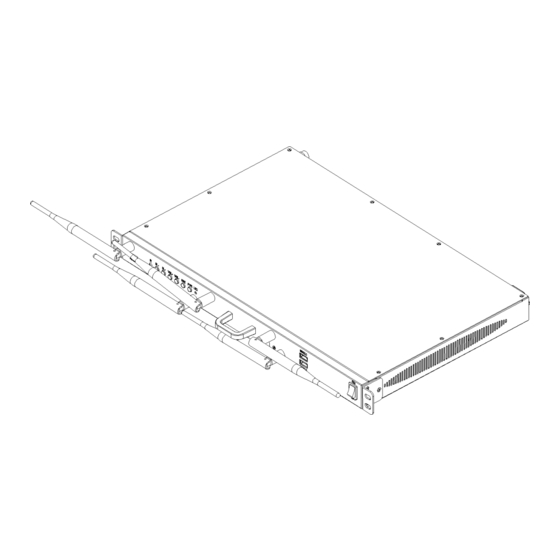
Page 9: Ai Box410 (Back-Mounted Version) Installation
AI Box 410 Attach wire, For the hardware wire connection remote control, etc surname 2.2 AI BOX410 (back-mounted version) installation 2.2.1 AI BOX410 (back-mounted version) structure installation... -
Page 10: Installation Of Infrared 5P Extension Line And Indicator Light Board
AI BOX400 (Back version) installation steps step Absenicon2.0 Conference screen + AI Box Conference screen + AI Box 400 Step 1: Install the bead holder on the two guide rails Note: Place the two rails symmetrically and install the buckle holder on the front of the rail (groove surface). Step 2: Install the guide rail on the left row of the display (on... -
Page 11: Connection Diagram Of The Ai Box400 Control Box
IR 5P extended line x 1pcs Ired indicator board x 1 pcs One-key black screen button x 1 pcs And IR 5P elongation winding displacement Infrared indicator light Power-on / board standby button 2.3 Connection diagram of the AI BOX410 control box... -
Page 12: Use The Ai Box 410 Control Box To Debug The Led Display Screen
Control box Schematic diagram of the control box connection 2.4 Use the Ai box 410 control box to debug the LED display screen Step 1 can be connected to the computer through the USB Mini interface or through the network port. - Page 13 Step 2 Run NovaLCT V5.3.1, click "View Device Details" to confirm that the control box is connected, log in> Synchronize Advanced Login> Display Configuration Step 3 Set the output resolution of the control box sending card. The output resolution is set to the resolution of the display screen.
-
Page 14: Operation And Use Of The Conference Screen System
Note: The output port serial number is the output network port number on the control box, and the size of the receiving card is the display resolution of a single LED box. 3. Operation and use of the conference screen system 3.1 Boot-up operation Power on the LED meeting screen and the AI Box 400 control box, press the power switch on the AI Box 400 control box to the "ON"... -
Page 16: Shutdown Operation
3.2 Shutdown operation When the LED meeting screen is working normally, there are the following two shutdown operation modes. Mode 1: Press the switch button in the lower right corner of the LED meeting screen panel, and the screen body shows "Shutdown countdown (5S)"... -
Page 17: Standby Operation
Complete power: Press the power switch on the AI Box 400 control box to OFF. 3.3 Standby operation In the normal operation of the LED conference screen: press the power button on the remote control, the screen display "standby (5S)" and "shutdown", select "standby" after countdown 5S standby (switch button status indicator light blue light);... -
Page 18: Description Of The Remote Control
3.4 Description of the remote control 3.4.1 Description of the remote control keys 3.4.2 Remote control pairing guidance Way a Also hold down the sum on the remote control Press the key to pair up;... - Page 19 Method 2 1. In the main screen interface of the conference screen system, select "more applications" and enter the APP application interface; 2. Click "Settings", open the menu interface, select "network —— Bluetooth", and enter the Bluetooth Settings interface; 3. When the blue indicator on the top of the remote control flashes, select the scanning device in the Bluetooth Settings 4.
-
Page 20: Initialization Settings
3.5 Initialization settings When using the Absen LED meeting screen for the first time, please follow the novice instructions to complete the initialization setting. Step 1: Select the language of the meeting screen system, including Chinese, English and Japanese; Step 2: pair the remote control with Bluetooth, and hold down the "menu button" and "Home page button" on the... - Page 22 Step 3: Select the Wi-Fi required to be connected, and enter the corresponding password;...
- Page 23 Step 4: Customize the device name to facilitate the search with other devices; Step 5: pair the screen projector, insert the screen projector into the USB interface on the large screen;...
-
Page 24: Guidelines For Beginners
After initialization, you can view novice instructions or directly start using the Absenicon conference screen system. 3.6 Guidelines for beginners 3.6.1 Guide of the remote control... -
Page 26: Screen Projector Guide
3.6.2 Screen projector guide 3.6.3 IO S/MAC screen projection guidance... -
Page 27: Software Screen Guidelines
3.6.4 Software Screen Guidelines 3.7 Screen projection guidance 3.7.1 Wireless screen projection Method 1: screen projection device 1. For the first use, or update the device name, hot name and hot password, match the USB interface of the AI Box 400 control box of the conference screen;... - Page 28 (3) Press the round button of the screen projector to cast the screen successfully. Method two: PC screen projection On the PC side, open the browser and enter " https: / / www.absen. Cn / absenicon / ", download the corresponding client.
- Page 29 MAC OS System computer projection screen Use the screen mirror to direct the screen. PC connected to Absenicon conference screen hot spot (default name Absenicon_XXXX, password default 12345678); click the "Screen Mirror" icon in the upper right corner and select the corresponding device name to complete the screen casting;...
-
Page 30: 2Android Version Of The Transcreen Function Introduction
After downloading and installing the Transcreen software, open the software interface as follows, which is not connected to the authorized device. At this time, you need to connect the WIFI hotspot to the conference screen (name default: Absenicon_XXXX, password default: 12345678), and then open Transcreen APP, select the corresponding device name, and connect the conference screen device. - Page 31 Throw photos / audio and video / file Click "Send photos" to upload the photos stored on the phone to the meeting screen; Click "Projection Video" to upload the video and audio stored by the phone to the meeting screen; click "Document projection"...
- Page 32 Wireless snapshot Support wireless snapshot function, the audience can put the speaker on the display device of the complete screen down, and transmit back to their mobile phone, stored in the designated location. (1) Click "Display master ball" on the conference system interface to enter the wireless central control interface and open the "Wireless Snapshot"...
- Page 34 Iphone Mobile phone screen projection (mobile phone image) Use the mobile phone to connect to the Absenicon meeting screen hotspot (default name: Absenicon_XXXX, password default: 12345678); Swipe up from the bottom of the screen to open the control center; Click "Screen Mirror", select Absenicon_XXXX, to complete the mobile phone screen projection; Iphone Mobile phone screen projection (Transcreen software screen projection) (1) Search for the "Transcreen"...
- Page 35 Mirror cast screen Click "Mirror Screen", the following prompts appear, complete the wireless projection according to the guidelines; Throw photos / audio and video / file Click "Send Photo" to upload the photos to the conference screen; click "Projection Video" to upload the video and audio to the conference screen;...
-
Page 36: Multi-Split Screen And Screen Projection
3.7.3 Multi-split screen and screen projection Ab s e n icon The conference system supports multi-split screen display function, which can freely set multi-screen, and at most four-split screen. Users can set multi-split screen casting according to the following steps (1 (1) In the main interface of the conference screen system, select "Quick screen casting"... - Page 37 (3) Select the screen casting mode in the "Split Screen Display Mode" window, with optional "single split screen", "double split screen" and "four split screen"; (4) Click the "Display master ball" on the interface to enter the wireless central control interface, and click successively to select the connected device to complete the multi-split screen casting;...
-
Page 38: The Type Of Screen Projection Code Generation
3.7.4 The type of screen projection code generation In the wireless screen casting interface, press the remote control confirmation button or select the icon in the upper right corner of the interface, swipe and select the "screen casting code generation type" in the pop-up menu bar. Optional 6 digital screen code, 6 universal screen code, 8 universal screen code. -
Page 40: Access To The Signal Source
3.8 Access to the signal source Use the HDMI line to connect the Absenicon conference screen HDMI port to one end and the PC to one end. 3.8.1 Signal source switching The user can switch over the multiple signal sources in the following three ways. 3.8.2, multimedia presentation On the main interface of the conference screen system, click "Multimedia Demonstration"... -
Page 41: 3, Remote Control Menu
3.8.3, Remote control menu Short press the menu button on the remote control and enter the menu bar. Click "Signal Source", and the source switching interface is popup at the bottom of the screen; Select the source for screen demonstration, press the remote control confirmation key to switch successfully. 3.8.4 Signal source switching of the remote control (1) Short press the "signal source switch"... -
Page 42: Display The Effect Settings
3.9 Display the effect settings To adjust the display effect to obtain a more comfortable viewing effect, it can be done in the following ways. 3.9.1 Scene mode Absenicon Conference screen is specifically for different conference application scenarios, providing four scene modes, whether document demonstration, video playback, teleconference, can match the best display effect. -
Page 43: Custom Display Effect
3.9.2 Custom display effect Users can fine-tune after choosing the scene mode to meet the personalized requirements. Short press the menu button on the remote control, enter the menu bar; Click "Effect adjustment" to enter the effect adjustment interface; Customstom display effect by adjusting "brightness", "saturation", "contrast", "contrast", "Color Temperature" and "tone"; If it is not satisfied with the current effect after the adjustment, click the Restore Default button to restore the default parameters of the current mode. -
Page 44: Settings
3.10 Settings In the main interface of the conference screen system, select "More applications" and enter the "Settings" application interface. 3.10.1 Network Settings In the main setting interface, select "Network" to enter the "Network Settings" interface. - Page 45 Cable network Select "Wired Network" to enter the wired network setting interface. "Wired Settings" and "select" Automatic " to automatically obtain the IP address. When the icon is displayed in the upper right corner of the main interface, the network connection is successful.
- Page 46 Enter the password and click OK to connect to Wi-Fi. This machine hot spot Select the "native hotspot" and enter the native hotspot setting interface.
- Page 47 Hot spot switch is on; Set the password of the wireless hotspot, click "OK" to open the hotspot;...
- Page 48 Note: After modifying the local hotspot name or password, you need to connect the screen projector to the USB port of the meeting card and pair it again. Channel switching.
-
Page 49: Effect Setting
Select "Bluetooth" to enter the local hotspot setting interface. Turn on the Bluetooth switch and automatically scan the device; Select the device to be paired; enter the corresponding number and click Pair. 3.10.2 Effect setting In the main Settings interface, select Effects to enter the Effects Settings interface. mode selection Select "Standard mode", "Soft mode", "Cinema mode"... -
Page 50: Sound Settings
Eye protection mode The bottom button opens the eye protection mode. 3.10.3 Sound Settings In the "Settings" main interface, select "Sound" to enter the "Sound Settings" interface. Set the Absenicon meeting screen sound, including volume adjustment and system sound on / off. -
Page 51: General Settings
3.10.4 General Settings In the main Settings interface, select General to enter the Universal Settings interface. There are signal source setting, application management, time and date, language and keyboard, wallpaper, and touch assistance. Signal source settings In the general Settings main interface, select "signal Source Settings" and enter the signal source Settings interface. Management of the following settings for the connected signal source. - Page 52 Memory signal source: set the boot signal source, select "Last Use", "System Home page" (default), "HDMI 1", "HDMI 2", "HDMI 3" and "Windows". HDMI Zoom: Scale the selected HDMI source with Adaptive (default), 4:3,16:9 and Point-to-Point. application management In the general setting main interface, select "Application Management" and enter the application management interface.
- Page 53 Management of the installed APP. Forced stop: force the APP to the stop state. Open the app: Run the selected APP. Uninstall: Uninstall the selected APP. Clear data: Clear the data cache of the selected APP. time and date In the general setting main interface, select "Time and Date" to enter the time and date setting interface. Set the following for the time and date of the Absenicon meeting screen.
- Page 54 Date format: choose "Year-month-day" (default), "month-day-year" and "Day-month-year". Language and keyboard In the general setting main interface, select "Language and Keyboard", and enter the language and keyboard setting interface. Set up in the language of the Absenicon conference screen and the input method of the keyboard. Language: Choose Chinese (Simplified) (default), English, Chinese (Traditional), and Japanese.
- Page 55 Keyboard: optional Android Keyboard (AOSP), Remote Control Input Method (default). wallpaper In the general Settings main interface, select "Wallpaper" and enter the wallpaper Settings interface. Set up the desktop wallpaper of the Absenicon conference screen.
- Page 56 The system has a wallpaper: select the target wallpaper, click "Set as wallpaper". Custom wallpaper: Click Custom Wallpaper, select the local picture you need to set as wallpaper in the ES file browser, and click. Touch assist In the general Settings main interface, select "Touch Assist" and enter the Touch Assist Settings interface. Open Touch Assist, and click the small triangle icon on both sides of the interface to open the sidebar.
- Page 58 : Return key and click to return to the previous step. : Home page key, click back to the main interface. : Brush key, click Open the brush tool. : White board key, click Open the whiteboard tool. : Food order key, click Open the menu bar. Note: The remote control can not operate the touch assist menu, connect the mouse peripheral or use the touch screen for control.
-
Page 59: System Settings
3.10.5 System Settings In the Settings main interface, select "System" to enter the "System Settings" interface. There are timing switch, restore factory design, system upgrade, about, novice guide, network port switch. Timed switch machine In the main interface of system setting, select "timing switch" and enter the timing switch setting interface. Set the timing switching time of the Absenicon meeting screen. - Page 60 factory data reset In the main interface of system Settings, select "Restore Factory Settings", and enter the restore factory Settings interface. Click Restore Factory Settings to restore the Absenicon conference screen to its factory status. explain: ⚫ Local documents, photos, videos, applications and other data will be cleared and cannot be restored. ⚫...
- Page 61 Android upgrade In the main interface of system Settings, select "System Upgrade" and enter the Android system upgrade interface. Insert the U disk with the upgrade package into the USB port of the Android card.(The upgrade package file name is: update.
- Page 62 The novice guide In the main interface of system Settings, select the "novice Guide" and enter the novice guide interface. Network port switch In the system setting main interface, select "Network port switch". ⚫ Switch the status of the network port, select LCT (default), Cable Network. ⚫...
-
Page 63: Document Management
3.11 Document management The user can follow the following steps for simple operation. In the main interface of the conference screen system, select "More applications" to enter the "ES File Browser" interface. Select the folder where the target file is located, select the target file to confirm open. Long press the remote control confirmation key or the left mouse button to "copy / cut / delete / rename"... -
Page 64: Software Information
Wireless screen projection A pp Transcreen, support for iphone /ipad for Apple store download Wireless screen projection APP Transcreen, support for Andriod website download for windows (https://www.absen.cn/absenicon ) Android board card MX420_V1.0.3.6 3.12.2 Hardware version AI BOX410 Control box hardware version class version number Meeting card Mee400 (Connotation Nova Conference Embedded Software V1.0) -
Page 65: Dealing With Common Problems
4. Dealing with common problems frequently order asked terms of settlement number questions Mobile phones 1. Check whether the conference screen system is turned on for wireless hotspots, do not search and turn it on in the system setting network; for hot spots 2. - Page 66 playing. The Bin file upgrade needs to meet the following four conditions, please check one by one. ① Confirm that the U-disk format is FAT 32. ② Check whether there are upgrade files in the U disk root directory, if not, please The Bin file save the upgrade file in the root directory.
- Page 67 Setting it to a passive black screen on the NovaLCT can solve the problem Step 1 Run NovaLCT, select "Login> Synchronize Advanced Login", and log in to the advanced user interface. Step 2 Select "Settings> Presave screen" and enter the "Presave Picture Settings" interface.
- Page 68 2. When the product is commercially activated by default. 1. Check whether the volume value of the meeting screen installation table system AI Box 410 is set to 0; Connect the 2. Check whether the player volume is set to 0 when the video is played;...
- Page 69 FCC Statement This device complies with part 15 of the FCC Rules. Operation is subject to the following two conditions: (1) This device may not cause harmful interference, and (2) This device must accept any interference received, including interference that may cause undesired operation.
Need help?
Do you have a question about the AI BOX 410 and is the answer not in the manual?
Questions and answers