CRAFTSMAN CMEMW213 - 13 Amp 20-in. 3-in-1 Corded Lawn Mower Manual
- Instruction manual (41 pages)
Advertisement
Definitions: Safety Alert Symbols and Words
This instruction manual uses the following safety alert symbols and words to alert you to hazardous situations and your risk of personal injury or property damage.

Indicates an imminently hazardous situation which, if not avoided, will result in death or serious injury.

Indicates a potentially hazardous situation which, if not avoided, could result in death or serious injury.

Indicates a potentially hazardous situation which, if not avoided, may result in minor or moderate injury.
 (Used without word) Indicates a safety related message.
NOTICE: Indicates a practice not related to personal injury which, if not avoided, may result in property damage.
Read all safety warnings and all instructions. Failure to follow the warnings and instructions may result in electric shock, fire and/or serious injury.
Never modify the power tool or any part of it. Damage or personal injury could result.

To reduce the risk of injury, read the instruction manual.
If you have any questions or comments about this or any product, call CRAFTSMAN toll free at:
1-888-331-4569.
IMPORTANT SAFETY WARNINGS AND INSTRUCTIONS
To reduce risk of injury:
- Before any use, be sure everyone using this tool reads and understands all safety instructions and other information contained in this manual.
- Save these instructions and review frequently prior to use and in instructing others.
- When using electric lawn mowers, basic safety precautions should always be followed to reduce the risk of fire, electric shock, and personal injury, including the following:
READ ALL INSTRUCTIONS
GENERAL SAFETY WARNINGS AND INSTRUCTIONS FOR ALL TOOLS
- This tool can be dangerous. Follow all warnings and Safety Instructions in this manual. The operator is responsible for following warnings and instructions in this manual and on unit. Restrict use of this mower to persons who read, understand and follow warnings and instructions in this manual and on unit.
- Avoid dangerous environment – don't use lawn mowers in damp or wet locations.
- Don't Use In Rain.
- Keep Children Away – All visitors should be kept a safe distance from work area.
- Dress Properly – Do not wear loose clothing or jewelry. They can be caught in moving parts. Use of rubber gloves and footwear is recommended when working outdoors.
- Use Safety Glasses – Always use face or dust mask if operation is dusty.
- Use Right Appliance – Do not use lawn mower for any job except that for which it is intended.
- Ground Fault Circuit Interrupter (GFCI) protection should be provided on the circuit(s) or outlet(s) to be used for the lawn mower. Receptacles are available having built-in GFCI protection and may be used for this measure of safety.
- Check for damaged parts. Before further use of the mower, a guard or other part that is damaged should be carefully checked to determine that it will operate properly and perform its intended function. Check for alignment of moving parts, binding of moving parts, breakage of parts, mounting, and any other conditions that may affect their operation. A guard or other part that is damaged should be properly repaired or replaced by an authorized service center unless otherwise indicated elsewhere in this manual.
- Repairs and service. Repairs, maintenance and any adjustments not specified in this manual should be performed by authorized service centers or other qualified service organizations, always using identical replacement parts.

To prevent electric shock use only with an extension cord suitable for outdoor use, such as SW, SOW, STW, STOW, SJW, SJOW, SJTW, or SJTOW.
Extension Cord – Make sure your extension cord set is in good condition. When using an extension cord, be sure to use one heavy enough to carry the current your product will draw. For proper size cords see chart below. An undersized cord will cause a drop in line voltage resulting in loss of power and overheating. To reduce the likelihood of disconnection of lawn mower cord from the cord set during operating:
Minimum gauge for Cord sets
| Volts | Total length of Cord in Feet (meters) | ||||
| 120 V | 25 (7.6) | 50 (15.2) | 100 (30.5) | 150 (45.7) | |
| 240 V | 50 (15.2) | 100 (30.5) | 200 (61.0) | 300 (91.4) | |
| Ampere Rating | American Wire gauge | ||||
| More Than | Not More Than | ||||
| 0 | 6 | 18 | 16 | 16 | 14 |
| 6 | 10 | 18 | 16 | 14 | 12 |
| 10 | 12 | 16 | 16 | 14 | 12 |
| 12 | 16 | 14 | 12 | Not Recommended | |
- Make a knot as shown in Figure B; or
![]()
- Use one of the plug-receptacle retaining straps or connectors described in this manual.

- Devices for retaining extension cords are available.
- Don't Abuse Cord – Never pull lawn mower by cord or yank it to disconnect from receptacle. Keep cord from heat, oil, and sharp edges.
- Don't Force Lawn Mower – It will do the job better and safer at the rate for which it was designed.
- Don't Overreach – Keep proper footing and balance at all times.
- Stay Alert – Watch what you are doing. Use common sense. Do not operate lawn mower when you are tired.
- Disconnect Lawn Mower – Disconnect the lawn mower from the power supply when not in use, before servicing, when changing accessories such as blades, and the like.
- Store Idle Lawn Mower Indoors – When not in use, lawn mower should be stored in an indoor dry and locked- up place – out of reach of children.
- Maintain Lawn Mower With Care – Keep cutting edges sharp and clean for best and safest performance.
Follow instructions for lubricating and changing accessories. Inspect lawn mower cord periodically and if damaged, have it repaired by an authorized service facility. Inspect extension cords periodically and replace if damaged. Keep handles dry, clean, and free from oil and grease. - Keep guards in place and in working order.
- Keep blades sharp.
- Keep hands and feet away from cutting area.
- Objects struck by the lawn mower blade can cause severe injuries to persons. The lawn should always be carefully examined and cleared of all objects prior to each mowing.
- If lawn mower strikes a foreign object, follow these steps:
- Stop lawn mower. Release the bail handle.
- Unplug power cord.
- Inspect for damage.
- Repair any damage before restarting and operating the lawn mower.
- Use identical replacement blades only.
Extension Cords
Use only three-wire outdoor extension cords that have three- prong grounding-type plugs and three-pole receptacles that accept the lawn mower's plug.
For All Double-Insulated Lawn Mowers
Replacement Parts
When servicing use only identical replacement parts.
Polarized Appliance Connections
To reduce the risk of electric shock, this appliance has a polarized plug (one blade is wider than the other) and will require the use of a polarized extension cord. The appliance plug will fit into a polarized extension cord only one way. If the plug does not fit fully into the extension cord, reverse the plug. If the plug still does not fit, obtain a correct polarized extension cord. A polarized extension cord will require the use of a polarized wall outlet. This plug will fit into the polarized wall outlet only one way. If the plug does not fit fully into the wall outlet, reverse the plug. If the plug still does not fit, contact a qualified electrician to install the proper wall outlet. Do not change the equipment plug, extension cord receptacle, or extension cord plug in any way.
SAVE THESE INSTRUCTIONS

Safe Practices for Pedestrian- Controlled Mowers
This machine is capable of amputating hands and feet and throwing objects. Failure to observe the following safety instructions could result in serious injury or death.
General Information
- Read, understand, and follow instructions and warnings in this manual and on the machine, engine and attachments.
- Only allow operators, who are responsible, trained, familiar with the instructions, and physically capable to operate the machine.
- Do not operate the machine while under the influence of alcohol or drugs.
Preparation Before Operating
- Clear the operating area of any objects which could be thrown by or interfere with operation of the machine.
- Keep the area of operation clear of all bystanders, particularly small children. Stop the machine and attachment(s) if anyone enters the area.
- Do not operate the machine without the entire grass catcher, discharge chute, or other safety devices in place and functioning properly. Check frequently for signs of wear or deterioration and replace as needed.
- Wear appropriate personal protective equipment such as safety glasses, hearing protection, and footwear.
Operating
- Only operate the machine in daylight or good artificial light.
- Avoid holes, ruts, bumps, rocks, or other hidden hazards. Uneven terrain could overturn the machine, or cause operator to lose their balance or footing.
- Do not put hands or feet near rotating parts or under the machine. Keep clear of the discharge opening at all times.
- Do not direct discharge material toward anyone. Avoid discharging material against a wall or obstruction. Material may ricochet back toward the operator. Stop the blade(s) when crossing gravel surfaces.
Children Specific
- Tragic accidents can occur if the operator is not alert to the presence of children. Children are often attracted to the machine and the mowing activity. Never assume that children will remain where you last saw them.
- Keep children out of the operating area and under the watchful care of a responsible adult other than the operator.
Slope Specific
- Slopes are a major factor related to accidents. Operation on slopes requires extra caution.
- Travel in the manufacturer recommended direction on slopes. Use caution while operating near dropoffs.
- Avoid mowing wet grass. (Poor footing could cause a slip and fall accident.)
- Do not operate machine under any condition where traction, steering, or stability is in question. Mower could slide even if the wheels are stopped.
- Avoid starting and stopping on slopes. Avoid making sudden changes in speed or direction. Make turns slowly and gradually.
- Use extra care while operating machine with a grass catcher or other attachment(s). They can affect the stability of the machine.
Service
- Keep machine in good working order. Replace worn or damaged parts.
- Use caution when servicing blades. Wrap the blade(s) or wear gloves. Replace damaged blades. Do not repair or alter blade(s).
The following are explanations of important safety hazard pictorials on the mower.
 | User must read and understand the instruction manual. |
 | To avoid the risk of serious injury do not mow up and down slopes. Always mow across slopes. |
 | To avoid the risk of injury to bystanders keep all persons and pets at a safe distance from the mower while operating. |
 | Rotating blades can cause serious injury. Keep hands and feet clear of mower deck and discharge opening at all times. Always be sure blade has stopped (wait for the blade to stop rotating (approximately 3 seconds) after releasing bail handle and disconnecting it from the power source) before removing and replacing grass catcher, cleaning, servicing, transporting or lifting the mower. |
 | Objects struck by mower blade can cause serious injury. Stay behind the handle when the motor is running. Always ensure persons and pets are clear of the discharge from the mower while operating. Always inspect mowing area before mowing and remove objects that could be thrown by blade. Release bail handle to turn mower off and wait for the blade to stop rotating (approximately 3 seconds) before crossing walk, roads, patio and gravel drives. |
Additional Safety Information
ALWAYS use safety glasses. Everyday eyeglasses are NOT safety glasses. Also use face or dust mask if cutting operation is dusty. ALWAYS WEAR CERTIFIED SAFETY EQUIPMENT:
- ANSI Z87.1 eye protection (CAN/CSA Z94.3),
- ANSI S12.6 (S3.19) hearing protection,
- NIOSH/OSHA/MSHA respiratory protection.
![]()
Some dust created by this product
contains chemicals known to the State of California to cause cancer, birth defects or other reproductive harm. Some examples of these chemicals are:
- compounds in fertilizers
- compounds in insecticides, herbicides and pesticides
- arsenic and chromium from chemically treated lumber
To reduce your exposure to these chemicals, wear approved safety equipment such as dust masks that are specially designed to filter out microscopic particles.
The label on your tool may include the following symbols. The symbols and their definitions are as follows:
| V | volts |  or AC/DC | alternating or direct current |
| Hz | hertz | ||
| min | minutes |  | Class II Construction (double insulated) |
 or DC | direct current | ||
 | Class I Construction (grounded) | ||
| no | no load speed | ||
| .../min | per minute | n | rated speed |
| BPM | beats per minute |  | earthing terminal |
| IPM | impacts per minute | | safety alert symbol |
| RPM | revolutions per |  | visible radiation |
| sfpm | surface feet per minute |  | avoid staring at light |
| SPM | strokes per minute minute |  | wear respiratory protection |
| OPM | oscillations per minute |  | wear eye protection |
| A | amperes |  | wear hearing protection |
| W | watts |  | read all documentation |
 or AC | alternating current | IPXX | IP symbol |
SAVE THESE INSTRUCTIONS FOR FUTURE USE
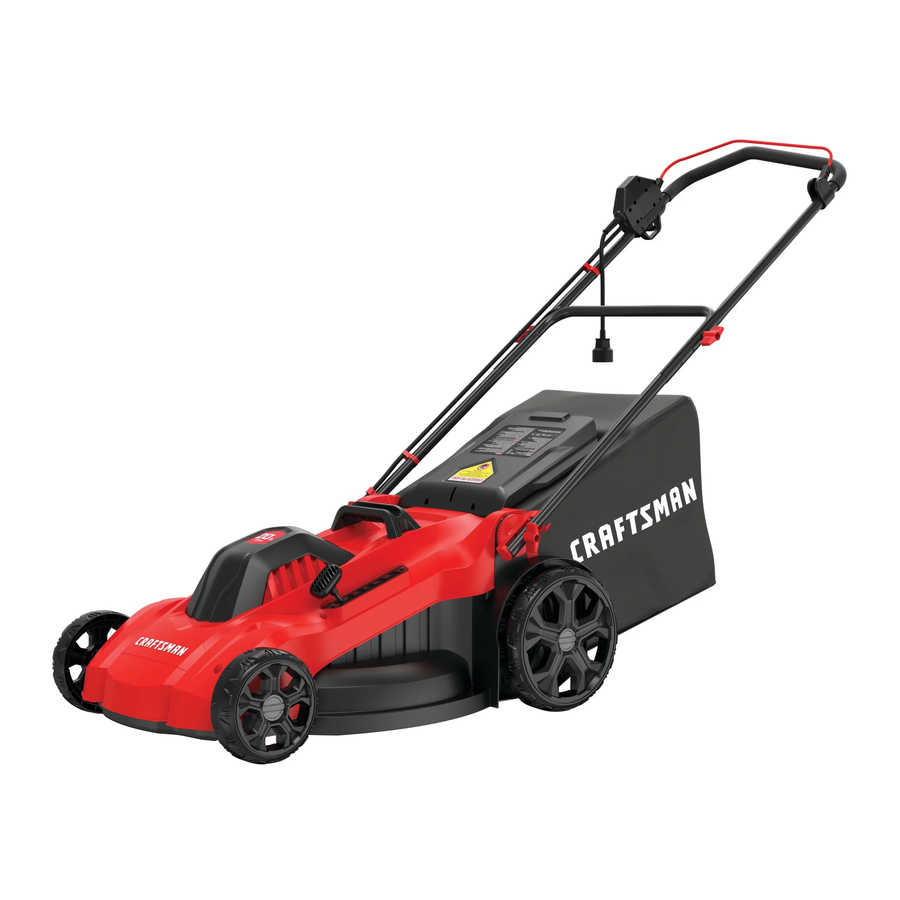
COMPONENTS

- ON-OFF Switch box
- Bail handle
- Upper handle
- Lower handle
- Upper handle knob
- Lower handle knob
- Cut height adjust lever
- Grass collection bag
- Rear door cover
- Carrying handle
Motor
Be sure your power supply agrees with the nameplate marking. Voltage decrease of more than 10% will cause loss of power and overheating. These tools are factory tested; if this tool does not operate, check power supply.
Intended Use
This mower is designed for residential use.
DO NOT use under wet conditions or in presence of flammable liquids or gases.
DO NOT let children come into contact with the tool. Supervision is required when inexperienced operators use this tool.
ASSEMBLY AND ADJUSTMENTS
To reduce the risk of serious personal injury, turn unit off and disconnect it from power source before making any adjustments or removing/installing attachments or accessories. An accidental start-up can cause injury.
Before assembly, make sure the bail handle is released and the mower is unplugged.
Adjusting Lower Handle (Fig. A, C)
There are 2 operating heights for the handle to accommodate multiple operators.

- Lift lower handle
![]() into place.
into place. - Align the arrow
![]() on the base of the mower with 1 or 2 on the base of the handle.
on the base of the mower with 1 or 2 on the base of the handle.
![]()
Ensure each side of the lower handle is set on the same number. The arrow must be lined up with 1 or 2 for operation. - Tighten the handle height adjust knobs
![]() . As you close each, make sure the teeth
. As you close each, make sure the teeth ![]() are engaged. Tighten the lower handle knobs to secure the lower handle in place.
are engaged. Tighten the lower handle knobs to secure the lower handle in place.
 on the base of the mower with 1 or 2 on the base of the handle.
 are engaged. Tighten the lower handle knobs to secure the lower handle in place.
Attaching/Adjusting Upper Handle (Fig. A, D)

- Remove the upper-handle attachment knobs
![]() , washers, and bolts from the handle.
, washers, and bolts from the handle. - Line up the holes on the bottom of the upper handle
![]() with one of the three handle height holes on the top of the lower handle
with one of the three handle height holes on the top of the lower handle ![]() .
.
NOTE: Make sure the cord is located on the front of both handles. If it is not it may result in the cord tangling and the inability to easily store the mower. - Fit the upper handle part to the lower handle using the upper handle knobs
![]() , washers and bolts.
, washers and bolts. - From the outside of the upper handle
![]() , slide the lever bolt through the holes.
, slide the lever bolt through the holes. - Slide the washer over the bolt of the upper-handle attachment knobs and loosely assemble the entire assembly.
- Rotate the upper handle into its operating position.
- Tighten the upper handle knobs. If it is too tight or too loose, adjust the upper-handle attachment knobs to adjust the clamping. They should be tight enough so the handles are held firmly.
 , washers and bolts.
Securing the Motor Cable (Fig. E)
Attach cable so that it does not become stretched or pinched in the joints of the handles during use or folding. This can cause damage to the cord.
The motor cable  has to be fixed to the handles using the cable restraints
  that are already attached to the handle.

- Place the handles in operating position, see Adjusting Lower Handle section.
- Run the cable up the front of the lower
![]() and upper
and upper ![]() handles.
handles. - Pull back the cable restraint.
- Slide the motor cable under the clip and ensure it is fully held in place by the restraint.
Bagging (Fig. F)

- Lift the rear door cover
![]() and place the grass collection bag
and place the grass collection bag ![]() onto the mower so the bag hooks
onto the mower so the bag hooks ![]() rest on the lugs
rest on the lugs ![]() . Then lower the rear door cover.
. Then lower the rear door cover.
 rest on the lugs
  . Then lower the rear door cover.
Safety Shield and Rear Door (Fig. A)
The safety shield is designed to minimize the throwing of stones or other objects by the mower blade backward from under the mower deck.
The shield, along with the rear door cover  minimizes the possibility of accidental foot contact with the blade. DO NOT operate mower without the safety shield and rear door in place.
Carrying the Mower (Fig. A, G)

ROTATING BLADES CAN CAUSE SERIOUS INJURY. TO PREVENT SERIOUS INJURY, UNPLUG MOWER WHEN UNATTENDED, CLEANING, SERVICING, TRANSPORTING, LIFTING, OR STORING MOWER.
The mower can be carried using the convenient carry handles  . DO NOT attempt to lift the mower by grasping the upper handle
  or lower handle
  .
.
OPERATION
To reduce the risk of serious personal injury, turn unit off and disconnect it from power source before making any adjustments or removing/installing attachments or accessories. An accidental start-up can cause injury.
Sharp moving blade. Take your mower to the nearest service center for repair if rear door does not close.
Sharp moving blade. Never operate the mower in bagging mode unless the hanger hooks on the grass catcher are seated properly on the mower and the rear discharge door rests firmly against the top of the grass catcher as serious injury could result.
Sharp moving blade.
Rotating blades can cause serious injury. To prevent serious injury, unplug mower when unattended, or when charging, cleaning, servicing, transporting, lifting, or storing mower.
Let the mower work at its own pace. Do not overload.
READ THIS INSTRUCTION MANUAL BEFORE OPERATING YOUR MOWER. Refer to Components to familiarize yourself with the location of various controls and adjustments. Save this manual for future reference.
Proper Hand Position (Fig. H)

To reduce the risk of serious personal injury, ALWAYS use proper hand position as shown.
To reduce the risk of serious personal injury, ALWAYS hold securely in anticipation of a sudden reaction.
Proper hand position requires both hands on the upper handle .
Adjusting Mower Cut Height (Fig. I)

- Pull the mower cut height adjustment lever
![]() out of the locking notch.
out of the locking notch. - Move the lever towards the rear of the appliance to lower the height of cut.
- Move the lever towards the front of the appliance to raise the height of cut.
- Push the height adjustment lever into one of the 6 locking notches.
NOTE: If you are not sure which height to cut, begin mowing with the cut height adjustment lever in position 6 and adjust the height down as needed.
Starting Mower (Fig. J)

Sharp moving blade. Never attempt to override the operation of this switch box as serious injury could result.
Never attempt to lock a switch or bail handle in the on position.
Your mower is equipped with a special on-off switch box.
- To operate the mower, push the button
![]() on the switch box
on the switch box ![]() , then pull the bail handle
, then pull the bail handle ![]() to the handlebar. Release button and hold bail handle with both hands.
to the handlebar. Release button and hold bail handle with both hands. - To turn the mower off, just release the bail handle.
NOTE: Once the bail handle has returned to the original position it will activate the "Automatic Braking Mechanism". The motor is braked and the mower blade will stop rotating in three seconds or less.
 on the switch box
 Mowing (Fig. K)

Always inspect area where mower is to be used and remove all stones, sticks, wire, bones and other debris which might be thrown by the rotating blade.
We recommend to use your mower as outlined in this section in order to achieve optimum results and to reduce the risk of cutting the main cable.
- Place the bulk of the cable on the lawn, close to the starting point (position 1 in Figure K).
- Switch the mower on as described above.
- Proceed as shown in Figure K
- Move from position 1 to position 2.
- Turn right, stepping over the cable and proceed towards position 3.
- Turn left, stepping over the cable and move towards position 4.
- Repeat the above procedure as required.
![]()
Do not work towards the cable as shown in Figure K.
Mowing Tips (Fig. A)
Always inspect area where mower is to be used and remove all stones, sticks, wire, bones, and other debris which might be thrown by the rotating blade.
Mow across the face of slopes, never up-and-down. Exercise extreme caution when changing direction on slopes. Do not mow excessively steep slopes. Always maintain good footing.
- Release bail handle to turn mower "OFF" when crossing any gravel area (stones can be thrown by the blade).
- Set mower at highest cutting height when mowing in rough ground or in tall weeds. Removing too much grass at one time can cause the motor to be overloaded and to stop. Refer to Troubleshooting guide.
- If the grass collection bag
![]() is used during the fast growing season, the grass may tend to clog up at the discharge opening. Release bail handle to turn mower off and unplug mower. Remove the catcher and shake the grass down to the back end of the bag. Also clean out any grass or debris which may be packed around the discharge opening. Replace the grass catcher.
is used during the fast growing season, the grass may tend to clog up at the discharge opening. Release bail handle to turn mower off and unplug mower. Remove the catcher and shake the grass down to the back end of the bag. Also clean out any grass or debris which may be packed around the discharge opening. Replace the grass catcher.
 is used during the fast growing season, the grass may tend to clog up at the discharge opening. Release bail handle to turn mower off and unplug mower. Remove the catcher and shake the grass down to the back end of the bag. Also clean out any grass or debris which may be packed around the discharge opening. Replace the grass catcher.
- If mower should start to vibrate abnormally, release bail handle to turn mower off and unplug mower. Check immediately for cause. Vibration is a warning of trouble. Do not operate mower until a service check has been made. Refer to Troubleshooting Guide in manual.
- ALWAYS RELEASE BAIL HANDLE TO TURN MOWER OFF AND UNPLUG MOWER WHEN LEAVING IT UNATTENDED, EVEN FOR A SHORT PERIOD OF TIME.
Mower Overload
To prevent damage due to overload conditions, do not try to remove too much grass at one time. Slow down your cutting pace, or raise the cut height.
MAINTENANCE
To reduce the risk of serious personal injury, turn unit off and disconnect it from power source before making any adjustments or removing/installing attachments or accessories. An accidental start-up can cause injury.
Removing and Installing Blade (Fig. L, M)

RISK OF INJURY. WHEN REASSEMBLING THE BLADE SYSTEM, ENSURE EACH PART IS REINSTALLED CORRECTLY, AS DESCRIBED BELOW. IMPROPER ASSEMBLY OF THE BLADE OR OTHER PARTS OF THE BLADE SYSTEM MAY CAUSE SERIOUS INJURY.
- Cut a piece of 2x4 wood
![]() (about 2 feet long) (610 mm) to keep blade from turning when removing the flange nut
(about 2 feet long) (610 mm) to keep blade from turning when removing the flange nut ![]() .
.
![]()
Use gloves and proper eye protection. Turn the mower on its side. Be careful of sharp edges of blade. - Position wood and unscrew flange nut counterclockwise with a 18 mm wrench.
- Note the orientation of each part as you remove it. Remove nut
![]() . Pull off washer
. Pull off washer ![]() , the blade insulator
, the blade insulator ![]() , and the blade
, and the blade ![]() . Examine all pieces for damage and replace if necessary.
. Examine all pieces for damage and replace if necessary.
NOTE: The fan![]() should not be able to be removed.
should not be able to be removed. - To reassemble, slide the blade on. It can only be attached to the fan in one direction and location. Line up the D-shaped hole of the blade with the D-shaped post of the fan, ensuring the writing on the blade faces out away from the mower. Place the insulator on the blade so that the two outer ribs extend past the blade. Place the square washer on top of the insulator so that it sits inside of the two outer ribs on the insulator. Replace the nut with the wide side against the washer.
- To tighten firmly, position the piece of wood to keep the blade from turning. Secure nut with the wrench.
 (about 2 feet long) (610 mm) to keep blade from turning when removing the flange nut
  .
. , the blade insulator
  , and the blade
  . Examine all pieces for damage and replace if necessary.
 should not be able to be removed.
Blade Sharpening (Fig. N)

KEEP BLADE SHARP FOR BEST MOWER PERFORMANCE. A DULL BLADE DOES NOT CUT GRASS CLEANLY.
Use gloves and proper eye protection while removing, sharpening, and installing blade.
Sharpening the blade twice during a mowing season is usually sufficient under normal circumstances. Sand causes the blade to dull quickly. If your lawn has sandy soil, more frequent sharpening may be required.
REPLACE BENT OR DAMAGED BLADE IMMEDIATELY.
When Sharpening the Blade
- Make sure blade remains balanced.
- Sharpen blade at the original cutting angle.
- Sharpen cutting edges on both ends of blade, removing equal amounts of material from both ends.
To Sharpen Blade in a Vise (Fig. N)
- Be sure the bail handle is released, the blade has stopped and the mower is unplugged before removing the blade.
- Remove blade from mower. See instructions for
Removing and Installing Blade. - Secure blade
![]() in a vise
in a vise ![]() .
. - Wear proper eye protection and gloves and be careful not to cut yourself.
- Carefully file the cutting edges of the blade with a fine tooth file
![]() or sharpening stone, maintaining the angle of the original cutting edge.
or sharpening stone, maintaining the angle of the original cutting edge. - Replace blade on mower and tighten securely.
 or sharpening stone, maintaining the angle of the original cutting edge.
Storage (Fig. A, O)

Rotating blade can cause serious injury. Release bail handle to turn mower off and unplug mower before lifting, transporting, or storing the mower. Store in a dry place.
Pinch point. To avoid being pinched, keep fingers away from area between handles when folding down handles.
Make sure cord does not become stretched or pinched in the joints of the handles during folding. This can cause damage to the cord.
The handle of the mower can be easily folded down for quick and convenient storage.
- Holding onto the handle, open, but do not remove, the lower-handle attachment knobs
![]() and fold the handle to the front of the mower.
and fold the handle to the front of the mower. - Open, but do not remove, the upper handle attachment knobs
![]() , or loosen the knobs, and fold the upper handle
, or loosen the knobs, and fold the upper handle ![]() back over the lower handle
back over the lower handle ![]() .
. - The mower shold be compacted down as shown in Figure O.
 and fold the handle to the front of the mower.
Accessories
Since accessories, other than those offered by CRAFTSMAN, have not been tested with this product, use of such accessories with this tool could be hazardous. To reduce the risk of injury, only CRAFTSMAN recommended accessories should be used with this product.
Recommended accessories for use with your tool are available at extra cost from your local dealer or authorized service center. If you need assistance in locating any accessory, please contact CRAFTSMAN, call 1-888-331-4569.
Cleaning
Blow dirt and dust out of all air vents with clean, dry air at least once a week. To minimize the risk of eye injury, always wear ANSI Z87.1 approved eye protection when performing this procedure.
Never use solvents or other harsh chemicals for cleaning the non-metallic parts of the tool. These chemicals may weaken the plastic materials used in these parts. Use a cloth dampened only with water and mild soap. Never let any liquid get inside the tool; never immerse any part of the tool into a liquid.
Repairs
To assure product SAFETY and RELIABILITY, repairs, maintenance and adjustment (including power cord repairs, and brush inspection and replacement, when applicable) should be performed by a CRAFTSMAN factory service center or a CRAFTSMAN authorized service center. Always use identical replacement parts.
Preventing Corrosion (Fig A)
Fertilizers and other garden chemicals contain agents which greatly accelerate the corrosion of metals. If you mow in areas where fertilizers or chemicals have been used, the mower should be cleaned immediately afterward as follows:
Release bail handle  to turn mower off and unplug mower. Wipe all exposed parts with a damp cloth.
DO NOT POUR OR SPRAY WATER ON THE MOWER IN AN ATTEMPT TO CLEAN IT. Do not store the tool on or adjacent to fertilizers or chemicals. Such storage can cause rapid corrosion.
Meets CPSC Safety Requirements
CRAFTSMAN Mowers conform to the safety standards of the American National Standards Institute, and the U.S. Consumer Product Safety Commission. The Blade turns when the motor is running.
Register Online
Register your product now for:
- WARRANTY SERVICE: Registering your product will help you obtain more efficient warranty service in case there is a problem with your product.
- CONFIRMATION OF OWNERSHIP: In case of an insurance loss, such as fire, flood or theft, your registration of ownership will serve as your proof of purchase.
- FOR YOUR SAFETY: Registering your product will allow us to contact you in the unlikely event a safety notification is required under the Federal Consumer Safety Act.
Register online at www.craftsman.com/registration
Three Year Limited Warranty
CRAFTSMAN will repair or replace, without charge, any defects due to faulty materials or workmanship for three years from the date of purchase. This warranty does not cover part failure due to normal wear or tool abuse. For further detail of warranty coverage and warranty repair information, visit www.craftsman.com or call 1-888-331-4569. This warranty does not apply to accessories or damage caused where repairs have been made or attempted by others. THIS LIMITED WARRANTY IS GIVEN IN LIEU OF ALL OTHERS, INCLUDING THE IMPLIED WARRANTY OF MERCHANTABILITY AND FITNESS FOR A PARTICULAR PURPOSE, AND EXCLUDES ALL INCIDENTAL OR CONSEQUENTIAL DAMAGES. Some states do not allow limitations on how long an implied warranty lasts or the exclusion or limitation of incidental or consequential damages, so these limitations may not apply to you. This warranty gives you specific legal rights and you may have other rights which vary in certain states or provinces.
90 DAY MONEY BACK GUARANTEE
If you are not completely satisfied with the performance of your CRAFTSMAN Power Tool or Nailer for any reason, you can return it within 90 days from the date of purchase with a receipt for a full refund – no questions asked.
LATIN AMERICA: This warranty does not apply to products sold in Latin America. For products sold in Latin America, see country specific warranty information contained in the packaging, call the local company or see website for warranty information.
FREE WARNING LABEL REPLACEMENT: If your warning labels become illegible or are missing, call 1-888-331-4569 for a free replacement.
TROUBLESHOOTING GUIDE
To reduce the risk of serious personal injury, turn unit off and disconnect it from power source before making any adjustments or removing/installing attachments or accessories. An accidental start-up can cause injury.
For assistance with your product call CRAFTSMAN at 1-888-331-4569.
| PROBLEM | SOLUTION |
Mower doesn't run when bail handle is activated | Check to make sure mower is properly plugged in and that the button on switch box is being completely depressed before pulling the bail handle. |
| Release bail handle to turn mower off. Unplug mower. Turn mower over and check that blade is free to turn. | |
Motor stops while mowing | Release bail handle to turn mower off. Unplug mower. Turn mower over and check that blade is free to turn. |
| Raise cutting height of wheels to highest position and start mower. | |
| Avoid overloading the mower. Slow down the cutting pace, or raise the cut height. | |
| Mower runs but cutting performance is unsatisfactory, or does not cut entire lawn | Release bail handle to turn mower off. Unplug mower. Turn mower over and check: Blade for sharpness - Keep blade sharp. Deck and discharge chute for clogging. |
| Cut height adjustment may be set too low for grass condition. Raise cutting height. | |
Mower is too hard to push | Release bail handle to turn mower off. Unplug mower. Raise cutting height to reduce deck drag on grass. Check each wheel for free rotation. |
Mower is abnormally noisy and vibrates | Release bail handle to turn mower off. Unplug mower. Turn mower on side and check blade to ensure it has not been bent or damaged. If blade is damaged, replace with a CRAFTSMAN replacement blade. If the underside of the deck is damaged, return mower to a CRAFTSMAN Authorized service center. |
| If there is no visible damage to the blade and the mower still vibrates: Release bail handle to turn mower off, unplug mower, disassemble entire blade assembly as described in the Removing and Installing Blade section. Remove any debris and clean each piece. Replace each piece as described in the Removing and Installing Blade section. If mower still vibrates, return the mower to an authorized CRAFTSMAN authorized service center. | |
Mower not picking up clippings with bag | Chute clogged. Release bail handle to turn mower off. Unplug mower. Clear chute of grass clippings. |
| Raise cutting height of wheels to shorten length of the cut. | |
| Bag full. Empty bag more often. |

IF YOU HAVE QUESTIONS OR COMMENTS, CONTACT US.
1-888-331-4569
WWW.CRAFTSMAN.COM

Documents / Resources
References
Download manual
Here you can download full pdf version of manual, it may contain additional safety instructions, warranty information, FCC rules, etc.
Download CRAFTSMAN CMEMW213 - 13 Amp 20-in. 3-in-1 Corded Lawn Mower Manual
Advertisement


Need help?
Do you have a question about the CMEMW213 and is the answer not in the manual?
Questions and answers