Advertisement
Advertisement
Table of Contents

Subscribe to Our Youtube Channel
Related Manuals for Parachute Outpost


Summary of Contents for Parachute Outpost
- Page 1 Assembly Instructions Outpost Wood Bed Frame...
- Page 2 Assembly Instructions Before getting started: Remove instructions from the side of the box and clear the area of fragile objects. Bed frame assembly requires two people. Please read all instructions carefully and do not discard in case they’re needed for future reference. Parts list: B2.
- Page 3 Assembly Instructions Line up the holes on the left and right rails with the designated holes located on the front leg and back leg frames. From there, layer a spring washer onto a flat washer (B5, B6) before tightly screwing the designated allen bolts (B1) in place with an allen key. NOTE: Loosely hand thread all bolts into place to check alignment before proceeding.
- Page 4 Assembly Instructions Now that you have the outline of the frame constructed, attach both the left and right rails to the headboard by aligning the designated holes and layering a flat washer onto a spring washer (B5, B6). From there, you’ll be able to tighten the allen bolts (B3) into place and complete the top portion.
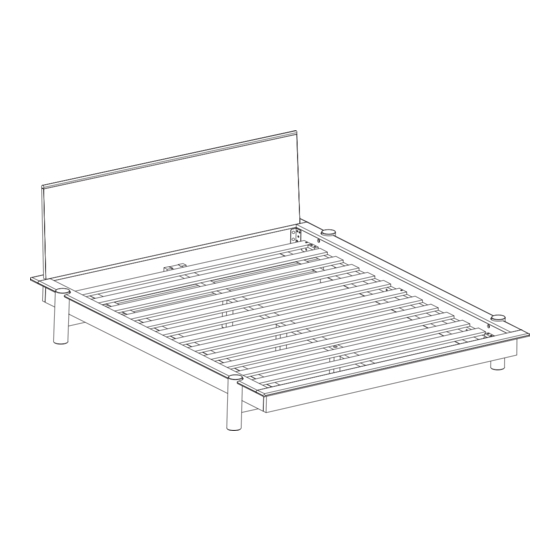
- Page 5 Assembly Instructions Next, slide the assembled support rail into the designated metal brackets located at the center of the headboard and footboard. Take the pre-assembled slats set and line up each corner with the corners of the newly assembled bed frame. Loosely thread each screw (B4) into place on the top and bottom corners of the left and right sides.
- Page 6 Assembly Instructions Inspect all corners, joints and connections to ensure proper assembly before placing your mattress on top of the slats. Have a wonderful night’s sleep. 6 / 7...
Need help?
Do you have a question about the Outpost and is the answer not in the manual?
Questions and answers