Table of Contents
Advertisement
Advertisement
Table of Contents
Troubleshooting

Related Manuals for Snapper Pro S200 XT


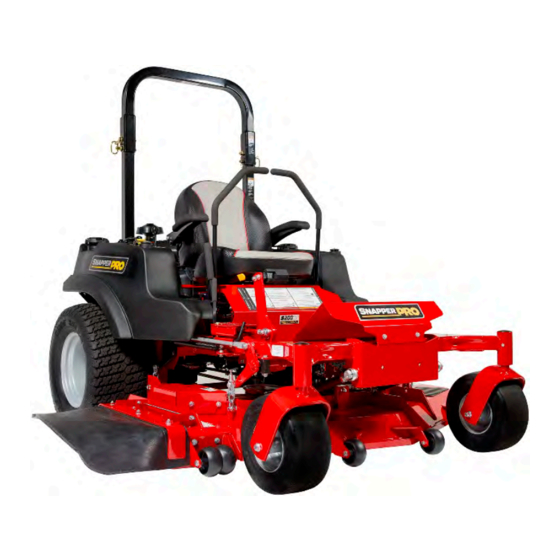
Summary of Contents for Snapper Pro S200 XT
-
Page 2: Table Of Contents
Table of Contents: Checking Tire Pressures..........32 Lubrication..............32 General Information.............. 3 Lubricate the Front Casters..........33 Identifying Your Unit............3 Servicing the Mower Blades...........34 Operator Safety..............3 Seat Adjustment............. 35 Safety Alert Symbol and Signal Words......3 Seat Adjustment (Suspension Seat)......36 California Proposition 65.......... -
Page 3: General Information
Snapper Pro® is a registered trademark of Briggs & Stratton. When contacting your authorized service dealer for Identifying Your Unit replacement parts, service, or information you MUST have these numbers. -
Page 4: California Proposition 65
injury. In addition, a hazard symbol may be used to represent Use common sense, and think through what you are doing. the type of hazard. If you are not sure that the task you are about to perform can be safely done with the equipment you have chosen, ask a professional: contact your local authorized dealer. ... - Page 5 Slope Operation Moving Parts This equipment has many moving parts that can injure you or someone else. However, if you stay in the operator zone (stay seated in the seat), and follow the safety rules in this operator’s manual, the unit is safe to operate. Operation on slopes can be dangerous.
-
Page 6: Slope Identification Guide
Retaining walls and drop-offs around steps and water are Only operate this unit outdoors and away from unventilated a common hazard. Do NOT operate down slope towards or areas such as inside garages or enclosed trailers. The near water, retaining walls, or drop-offs. engine emits poisonous carbon monoxide gas and prolonged exposure in an enclosed area can result in serious injury or Give yourself a minimum of two mower widths of clearance... -
Page 7: Safety Rules And Information
Note: A paper gauge slope identification guide is included • Be sure of your footing while using pedestrian controlled in your product literature packet and is also available to equipment, especially when backing up. Walk, don’t run. download from the manufacturer's website. Reduced footing could cause slipping. ... - Page 8 • Avoid starting, stopping, or turning on a slope. Do NOT WARNING make sudden changes in speed or direction, which could It is a violation of California Public Resource Code, Section cause the mower to rollover. 4442, to use or operate the engine on any forest-covered, •...
- Page 9 Service and Maintenance wire. Wait for all movement to stop before adjusting, cleaning or repairing. To avoid personal injury or property damage, use extreme • Clean grass and debris from cutting units, drives, care in handling gasoline. Gasoline is extremely flammable mufflers, and engine to prevent fires.
- Page 10 Inspection of the Roll Bar Protective Structure WARNING Units with hydraulic pumps, hoses, or motors: Hydraulic WARNING fluid escaping under pressure may have sufficient force to Failure to properly inspect and maintain the ROLL BAR penetrate skin and cause serious injury. If foreign fluid is protective structure can cause serious injury or death.
-
Page 11: Safety Decals And Symbols
Understand and follow all safety decals to reduce the risk of a personal injury or property damage. WARNING If any safety decals become worn or damaged and cannot be read, order replacement decals from your local authorized Snapper Pro® servicing dealer. - Page 12 WARNING DANGER Avoid serious injury or death. Loss of control and roll-over hazard. • Read operator's manual before using this product. • Do NOT operate this machine unless you are trained. Operating on slopes can be hazardous and cause loss •...
- Page 13 Decal, Warning, Pinch Point Decal, Warning, Hand in Belt Part Number: 84008198 Part Number: 84008200 WARNING Amputation and Pinch Point Hazard. WARNING To avoid injury from rotating parts, stay Pinch Point. clear of parts and keep all shields and guards in place. To avoid injury from loaded spring, read operator's manual before removing spring.
-
Page 14: Safety Icons For Optional Jack Kit Accessory
Decal, Caution, Folding Roll Bar Part Number: 5105632 - Decal, Warnings, Svc Jack Part Number: 5104083YP 1.) Warning - Read the Operator's Manual. 2.) Crushing Hazard, Mower: (1.) Park machine on flat level ground and engage the parking brake; (2.) Stop the WARNING engine and remove the ignition key;... - Page 15 Zero-Turn Rider Controls Cutting Height Storage Hole for Deck Lift Lock Adjustment Cutting Height Lever Adjustment Pin "A" - Deck Lift Pedal Parking Brake: Pull the parking brake lever up "B" - Cutting Height Adjustment Pin and back to engage the parking brake. Move the lever fully forward and down to disengage the parking brake.
- Page 16 Retractable Seat Belt: The seat belt is used to secure the operator to the seat. The seat belt should always be worn when the Roll Bar is in the raised position. The seat belt should never be worn when the Roll Bar is in the down position. Transmission Oil Fill: Transmission oil is added through the hydraulic oil tanks.
- Page 17 backwards seat adjustment lever, position the seat as desired, and release the lever to lock the seat in position. Seat Adjustment Knob (Suspension): The suspension adjustment knob adjusts the suspension of the seat (ride comfort). Turn the adjustment knob until the display scale has a reading that matches the weight of the operator.
- Page 18 C. Choke D. Ignition Switch E. Hour Meter F. Malfunction Indicator Lamp (M.I.L.) G. Electronic Throttle Control Rocker Switch Throttle Control: The throttle controls engine speed. Move the throttle forward to increase engine speed and back to decrease engine speed. Always operate at FULL throttle when mowing.
-
Page 19: Operation
Operation through the engine oil fill. See the engine Operator’s manual for instructions, engine oil dipstick location and oil Before First Time Operation recommendations. • Make sure all nuts, bolts, screws and pins are in place • Be sure to read all information in the Safety and and tight. -
Page 20: Starting The Engine - Fuel Injected Models With Electronic Throttle Control
Note: To prime a dry fuel system, turn the key switch to the down follow the procedure given in Stopping the Zero-Turn RUN position for one minute. Allow the fuel pump to cycle Riding Mower. and prime the system. Turn the ignition switch to OFF. Stopping the Zero-Turn Riding Mower 1. - Page 21 Reverse Travel Practice LOOK DOWN AND BEHIND, then gradually move both ground speed control levers evenly BACK from neutral. Slow down and repeat. Note: Practice backing up for several minutes before attempting to do so near objects. The zero-turn riding mower FIRST, place your hands onto the levers as shown. turns sharply in reverse as well as forward, and backing up straight takes practice.
-
Page 22: Mowing
Mowing 1. Engage the parking brake. Make sure that the PTO switch is disengaged, the ground speed control levers are locked in the NEUTRAL position and the operator is in the seat. 2. Start the engine. See Starting the Engine. 3. - Page 23 • Avoid mowing after rain or even heavy dew, and never mulch when the grass is wet (moist grass does not mulch well, and clumps beneath the mower deck). Mowing Patterns Always start mowing on a smooth, level area. The size and type of area to be mowed will determine the best mowing pattern to use.
-
Page 24: Pushing The Rider By Hand
The remainder of the mowing should be done in the opposite The best mulching action typically results from cutting only direction so that the clippings are dispersed OUT onto the the top 1/2 inch to 3/4 inch of grass blade. This provides area of lawn previously cut. -
Page 25: Raise And Lower The Roll Bar
3. Push or pull the top of the roll bar forward against the spring clips and reinstall the retainer pins and hair pin Raise and Lower the Roll Bar clips to secure the roll bar in the raised position. Attaching a Trailer WARNING Avoid serious injury or death from roll over: The maximum weight of a towed trailer should be less than... -
Page 26: Maintenance Schedule
Starting After Long Term Storage Here is a checklist of things to do when storing your unit temporarily or in between uses: Before starting the unit after it has been stored for a long period of time, perform the following steps. •... -
Page 27: Maintenance Procedures
2. Fill the fuel tank to the bottom of the filler neck. This will ENGINE MAINTENANCE allow for fuel expansion. Change Oil & Filter Note: Do not overfill. Refer to your engine operator's Check/Replace Spark Plugs manual for specific fuel recommendations. Check/Replace Fuel Filter 3. -
Page 28: Changing The Engine Oil And Filter (Engines With Remote Oil Tank)
Changing the Engine Oil and Filter (Engines with Remote Oil Tank) Engine Oil Type: 15W-50 synthetic oil. (See the engine operator's manual for other oil recommendations.) Engine Oil Change Amount: 5 qt (4,73 L). Oil Change Interval: Every 500 hours. Important: Always make sure that the mower is parked on a flat, level surface when checking the engine oil level. -
Page 29: Changing The Engine Oil And Filter (All Other Models)
7. Remove the cap from the drain spout of the oil drain valve. 12. Remove the engine oil dipstick and check the oil level. 8. To operate the oil drain valve, turn counter-clockwise to Maximum oil level is the "FULL" line (G, Figure 28) on the open and drain the engine oil into a suitable container. -
Page 30: Disposing Of Used Engine Oil
Electronic Fuel Injection (EFI) System - EFI Models EFI is an electronically-controlled fuel management system which is monitored by an Electronic Control Unit (ECU). A Malfunction Indicator Lamp (M.I.L.) will illuminate if problems or faults are detected. Servicing by an authorized dealer is necessary. -
Page 31: Transmission Oil Filter Change
2. Check the oil level when the unit is cold. The oil should be up to the "FULL COLD" mark (B) on the transmission oil tanks. If the oil is below this level, proceed to step 3. 3. Before removing the tank cap (C), make sure that the area around the tank cap and fill neck of the tank is free of dust, dirt, and other debris. -
Page 32: Purging The Air From The Hydraulic System
6. Install the top oil fill vent port plug and continue filling stamped on the side-wall of the tires. The pressures shown the system with oil until the fill line is reached in the provide proper traction and extend tire life. expansion tank. -
Page 33: Lubricate The Front Casters
72" Mower Decks: 72" Mower Decks: Lubricate the Front Casters Interval: Annually 1. Remove the 1/4-28 bolt (A, Figure 40) screwed into the caster and install a 1/4-28 grease fitting. 61" Mower Decks:... -
Page 34: Servicing The Mower Blades
Inspecting, Sharpening, and Balancing the Mower Blades CAUTION Laceration hazard. Mower blades are sharp. Always wear gloves when handling, or working near, mower blades. 1. Remove the mower blade from the unit. See Removing the Mower Blades. 2. Clean the blade to remove any dried grass or other debris. -
Page 35: Seat Adjustment
4. If the cutting edges are not sharp or have nicks, sharpen 9. Check the balance of the blade. If either end of the the blades. blade moves downward the end that moves downward is heavier than the other. Sharpen the heavy end until balance is achieved. -
Page 36: Seat Adjustment (Suspension Seat)
levers (how close the ends are to one another), and the height of the control levers can be adjusted. To Adjust the Control Lever Alignment Loosen the mount bolts (A, Figure 48) and pivot the control lever(s) (C) to align with each other. Seat Adjustment (Suspension Seat) In addition to the forward and backward seat adjustment, models equipped with suspension seats can also be adjusted... -
Page 37: Cutting Height Adjustment
1. Loosen the securing nut (B). 1. While sitting in the operator’s seat, press the deck lift foot pedal forward until it locks into the 5" (12,7 cm) position. 2. Turn the top speed adjustment bolt counter-clockwise to reduce the speed. 2. -
Page 38: Neutral Adjustment
Note: This adjustment should not be performed while the machine is running. It may take several attempts to achieved neutral, depending upon how much the machine creeps. Return-to-Neutral Adjustment The return-to-neutral function is a feature of the transmissions on this unit. Prior to checking the return-to-neutral function the neutral must be adjusted correctly as detailed in Neutral Adjustment. -
Page 39: Parking Brake Adjustment
4. If the spring length does not equal the measurement, the spring length will need to be adjusted. 5. Disengage the parking brake. 6. Loosen the set collar (C) and slide it away from the back of the parking brake bracket (D). CAUTION Do not adjust the spring to be shorter than 2-11/16"... -
Page 40: Deck Lift Rod Timing Adjustment (61" Mower Decks)
2. Set the mower deck in the 3-1/2” (8,9 cm) cutting height NOT equal (greater than 1/8” (3,17 mm) difference), position. adjustment is required continue with Step 4. 3. Visually inspect the front deck lift levers (C): 4. Lock the deck lift pedal in the TRANSPORT position. Remove the cutting height adjustment pin and lower the •... -
Page 41: Deck Lift Rod Timing Adjustment (72" Mower Decks)
8. Reinstall the clevis on the lift pivot arm and secure with the 1/2” clevis pin previously removed. Tighten the jam nut against the clevis. 9. Remove the blocks from the under the mower deck. 10. Remove the cutting height adjustment pin from in front of the deck lift pedal arm. - Page 42 Determining if the Deck Leveling Needs to be Adjusted 1. Park the unit on a flat, level surface. Disengage the PTO, engage the parking brake, turn the ignition switch to OFF, and remove the ignition key. 2. Lock the deck lift pedal in the TRANSPORT position. Place the cutting height adjustment pin in the 4"...
-
Page 43: Deck Lift Assist Springs
3. Turn the hex adjusters on the deck linkages (C) 7. Remove the blocking from under the mower deck. clockwise to raise the mower deck or counter- 8. Re-check the measurements from the tips of the mower clockwise to lower the mower deck. blades to the ground. -
Page 44: Mower Deck Drive Belt Replacement (Single Belt Models)
WARNING Use extreme caution when rotating the idler arm with the breaker bar, due to the increased tension in the spring as the idler arm is being rotated. Injury may result if the breaker bar is prematurely released while the spring is under tension. -
Page 45: Long Left Hand Deck Belt Replacement
12. Turn the adjustment nut (E) until the measurement is achieved. Re-tighten the jam nut. 13. Re-install the mower deck guards and the floor pan. 4. Remove the long left hand belt (D) from the adjustable 14. Run the mower under no-load condition for about five (5) idler pulley (E) and it’s belt guide (F). -
Page 46: Short Right Hand Deck Belt Replacement (60" / 61" Mower Decks)
11. Re-install the mower deck guards and the floor pan. 12. Run the mower under no-load condition for about five (5) 5. Remove the spring anchor hardware (D) that anchors the minutes to break in the new belts. idler arm spring (E) to the mower deck. Short Right Hand Deck Belt 6. -
Page 47: Short Right Hand Deck Belt Replacement (72" Mower Decks)
Short Right Hand Deck Belt 9. Re-connect the idler arm spring. Install the 3/8 washer and then the spacer onto the shaft of the 3/8 bolt. Install Replacement (72" Mower Decks) the hook of the idler arm spring around the body of the NOTICE To avoid damaging belts, do not pry over spacer and then install the bolt into the spring anchor tab pulleys. -
Page 48: Cleaning The Battery And Cables
Cleaning the Battery and Cables If there is any doubt about the cause of the problem, see your authorized Snapper Pro® servicing dealer. If you need This unit is equipped with a maintenance-free BCIU1 battery. to replace the battery, follow the steps under Cleaning the Battery and Cables. -
Page 49: Troubleshooting
If there is any doubt about the cause of the Problem: Engine will not turnover or start. problem, see your authorized Snapper Pro® servicing dealer. Safety interlock switch faulty Replace as needed. See authorized service dealer. To charge the battery, follow the instructions provided by the... -
Page 50: Troubleshooting Common Cutting Problems
Troubleshooting Common Cutting Problem: Unit drive belt slips. Problems Belt stretched or worn Replace belt. Problem: Streaking Problem: Brake will not hold. Streaking is when thin strips of uncut grass are left behind the mower. Cause Remedy Streaking is usually caused by operator error or poor blade maintenance. Brake is incorrectly adjusted. -
Page 51: Specifications
Problem: Stepped Cutting Briggs & Stratton Vanguard 49R977 Blades are installed incorrectly. Reinstall the blades correctly. Electrical System 12 volt, 16 amp alternator, Battery: 340 cca Problem: Uneven Cutting Fits models: 5901664 Uneven cutting is waviness or smooth troughs in the lawn surface. Uneven cutting is usually caused by mower deck damage or misadjustment. - Page 52 Models with 61" Mower Deck Inflation Pressure: 25 psi (1,72 bar) - Models with air filled tires Overall Width (with discharge 63" (160 cm) Inflation Pressure: N/A (Flat Free chute up) Tire) - Models with flat free tires Overall Height (with Roll Bar 57"...
-
Page 53: Warranty
Unless required under Australian Consumer Law, Snapper Pro® shall not be liable under this Warranty to the Customer or any other person in connection with this Warranty, for consequential, direct or indirect damages, loss or costs incurred or suffered by the Customer or any other person;... - Page 54 Briggs & Stratton products. ABOUT YOUR WARRANTY Warranty service is available only through Snapper Pro® Authorized Service Dealers. This warranty only covers defects in materials or workmanship. It does not cover damage caused by improper use or abuse, improper maintenance or repair, normal wear and tear, or stale or unapproved fuel.
- Page 55 Notes...
Need help?
Do you have a question about the S200 XT and is the answer not in the manual?
Questions and answers