Ella's Bubbles TUB4TWO Owner's Manual
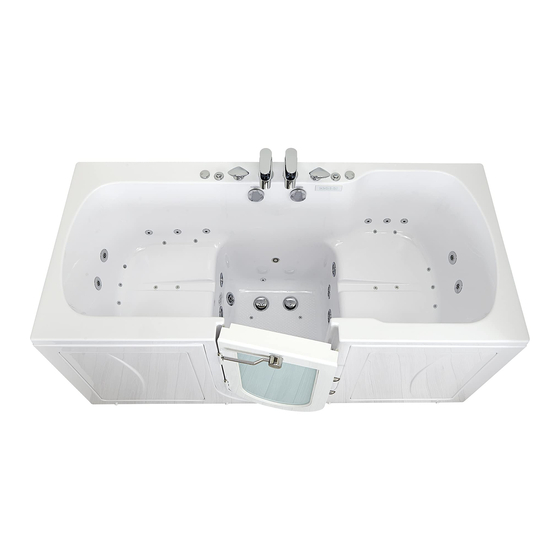
2 seat acrylic walk in bathtub
Hide thumbs
Also See for TUB4TWO:
- Owner's manual (24 pages) ,
- Owner's manual (30 pages) ,
- Owner's manual (27 pages)

Related Manuals for Ella's Bubbles TUB4TWO


Summary of Contents for Ella's Bubbles TUB4TWO
- Page 1 ELLA BIG4TWO & TUB4TWO 2 SEAT ACRYLIC WALK IN BATHTUB OWNERS MANUAL Customer Support #: 800 480 6850 Email: info@ellasbubbles.com Tub4Two Big4Two O2SA3680 O2SA3260...
-
Page 2: Table Of Contents
Table of Contents Unpacking and Inspecting................................1 Warnings and Labels................................. 2 - 4 Moving your Ella Walk In Bath..............................5 Important Safety Instructions..............................6 - 7 Required Steps Prior to Installation............................8 Drain and Plumbing Positioning Options........................9 - 12 Door and Frame Adjustments............................13 - 15 Door Handle Instructions................................ -
Page 3: Unpacking And Inspecting
Unpacking and Inspecting Inspect the carton for damage: Take a picture if possible. CAREFULLY RECORD ALL PERCEIVED DAMAGE DO NOT LIFT THE TUB BY THE PLUMBING. Doing so can result in leaks, for which the installer is responsible. All Walk-In Tubs are water tested before they leave our factory and the bath tub you have purchased has passed... -
Page 4: Warnings And Labels
Warnings and Labels Your Ella's bathtub comes with several warning label stickers throughout and are as follows: Push Control Acrylic Shell Back nut Air hose ellasbubbles.com... - Page 5 Warnings and Labels Continued Backnut MUST be securely tightened. Failure to do so will cause loosening over time resulting in it coming apart and falling down the drain. Drain closed Drain open completely all the way Drain must open completely to drain properly and close completely to avoid unnecessary drainage.
- Page 6 Warnings and Labels Continued WARNING! PLEASE READ BEFORE BEGINNING INSTALLATION WARNING: Do not attach the hand held shower to the wall unless you have an extension hose with a barrel protection. This may cause water to leak behind your walk in tub. TO INSTALL BARREL EXTENSION HOSE: Water from the hose can drip down into the hand shower base and get...
-
Page 7: Moving Your Ella Walk In Bath
Moving your Ella Walk in Bath •Remove all four (4) access panels before moving the tub •Take off the screw caps •Unscrew the screws with a Philips head screwdriver •Remove the end access panel WARNING: Do not carry the walk in tub by the panels. Be careful when carrying the tub, avoid front panel contact with the floor or stairs to prevent damages. -
Page 8: Important Safety Instructions
Important Safety Instructions WARNING: ***Read through the entire manual completely before beginning installation.*** Contract a licensed plumber and electrician for installation. Be sure you and your contractor are aware and follow all local plumbing and electrical codes. Your Ella Walk in Bath is not intended for outdoor use. - Page 9 Important Safety Instructions WARNING: ***USE TUB ONLY AS INTENDED! FAILURE TO DO SO CAN LEAD TO INJURY OR DEATH*** WARNING CORRECT BATHER SHOULD ONLY SIT AS SHOWN IN FIGURE TO THE LEFT. SIT FULLY IN SEAT WITH BACK ON THE BACKREST.
-
Page 10: Required Steps Prior To Installation
Required Steps Prior to Installation Protecting the Bath Cover and protect the bath shell and fixtures from scratches or other damages during the installation and tests. Remove the access panels when moving the Walk in Bath and always lift the bathtub from the frame (Page #2). Electrical The unit MUST be connected to a circuit protected by a ground fault circuit interrupter (GFCI) provided and installed by a licensed electrician and tested periodically (refer to... - Page 11 2" T Type Dual Port Dual Drain ellasbubbles.com...
-
Page 12: Drain And Plumbing Positioning Options
Drain and Plumbing Positioning Options ellasbubbles.com... - Page 13 Drain and Plumbing Positioning Options The drain positioning should be determined by a licensed plumber. The pictures above only show a few of the many possible options for drainage setup. For faster drainage all 4 ports may be connected to house drain. ellasbubbles.com...
- Page 14 Drain and Plumbing Positioning Options The drain positioning should be determined by a licensed plumber. The pictures above only show a few of the many possible options for drainage setup. For faster drainage all 4 ports may be connected to house drain. ellasbubbles.com...
-
Page 15: Door And Frame Adjustments
Door and Frame Adjustments Prepare the sub-floor for the drain and ensure that the area is level. The supporting sub-floor must be able to support the total weight of the bathtub, bather and water and must meet local construction code requirements. Use a level and make sure that the sub-floor below the tub is leveled. - Page 16 Door and Frame Adjustments Your walk in bathtub has been tested and leveled properly before leaving our facility. Our walk in bathtubs have been set on a perfectly level surface to ensure no leaks and proper door closing. It is up to your installer to test and make any adjustments necessary to ensure that all leveling legs support the tub frame and that the door is aligned correctly to prevent any leaks.
- Page 17 Door and Frame Adjustments WARNING: Failure to level the tub correctly WILL RESULT IN MISALIGNMENT! The drawings below illustrate some examples of what types of frame warping will occur if the legs are not level with the floor. ellasbubbles.com...
-
Page 18: Door Handle Instructions
Door Handle Instructions Door Stopper The door handle must be placed correctly so the handle stopper stops the door handle and protects the door mechanism from breaking. There must not be a gap between the door and door handle if it is installed correctly. Make sure to tighten the screw with a wrench. -
Page 19: Installation Of Deck Mount Grab Bar
Installation of Deck Mount Grab Bar Parts List: Chrome grab bar x (1) Escutcheon x (2) Rubber washers x (4) Metal washers x (2) Bolts x (2) WARNING Grab Bar GRAB BAR WASHERS MUST BE INSTALLED TO PREVENT CRACKING OF THE ACRYLIC SHELL, FAILURE TO DO SO WILL VOID THE WARRANTY Escutcheon *THE LARGER METAL WASHER IS THE MOST... -
Page 20: Installing Extension Kit
Installing Extension Kits Installing Extension Kits Deluxe Dimensions: 5"W x 29 1/2"L x 37"H L" Stainless Steel Brackets ......Qty (3) Elite Dimensions: 7"W x 29 3/4"L x 37 3/4"H L" Acrylic Bracket ........Qty (1) Royal Dimensions: 7"W x 31 3/4"L x 37 3/4"H 1"... -
Page 21: Finishing Installation
Finishing Installation After all of the water and electrical testing is completed and al�� x tures are checked, the tub can be installed to the surrounding wall or walls. Ella Walk in Baths come with low rise til�� ange which allows for two or one wall installations. The extension panel of the bathtub can be installed as needed for 60"... - Page 25 When installing and using this electrical equipment, basic safety precautions should always be followed, including: WARNING: Keep dry. Replace control WARNING: Failure to install in if exposed to water, moisture or strict accordance with each and contamination. every instruction above may compromise the system, which may cause injury to persons and/ or property.
- Page 26 TCV not operating properly. The TCV must be protected with filter or mesh in the water lines which must be cleaned periodically. Ella's Bubbles offers cleaning service for the cartridges for a nominal fee: labor + shipping.
-
Page 27: Warranty
Warranty Activation Form 1 of 2 INSTALLER'S INFORMATION _______________________________________________________________________________________ Page 1 Name _______________________________________________________________________________________ Address City State _________________________________ _________________________________________________ Telephone Email _________________________________ _________________________________________________ Date Signature Upon completing the installation of an Ella Walk In Bath, the following Warranty Activation Form must be completed, signed by both the customer and installer, and returned to Ella’s Bubbles, LLC. - Page 28 Copy of sales receipt must be included with warranty activation forms. To activate manufacturer's warranty, please complete both pages and use one of the options below to submit. Via mail: Ella's Bubbles, LLC. Warranty Department 2101 S. Carpenter St., Chicago, IL 60608 Via fax: 1-312-666-3551 Via email: warranty@ellasbubbles.com...
Need help?
Do you have a question about the TUB4TWO and is the answer not in the manual?
Questions and answers