Table of Contents
Advertisement
Advertisement
Table of Contents

Related Manuals for DAVID COMMERCIAL ZM-700.DV


Summary of Contents for DAVID COMMERCIAL ZM-700.DV
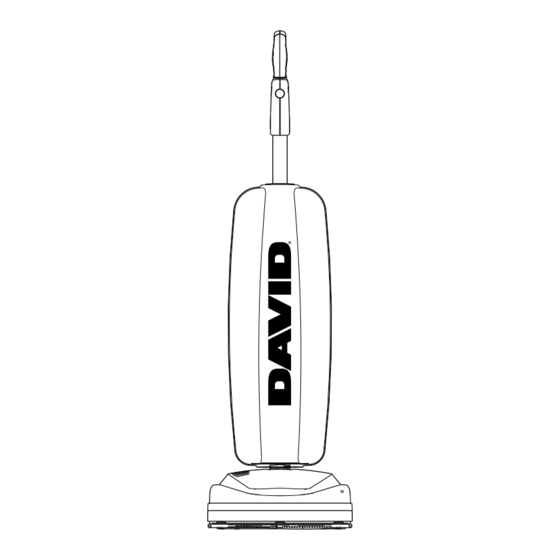
- Page 1 ® ZM-700.DV Owner’s Manual...
-
Page 2: Table Of Contents
CONTENTS Getting Started Important Safety Instructions Grounding Instructions Description of the Vacuum Assembling the Vacuum Operation Reclining the Handle On/Off Switch Edge Cleaning Automatic Carpet Height Adjustment Bare Floor Cleaning Maintenance and Care Power Cord Care Vacuuming Under Furniture Replacing the Vacuum Bag Removing/Reinstalling the Bottom Plate Replacing the Agitator Belt Brushroll Jam Indicator... -
Page 3: Important Safety Instructions
IMPORTANT SAFETY INSTRUCTIONS When using an electrical appliance, basic precautions should always be followed, including the following: READ ALL INSTRUCTIONS BEFORE USING THIS APPLIANCE. IMPORTANT: The manufacturer cannot accept responsibility for damage caused when the appliance is not used according to the instructions, or for uses other than those for which it was intended. -
Page 4: Grounding Instructions
GROUNDING INSTRUCTIONS This vacuum cleaner must be grounded. If it should malfunction or break down, grounding provides a path of least resistance for electric current to reduce the risk of electric shock. This vacuum cleaner is equipped with a cord having an equipment- grounding conductor and grounding plug. -
Page 5: Description Of The Vacuum
DESCRIPTION OF THE VACUUM DESCRIPTION OF THE VACUUM 1. Ergonomic Handle 2. On/Off Power Switch, Two Speed 3. Bag Compartment 4. Vacuum Nozzle 5. Furniture Guard 6. Brushroll Jam Indicator 7. Circuit Breaker Reset Button 8. Handle Release Pedal 9. Quick Release Cord Hook 10. -
Page 6: Assembling The Vacuum
ASSEMBLING THE VACUUM Attaching the Handle to the Vacuum NOTE: Do not plug in the vacuum until it is completely assembled. The vacuum cleaner and the handle are packed separately and require assembly. • Thread the cord through the lower and upper cord guides on the back of the vacuum bag (Fig. - Page 7 ASSEMBLING THE VACUUM Attaching the Cord Retainer to the Handle • Pull apart the rounded end of the cord retainer to open it up enough to fit around the carry handle (Fig. 1). • Attach the cord retainer around the carry handle.
-
Page 8: Operation
OPERATION Reclining the Handle • Press the handle release pedal located on the back of the vacuum with your foot to recline the handle (Fig. 1). On/Off Switch, Two Speed • The power switch located on the vacuum handle, is a three-way switch Fig. -
Page 9: Maintenance And Care
MAINTENANCE AND CARE Power Cord Care • If the cord or plug has any apparent damage, refrain from using the vacuum. • When the vacuum is in use, hold the cord to keep from running over it. • Avoid obstructions and do not pull the cord around sharp edges or corners. -
Page 10: Replacing The Vacuum Bag
MAINTENANCE AND CARE Replacing the Vacuum Bag NOTE: Unplug the vacuum cleaner from the electrical outlet before changing the bag. • Unzip the bag compartment. • Remove the used vacuum bag by pulling the green bag collar tab away from the vacuum (Fig. 1). Slide the Fig. -
Page 11: Removing/Reinstalling The Bottom Plate
MAINTENANCE AND CARE Removing and Reinstalling the Bottom Plate WARNING! To reduce the risk of electrical shock or injury from moving parts, unplug before servicing or cleaning. To Remove the Bottom Plate: • Press the handle release pedal to place Fig. -
Page 12: Replacing The Agitator Belt
MAINTENANCE AND CARE Replacing the Agitator Belt WARNING! To reduce the risk of electrical shock or injury from moving parts, unplug before servicing or cleaning. NOTE: To ensure maximum cleaning efficiency, the belt should be checked regularly to be sure it is in good condition. -
Page 13: Brushroll Jam Indicator
MAINTENANCE AND CARE Brushroll Jam Indicator If an object, such as a throw rug or article of clothing, is ever picked up into your vacuum, the vacuum will sense this “jammed brushroll” condition and turn off the brushroll. When this happens, the Brushroll Jam Indicator light on the top of the nozzle will flash in red. -
Page 14: Resetting The Circuit Breaker
MAINTENANCE AND CARE Resetting the Circuit Breaker WARNING! To reduce the risk of electrical shock or injury from moving parts, unplug before servicing or cleaning. Your vacuum features a circuit breaker to protect the machine against damage due to a surge in the electrical current. Electrical surging can be a result of, though not limited to, a jammed Circuit Breaker... -
Page 15: Key Replacement Parts
Retailer. To locate your nearest Authorized Retailer, visit our website at DAVIDPRODUCTS.COM or call 281-866-0027. Key Replacement Parts • Genuine bags and filters are available from your authorized DAVID retailer. For Best Performance • Keep machine and all accessories clean and in good operating condition. -
Page 16: Warranty
The original product, as described above, and/or non-wearable parts deemed defective, in DAVID Products’ sole discretion, will be repaired or replaced for the duration of the warranty period. If found to be defective within the stated warranty period, the unit will be repaired at no charge to you (both parts and labor) by an authorized DAVID Products Service Center. - Page 17 Consequential and incidental damages. Defects caused by repair persons not authorized by DAVID Products. These defects include damages caused in the process of shipping, altering, or repairing your DAVID Products product (or any of its parts) when the repair is performed by a repair person not authorized by DAVID Products.
- Page 18 NOTES...
- Page 19 NOTES...
- Page 20 ® DAVIDPRODUCTS.COM B503-2851 04/2022...
Need help?
Do you have a question about the COMMERCIAL ZM-700.DV and is the answer not in the manual?
Questions and answers