Sign In
Upload
Download
Table of Contents
Contents
Add to my manuals
Delete from my manuals
Share
URL of this page:
HTML Link:
Bookmark this page
Add
Manual will be automatically added to "My Manuals"
Print this page
×
Bookmark added
×
Added to my manuals
Manuals
Brands
Zero Manuals
Motorcycle
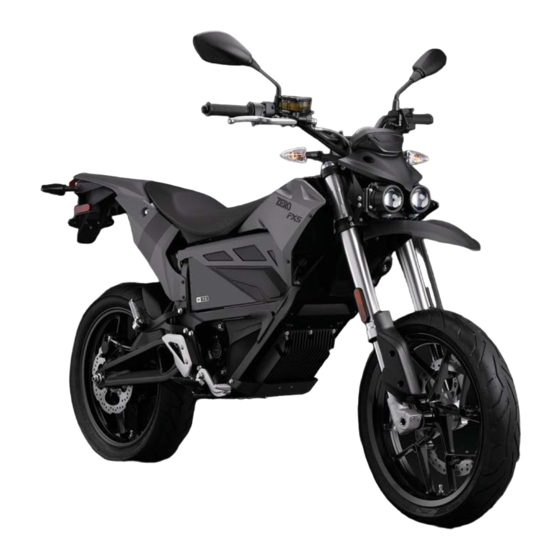
FXS 2019
Owner's manual
Zero FXS 2019 Owner's Manual
Hide thumbs
1
2
Table Of Contents
3
4
5
6
7
8
9
10
11
12
13
14
15
16
17
18
19
20
21
22
23
24
25
26
27
28
29
30
31
32
33
34
35
36
37
38
39
40
41
42
43
44
45
46
47
48
49
50
51
52
53
54
55
56
57
58
59
60
61
62
63
64
65
66
67
68
69
70
71
72
73
74
75
76
77
78
79
80
81
82
83
84
85
86
87
88
89
90
91
92
93
94
95
96
97
98
99
100
101
102
103
104
105
106
107
108
109
110
111
112
113
114
115
116
117
118
119
120
121
122
123
124
125
126
127
128
129
130
131
132
133
134
135
136
137
138
139
140
141
142
143
144
145
146
147
148
149
150
151
152
153
154
155
156
157
158
page
of
158
Go
/
158
Contents
Table of Contents
Troubleshooting
Bookmarks
Table of Contents
Table of Contents
Introduction
An Important Message from Zero
California Proposition 65
California Perchlorate Advisory
About this Manual
Useful Information for Safe Riding
When to Charge Your Z-Force® Power Pack
Identification Numbers
Owner Information
Power Pack Serial Number
Motor Serial Number
Key Code Number
Vehicle Identification Number (VIN)
General Information
Emissions Information
Vehicle Range
Maximizing Your Range
Transporting
General Safety Precautions
Important Operating Information
Location of Important Labels
Controls and Components
Motorcycle Controls
Left Side View
Right Side View
Dash Overview
Warning Indicator Lights
Dash Settings
Smartphone Application
Bluetooth® Pairing
Handlebar Controls
Performance Level Mode Button
Front Brake Lever Adjuster (FXS Only)
Parking Brake Operation (if Equipped)
General Operation
Key Switch/Steering Lock Positions
Motorcycle Tip-Over Sensor
Operating Your Motorcycle
ABS (Anti-Lock Braking System)
Front Suspension Adjustment
Rear Shock Adjustment
Power Pack and Charging
Power Pack
Modular Power Pack System - Removal and Installation (if Equipped)
On-Board Power Pack Charger
Charging the Power Pack
Quick Charging (Off-Board Accessory Charger)
Public Charging Stations
Add on Electrical Equipment
Maintaining Your Motorcycle
Owner's Responsibilities
Parts/Maintenance Items
Service History
Scheduled Maintenance
Component Fasteners
Power Pack
General Maintenance
Brakes
Parking Brake
Suspension
Wheels and Tires
Tire Inflation
Drive Belt
Drive Chain (Optional)
Headlight Alignment
Turn Signal Light Bulb Replacement
Brake/Tail Light Bulb Replacement
Running Light Bulb Replacement
Cleaning
Parking and Long Term Storage
Zero Motorcycles Accessories
Fuses
Troubleshooting
Electric Motorcycle Precautions
Troubleshooting Your Motorcycle
System Warning Indicator
Dash Error Codes
General Troubleshooting
Battery Management System
Cold and Hot Weather Considerations
Safety Interlocks
Specifications (Europe)
Zero FX
Zero FXS
Specifications (Rest of the World)
Zero FX
Zero FXS
Limited Warranty Information
Who Is the Warrantor
Who Does this Limited Warranty Cover
What Does this Limited Warranty Cover
What Is the Coverage Period of this Limited Warranty
What Is Not Covered by this Limited Warranty
What Other Limitations or Disclaimers Apply to this Limited Warranty
What Are Your Responsibilities as a Customer
What will Zero Motorcycles Do under this Limited Warranty
How Does this Limited Warranty Relate to State Law
How Do You Obtain Service under this Limited Warranty
How Do I Transfer Ownership and the Limited Warranty
Customer Information
Customer Assistance
Reporting Safety Defects
Maintenance Record
Service History
First Responder Information - High Voltage Component Locations
Advertisement
Quick Links
Download this manual
ZERO FX
™
ZERO FXS
™
2019 OWNER'S MANUAL
Table of
Contents
Previous
Page
Next
Page
1
2
3
4
5
Advertisement
Table of Contents
Troubleshooting
Troubleshooting
111
General Troubleshooting
118
Need help?
Do you have a question about the FXS 2019 and is the answer not in the manual?
Ask a question
Questions and answers
Related Manuals for Zero FXS 2019
Motorcycle Zero FX 2018 Owner's Manual
(156 pages)
Motorcycle Zero FXS 2018 Owner's Manual
(156 pages)
Motorcycle Zero FX 2015 Owner's Manual
(136 pages)
Motorcycle Zero FX 2016 Owner's Manual
(146 pages)
Motorcycle Zero FXS 2016 Owner's Manual
(146 pages)
Motorcycle Zero FX 2017 Owner's Manual
(154 pages)
Motorcycle Zero FXS 2017 Owner's Manual
(154 pages)
Motorcycle Zero FX 2019 Owner's Manual
(158 pages)
Motorcycle Zero SR/S Service Manual
(290 pages)
Motorcycle Zero S 2013 Owner's Manual
(124 pages)
Motorcycle Zero DSR 2018 Owner's Manual
(162 pages)
Motorcycle Zero S 2012 Owner's Manual
Electric motorcycles (120 pages)
Motorcycle Zero S 2014 Owner's Manual
(128 pages)
Motorcycle Zero 2014 FX Owner's Manual
2014 zero fx (124 pages)
Motorcycle Zero X Dirt 2011 Owner's Manual
(124 pages)
This manual is also suitable for:
Fx 2019
Table of Contents
Print
Rename the bookmark
Delete bookmark?
Delete from my manuals?
Login
Sign In
OR
Sign in with Facebook
Sign in with Google
Upload manual
Upload from disk
Upload from URL


Need help?
Do you have a question about the FXS 2019 and is the answer not in the manual?
Questions and answers