Table of Contents
Advertisement
Quick Links
Table of Content 8412RC00012-BZBG
..................................................................................................................................
.........................................................................................................................................
..............................................................................................................................
.......................................................................................................................................
..................................................................................................................................
Version No. 1-11 - 09.05.2023
.........................................................................................................................
......................................................................................................................
.....................................................................................................................
......................................................................................................................
.....................................................................................................................
...................................................................................................................
...............................................................................................................
........................................................................................................................
.............................................................................................................
.....................................................................................................................
.........................................................................................................
................................................................................................................
Doc. No. 998412RC00012-BZBG
..........................................................................
2
3
4
5
6
7
8
9
14
19
20
22
26
27
28
28
30
31
1 / 32
Advertisement
Table of Contents

Related Manuals for Seifert 8412RC00012-BZBG


Summary of Contents for Seifert 8412RC00012-BZBG
-
Page 1: Table Of Contents
Table of Content 8412RC00012-BZBG 1. User manual ..........................2. Legal regulations ......................... 3. Safety instructions ........................4. Settings ............................5. Functional principle ........................6. Technical data ..........................7. Performance graph ........................8. Mounting ............................9. Mounting Principle ........................10. Cut Out Dimension ........................ -
Page 2: User Manual
1. User manual This instruction manual contains information and instructions to enable the user to work safely, correctly and economically on the unit. Understanding and adhering to the manual can help one: Avoid any dangers. Reduce repair costs and stoppages. Extend and improve the reliability and working life of the unit. -
Page 3: Legal Regulations
2. Legal regulations Liability The information, data and instructions contained in this instruction manual are current at the time of going to press. We reserve the right to make technical changes to the unit in the course of its development. Therefore, no claims can be accepted for previously delivered units based on the information, diagrams or descriptions contained in this manual. -
Page 4: Safety Instructions
3. Safety instructions Upon delivery the unit is already meeting current technical standards and can therefore be safely taken into operation. Only authorised personnel is allowed to work on the unit. Unauthorised personnel must be prohibited from working on the unit. Operating personnel must inform their superiors immediately of any malfunction of the unit. -
Page 5: Settings
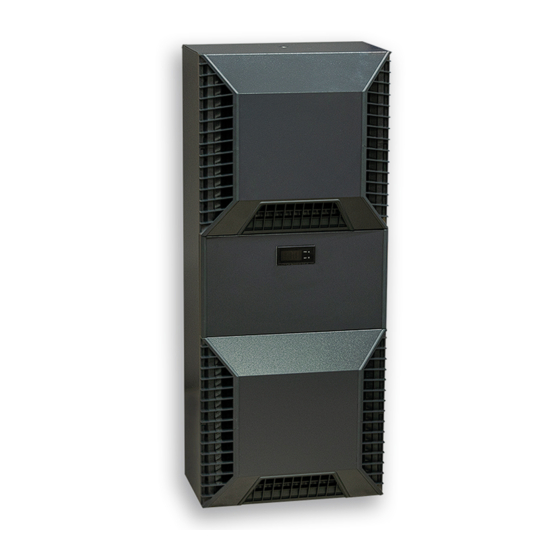
4. Settings The cooling unit is intended to be used as a complementary accessory to larger industrial equipment. The unit is used where heat needs to be dissipated from electrical control cabinets or similar enclosures in order to protect heat sensitive components. It is not intended for household use. The unit has two completely separate air circuits which ensure that the clean cabinet air does not come into contact with the ambient air which may well be dirty or polluted. -
Page 6: Functional Principle
5. Functional principle The cooling unit for industrial enclosures works on the basis of a refrigeration circuit consisting of four main components; a compressor, an evaporator, a condenser and an expansion device. The circuit is hermetically sealed and R134a refrigerant circulates inside it (R134a is chlorine free and has an Ozone Destruction Potential [ODP] of 0 and a Global Warming Potential [GWP] of 1430). -
Page 7: Technical Data
6. Technical data Order Number 8412RC00012-BZBG 1.50 kW @ 50 Hz Cooling capacity L35L35 1.55 kW @ 60 Hz 1.2 kW @ 50 Hz Cooling capacity L35L50 1.3 kW @ 60 Hz EER L35L35 2.20 Compressor type Rotary piston Refrigerant / GWP... -
Page 8: Performance Graph
7. Performance graph Version No. 1-11 - 09.05.2023 Doc. No. 998412RC00012-BZBG 8 / 32... -
Page 9: Mounting
8. Mounting Unpacking unit: Please follow the below steps to unpack the unit. STEP 1: Stand the cooling unit upright with the pre-cut packaging opening facing up. STEP 2: Pull off the packaging opening. STEP 3: Hang the transport loop of the unit in the transport hook and lift it slightly. STEP 4: Pull off... - Page 10 Mounting: The power supply rating on unit rating plate must comply with mains rating. Always disconnect the power supply before opening the unit. The heat load to be dissipated from enclosure should not exceed specific cooling output of the unit at any condition.
- Page 11 Cold air outlet duct: When using a cold air outlet duct please follow the steps below. Filter installation: If you install / replace a filter please follow the steps below. Loosen (do not completely unscrew) the 4 screws on the lower part of the front cover. Remove the bottom cover.
- Page 12 Applying supplied tight tape For KG 8562 only: Version No. 1-11 - 09.05.2023 Doc. No. 998412RC00012-BZBG 12 / 32...
- Page 13 Condensate management: High humidity and low temperatures inside the enclosure can lead to condensation on the evaporator. Condensate that flows back into the enclosure can damage sensitive control electronics. The integrated condensate evaporation of the cooling unit releases the condensate to the environment. If too much condensation forms, the condensation is drained out of the cooling unit from the front through the lower gill grilles.
-
Page 14: Mounting Principle
9. Mounting Principle Fig.1 The cooling unit can be installed in 3 different positions: A = recessed, B = semi recessed, C = wall mounted Version No. 1-11 - 09.05.2023 Doc. No. 998412RC00012-BZBG 14 / 32... - Page 15 Mounting the unit in recessed position STEP 1: Mounting the interior side of the unit [A] Mount the internal side of the unit into the enclosure by aligning the x4 M8 female threads to the 10mm holes of the cutout as shown in the figure. A supporting bracket is available at the bottom of the housing to help with centering the unit to the cutout.
- Page 16 STEP 2: Fixing the mounting hardware [B] Secure the internal side of the unit to the enclosure using the supplied x4 M8x120mm studs and M8 nuts. To achieve an adequate seal between the enclosure and the unit, the nuts should be tightened to 4.5 Nm. [C] The controller housing depth should be corrected according to the thickness of the enclosure walls by adjusting the x2 screws on each side of the controller housing.
- Page 17 STEP 3: Assembling the frame [D] Fix the frame by using the M8 fasteners as shown below. [E] With the frame secured, reattach the PE conductor to the tab indicated. [F] In order to prepare for fixing the front covers, thread the x8 M4 screws into the M4 rivnuts on the front face of the frame Version No.
- Page 18 STEP 4: Fixing the covers Starting with the bottom cover align the cover to the sides and bottom of the frame and clip the covers onto the M4 screws. [G] To secure the cover in place tighten the M4 screws with a screwdriver from the openings in the side vents.
-
Page 19: Cut Out Dimension
10. Cut Out Dimension Version No. 1-11 - 09.05.2023 Doc. No. 998412RC00012-BZBG 19 / 32... -
Page 20: Electrical Connection
Fluorescent lamps with electronic controllers or without phase shifting capacitors can be used, depending on the operating limits specified for each type of relay. SCCR Refer to UL508A Supplement SB and Seifert Systems’ document Short Circuit Current Rating (SCCR) on methods how to modify the available short circuit current within a circuit in the panel. - Page 21 Connect unit: Connect the cooling device according to the instructions below. The cable cross-section must correspond to the required power for the current consumption, but max. 2.5 mm² / AWG 14. Version No. 1-11 - 09.05.2023 Doc. No. 998412RC00012-BZBG 21 / 32...
-
Page 22: Controller
12. Controller The display shows the temperature in the range of -50°C to +150°C (-58°F to +302°F). The temperature is displayed with resolution of tenths between -19.9°C and +99.9°C (-3.8°F to +211.8°F). During programming, it shows the codes and values of the parameters. The display also shows icons according to occurring events. Display icons Icon Function Description... - Page 23 Setting heating set point, St2 (only for units supplied with internal heater): 1. Press “SET” twice slowly and display should show St2 and then the pre-set value of St2. (default: +5°C / +41°F) 2. Reach the desired value by using ▲ or ▼. 3.
- Page 24 Alarm Relay Operation Both normally closed (NC) and normally open (NO) alarm contacts are provided. These refer to the alarm state. Under normal conditions, the NC contact is closed and the NO contact is open. When an alarm condition is present or the door contact is open, the NC contact will open and the NO contact will close.
- Page 25 Failure Description Solution Code Low temperature alarm The measured temperature has fallen below the threshold P25. E07 / E08 Controller error Contact your service partner. Important Notes Whilst programming, if no button is pressed for 10 seconds, the display starts flashing, and after 1 minute returns to the main display without saving changes.
-
Page 26: Wiring Diagram
13. Wiring Diagram Power connector Signal connector Alarm (NC) Alarm (COM) Alarm (NO) Door contact Door contact Version No. 1-11 - 09.05.2023 Doc. No. 998412RC00012-BZBG 26 / 32... -
Page 27: Taking Into Operation
14. Taking into Operation Attention! The unit can be damaged by lack of lubricant. To ensure that the compressor is adequately lubricated the oil, which has been displaced during transport, must be allowed to flow back into it. The unit must therefore be allowed to stand for at least 30 min. -
Page 28: Trouble Shooting
15. Trouble Shooting Failure Condition Cause Solution Internal fan does not work Power not connected. Verify power supply Enclosure temperature is below Verify values of parameter setting temperature (St1) "St1" Internal fan works, external fan and compressor don't work Door switch contact is open Verify door switch Controller doesn't work Replace controller... - Page 29 Oel & cleaning drain pipe connection The oel & cleaning drain is in the base of the unit. To install an oel & cleaning pipe, please follow below steps: Remove the plastic stopper from in the base of the unit (factory setting is locked) Dispose the plastic stopper but keep the Slilicon washer Insert the drain socket Lock it clockwise and fix the oel &...
-
Page 30: Transport & Storage
17. Transport & Storage Malfunction due to transport damage On delivery the carton box containing the unit must be examined for signs of transport damage. Any transport damage to the carton box could indicate that the unit itself has been damaged in transit which in the worst case could mean that the unit will not function. -
Page 31: Parts Supplied / Spare Parts / Accessories
18. Parts supplied / Spare parts / Accessories Description Image Instruction manual CE Declaration Mounting gasket M6 * 16 bolts A6.4 toothed washers A6.4 washers M4 * 12 bolts 5 - pole terminal block for signals 4 - pole terminal block for electrical connection 1 Cable gland M16 * 1.5 Lock nut M16 * 1.5 Cable gland M20 * 1.5... - Page 32 Door switch contact 3100001 Seifert Systems GmbH Seifert Systems Ltd. Seifert Systems AG Seifert Systems GmbH Seifert Systems Ltd. Seifert Systems Inc. Seifert Systems Pty Ltd. Albert-Einstein-Str. 3 HF09/10 Wilerstrasse 16 Bärnthal 1 Rep. Office 75 Circuit Drive 105 Lewis Road...
Need help?
Do you have a question about the 8412RC00012-BZBG and is the answer not in the manual?
Questions and answers