Advertisement
Quick Links
KW350-P1-D-S-SC
Quick Setup Guide
・Appearance and Dimension
・ Installation Method
・ Terminals
・ Wiring Diagram
・ Settings Mode
・ Communication
・ Energy Pulse Output
・ Event Logging
・
Pulse Output
Isolation Voltage
2500Vac
Load Voltage
0~250Vac
Load Current
100mA(max)
Relay Output
Load Voltage
250Vac 30Vdc
Max Load Current
5A(Resistant Load)
Isolation Voltage
2000Vac(1min)
Action Time
10ms
Mechanical Life
20 million times
Electrical Life
About 50,000 times(5A, 250Vac,Resistant Load)
Communication
RS485 Baud Rate
1200~38400
Communication Protocol
ModBus-RTU
Infrared Communication
Non-contact infrared
Infrared Baud Rate
1200
Environment
Working Temperature
-25~70°C
Storage Temperature
-40~85°C
Automation Components, Inc.
2305 Pleasant View Road, Middleton WI
Phone: 1-888-967-5224
Web: www.workaci.com
Email: techsupport@workaci.com
Document#2305E3201 Revision Date: Apr., 2021
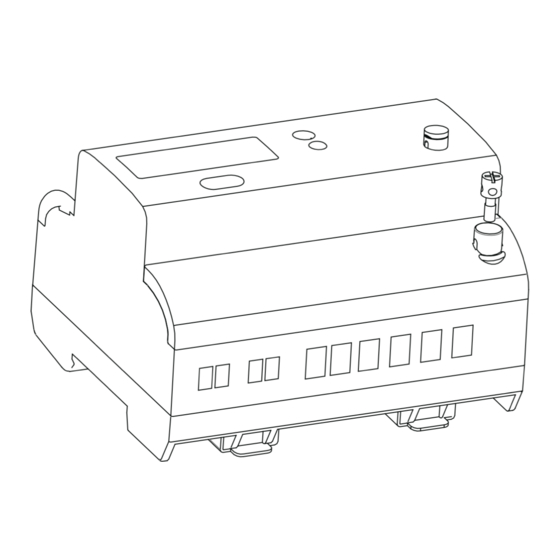
Appearance and Dimension
Front View
Installation Method
Steps:
1. To install the meter on the rail insert the top of the rail into the groove on the
back of the meter. Pull the metal clips back and slide the rail across the groove of
the meter.
2
5. To open the cover, remove the seal if applicable, unscrew the sealing screws and
life the cover upwards to remove.
Terminals
4
2. Use the metal clips to tighten the rail to complete installation.
Unit: mm
3. Before mentioning this step, the steps needed to remove the seal/cover need to
To attach seal/cover back onto the meter place the left side of the cover down onto
Side View
meter and press down on the right side. When installed correctly you will hear a
clicking sound. The steps to attach the other cover is opposite to the above step.
4. After inserting the cover, tighten the sealing screws and lay the seal.
Wiring Diagram
3
KW350
3 phase 4 wire (3LN, 3CT)
KW350
3 phase 3 wire (2LL, 3CT)
5
Advertisement

Related Manuals for aci KW350-P1-D-S-SC


Summary of Contents for aci KW350-P1-D-S-SC
- Page 1 Appearance and Dimension 2. Use the metal clips to tighten the rail to complete installation. Unit: mm KW350-P1-D-S-SC Quick Setup Guide 3. Before mentioning this step, the steps needed to remove the seal/cover need to ・Appearance and Dimension To attach seal/cover back onto the meter place the left side of the cover down onto...
- Page 2 Energy Pulse Output LCD Page Contents KW350 Addr Address S-01 220Vac Users can choose either energy pulse output or reactive energy pulse output. The Baud Rate S-02 energy pulse output function needs an external auxiliary power to supply. Auxiliary Power Parity S-03 Module...