Advertisement

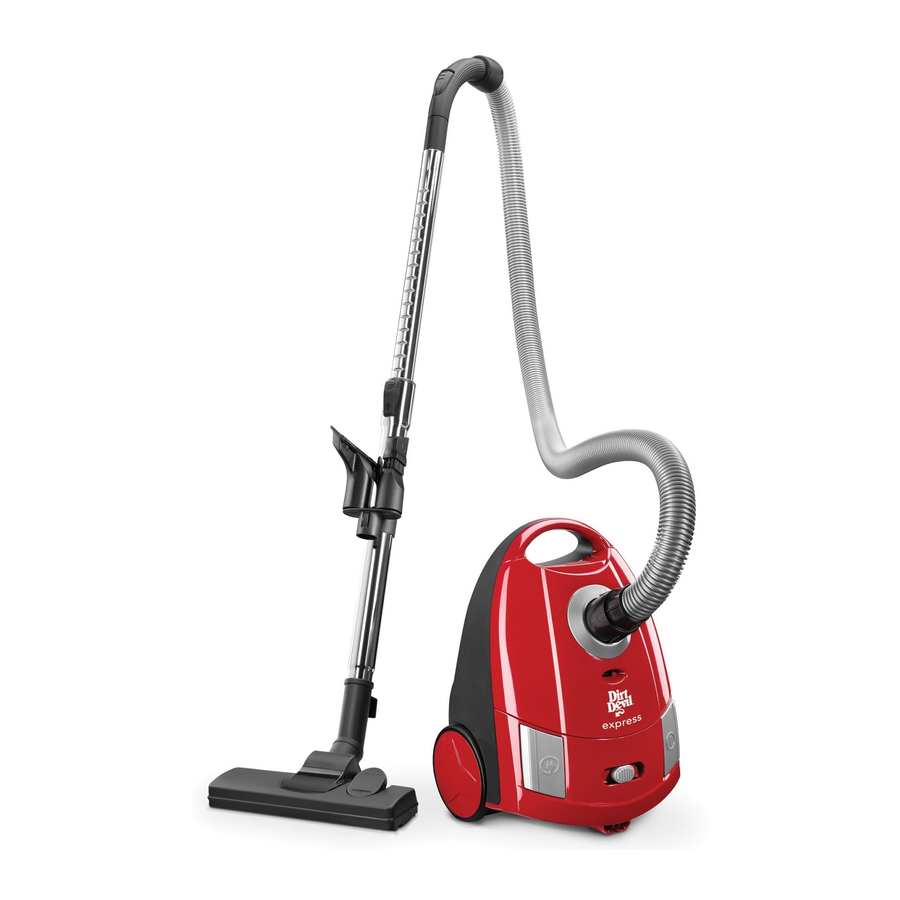
FEATURES

- Carry Handle
- Full Bag Indicator
- On/Off Switch
- Variable Suction Control
- Parking Bracket
- Cord Rewind
- Hose
- Floor Nozzle
- Wood Floor Brush
- 2 in 1 Combo Nozzle (in it's holder on back of cleaner) (as crevice tool) (as furniture brush)
- Upholstery Tool
- Tool Caddy
- Extension Wand
CORD RELEASE / REWIND
CORD RELEASE
- To release cord, pull outward from storage location. Do not pull out past the red tape.
![]()
CORD REWIND
- To rewind cord, push down on cord rewind button. Hold on to the plug while cord is rewinding to prevent cord from whipping.
![]()
ATTACHMENTS
TO REDUCE THE RISK OF INJURY - UNPLUG CLEANER BEFORE REMOVING OR INSTALLING HOSE.
HOSE INSTALLATION AND REMOVAL
- Hold hose and match tabs to align with slot inlets of canister. Insert hose. Push firmly until hose locks into place.
![]()
ATTACHMENT INSTALLATION
- Choose any of the handy accessories to meet your various cleaning needs. Then simply push it firmly o nto the hose or wand end.
![]()
ATTACHMENT INSTALLATION AND REMOVAL

- The hose can be used alone or with many combinations of wands and tools.
- To store attachments on the unit, simply place on the caddy located on wand. Crevice tool can be stored on rear of unit as shown.
- To remove the tool, pull apart gently. To unlock the wand, rotate and then pull apart.
NOTE: Please follow these instructions for attaching all other accessories.
HOW TO OPERATE
ON/OFF SWITCH OPTIONS

- Plug power cord into outlet.
- Attach hose and desired attachment.
- Turn power on (ON/OFF switch located on canister body)(A).
NOTE: For cleaning drapes, throw rugs, or other loose items, you may need to reduce the suction to prevent sucking ON/OFF SWITCH the item into the cleaning tool. To reduce suction, adjust speed control located on canister body.(B)
CLOG INDICATOR LIGHT
- When clog indicator light illuminates, turn unit off and clear clog maintain optimal performance.
![]()
BAG REMOVAL AND REPLACEMENT
TO REDUCE THE RISK OF INJURY FROM MOVING PARTS - UNPLUG CLEANER BEFORE SERVICING.
- BAG TYPE: AB
Press and lift lid latch to open (A).
![]()
- Pull the dust bag holder up and out together with the dust filter bag.
NOTE: Be careful when removing the dust filter bag so that no dust escapes. Pull the full dust filter bag up and out of the dust filter holder.
![]()
- Push the new dust filter into the filter bag holder, until it's flush with the edge of the filter bag holder.
NOTE: The dust compartment cover can only be closed if the dust filter bag is fitted correctly. The rocker on the dust filter bag holder prevents closing of the dust compartment cover if the dust filter bag is not correctly fitted.
![]()
- Reinsert the filter bag holder with the new dust filter bag. First, set the filter bag holder into it's guiderails. Then push the dust filter bag holder all the way down. Close the dust compartment cover until it clicks.
![]()
FILTER REMOVAL & REPLACEMENT
For filter replacement, please call 1-800-321-1134 or visit our website at www.dirtdevil.com to locate a dealer nearest you.
TO REDUCE THE RISK OF INJURY FROM MOVING PARTS - UNPLUG VACUUM BEFORE SERVICING.
- Remove the filter bag holder with the dust filter bag. Remove the motor protection filter by pulling it upwards out of it's guiderails. Hold filter under running water to rinse. DO NOT use soap/detergent. Tap excess water out of filter. Allow filter to COMPLETELY DRY for at least 24 hours. Replace filter.
![]()
- Pull down on tab to remove exhaust from back of cleaner.
![]()
- Remove exhaust filter from frame. Hold filter under running water to rinse. DO NOT use soap/detergent. Tap excess water out of exhaust filter. Allow exhaust filter to COMPLETELY DRY for at least 24 hours. Replace exhaust filter.
![]()
STORAGE/TRANSPORT
- It is recommended to retract the telescopic tube before transporting or storing.
Push the telescopic release catch down and simultaneously telescope the tube into it's lower half. To transport the cyclinder vacuum cleaner, you can carry by the carrying handle(A,1). When interupting your work use the parking hook into the parking bracket(B). For storing your appliance, hook the storage hook onto the storage bracket.
![]()
TROUBLESHOOTING GUIDE
| PROBLEM | POSSIBLE REASON | POSSIBLE SOLUTION |
Cleaner won't run |
|
|
Cleaner won't pick-up or low suction |
|
|
Dust escaping from cleaner |
|
|
Cleaner tools won't pick up |
|
|
ANY OTHER SERVICING SHOULD BE DONE BY AN AUTHORIZED SERVICE REPRESENTATIVE CUSTOMER SERVICE (1-800-321-1134)
In the event that further assistance is required, see your Yellow Pages for an authorized Royal® Dealer. Costs of any transportation to and from any place of repair are to be paid by the owner. The service parts used in this unit are easily replaced and readily available from an authorized Royal® Dealer or retailer. Always identify your cleaner by the model number and manufacturing code when requesting information or ordering replacement parts. (The model number appears on the bottom of the cleaner.)

Documents / Resources
References
Download manual
Here you can download full pdf version of manual, it may contain additional safety instructions, warranty information, FCC rules, etc.
Advertisement


Need help?
Do you have a question about the SD30035 and is the answer not in the manual?
Questions and answers