Table of Contents
Advertisement
Quick Links
38AUQ
Heat Pump Condensing Units
60 Hz
with Puronr (R---410A) Refrigerant
Sizes: 07, 08 and 12
CONTENTS
. . . . . . . . . . . . . . . . . . . . . . . . . . .
. . . . . . . . . . . . . . . . . . . . . . . . . . . . . . .
. . . . . . . . . . . . . . . . . . . . . . . . . . . . . .
. . . . . . . . . . . . . . . . . . . . . . . . . . .
. . . . . . . . . . . . . . . . . . . . . . . . . . . . . .
. . . . . . . . . . . . . . . . . . . . . . . . . . . . . . .
. . . . . . . . . . . . . . . . . . . . . . . . . .
. . . . . . . . . . . . . . . . . . . . . . . . . . . .
Cooling Unit Without Economizer - -
. . . . . . . . . . . . . . . . . . . . . . . . . . . . .
. . . . . . . . . . . . . . . . . . . . . . . . . . . . . . . . .
. . . . . . . . . . . . . . . . . . . . . . . . . . . . . . .
Installation, Start---Up
and Service Instructions
. . . . . . . . . . . . . . . . . . . .
. . . . . . . . . . . . . . . . . .
. . . . . . . . . . . . . . . . . . . . .
7 - - 17
. . . . . . . . . . . . . . . . . .
. . . . . . . . .
. . . . . . . . . . .
. . . . . . . . . . . . . . . . .
. . . . . . . . . . . . . . . . . . . .
. . . . . . . . .
. . .
. . . . . . . . . . . . . . . . . . . .
18 - - 27
. . . . . . . . . . . . . . . . . . . . . .
. . . . . . . . . . . . . . . . .
. . . . . . . .
. . . . . . . . . . . . . . . . .
2
3
3
. . . . . . . . . . . . . . . . . . . . . . . . . . . . . . . .
7
8
8
8
. . .
8
12
12
17
18
18
18
18
18
28
28
APPENDIX A
28
28
28
28
28
APPENDIX C
29
29
1
. . . . . . . . . . . .
. . . . . . . . . . . . . . . . . .
. . . . . . . . . . . . . . . . . . . . . . . . .
. . . . . . . . . . . . . . . . . . . . . . . . . . . . . .
. . . . . . . . . . . . . . . . . . . . . . .
. . . . . . . . . . . . . . . . . . . . . . .
. . . . . . . . . . . . . . . . . .
. . . . . . . . . . . . . . . . .
. . . . . . . . . . . . . . . . . . . . . . . .
. . . . . . . . . . . . . . . . . . . . . . . . . . . .
. . . . . . . . . . . . . . . . . . . . .
. . . . . . . . . . . . . . .
. . . . . . . . . . . . . . . . . . . . . . . . . . . . . . . . .
. . . . . . . . . . . . . . . . . . . .
. . . . . . . . . . . . . . . . . . . . . . . . . . . . . . . .
. . . . . . . . . . . . . . . . . . . . . . . .
. . . . . . . . . . . . . . . . . . . . . . . . .
. . . . . . . . . . . . . . . . . . . . . . . .
. . . . . . . . . . . . . . . . . . . . . . . . . .
. . . . . . . . . . . . . . . . . . .
30
30
31 - 44
31
31
31
31
31
31
. . . . . . . . .
32
32
32
32
40
42
42
44
44
45
-
46
46
. . . . . . . . .
47
51- - 52
Advertisement
Table of Contents

Related Manuals for Carrier 38AUQA/B07


Summary of Contents for Carrier 38AUQA/B07
-
Page 1: Table Of Contents
38AUQ Heat Pump Condensing Units 60 Hz with Puronr (R---410A) Refrigerant Sizes: 07, 08 and 12 Installation, Start---Up and Service Instructions CONTENTS SAFETY CONSIDERATIONS ....ROUTINE SYSTEM MAINTENANCE . -
Page 2: Safety Considerations
SAFETY CONSIDERATIONS WARNING Improper installation, adjustment, alteration, service, ELECTRICAL SHOCK HAZARD maintenance, or use can cause explosion, fire, electrical shock or other conditions which may cause personal Failure to follow this warning could cause personal injury or property damage. Consult a qualified installer, injury or death. -
Page 3: Installation Guidelines
38AUQ with 40RUQ issue. Replace any riser sections with reduced pipe sizes Model Numbers Full Load Airflow (cfm) if existing pipe sizes exceed these maximum tube size limits. 38AUQA/B07 --- 40RUQ*07 2400 38AUQD/E07 --- 40RUQ*07 2400 38AUQ*08 --- 40RUQ*08 3000... - Page 4 Standard Corner Corner Corner Corner Center of Gravity Unit Height Weight UNIT lbs. lbs. lbs. lbs. lbs. 42-3/8 38AUQ*07 [559] [635] [330] [1076] 42-3/8 38AUQ*08 [508] [610] [533] [1076] 50-3/8 38AUQ*12 [533] [610] [584] [1280] C150341 Fig. 1 - - 38AUQ*07-12 Unit Dimensions...
- Page 5 Table 1A — Physical Data — 38AUQ*07-12 Units — 60 Hz English UNIT 38AUQA/B07 38AUQD/E07 38AUQA/B08 38AUQA/B12 38AUQD/E12 NOMINAL CAPACITY (tons) OPERATING WEIGHTS (lb) Aluminum-Fin Coils ‡ REFRIGERANT TYPE R-410A R-410A R-410A R-410A R-410A † Operating Charge (w/ fan coil), Typical (lb) 18.0...
- Page 6 Table 1B — Physical Data — 38AUQ*07-12 Units — 60 Hz SI UNIT 38AUQA/B07 38AUQD/E07 38AUQA/B08 38AUQA/B12 38AUQD/E12 NOMINAL CAPACITY (kW) 21.1 21.1 26.4 35.1 35.1 OPERATING WEIGHT (kg) Aluminum-Fin Coils ‡ REFRIGERANT TYPE R-410A R-410A R-410A R-410A R-410A †...
-
Page 7: Installation
10 11 12 13 14 15 16 17 18 Example 8 A U Q A 1 2 A 0 C 6 0 A 0 A 0 Model Type Packaging 38AU = Carrier Condensing Unit 0 = Standard Puron ® R--- 410A Refrigerant 1 = LTL... -
Page 8: Step 2 - Complete Pre-Installation Checks
Do not install the outdoor unit in an area where fresh air S Locate the unit so that the outdoor coil (condenser) supply to the outdoor coil may be restricted or when airflow is unrestricted on all sides and above. recirculation from the condenser fan discharge is possible. - Page 9 Charge Quantity, lbs. Calculated for both liquid line sizes (where applicable), but only with large suction line size (where applicable) NOTE: For applications with linear length greater than 100 ft (30.5 m), contact your local Carrier representative. Check Vertical Separation —...
- Page 10 Table 3 – Maximum Vapor Line Sizes Table 4 – Puron-duty Filter Drier(s) 38AUQ Unit 38AUQ Unit Liquid Desiccant Part 38AUQ Model-Size BELOW ABOVE Line OD Volume Number Ref Size ID Unit ID Unit 38AUQ*07 8 cu. in. KH43LS088 Max Diameter, Single Pipe (in.) (A.B)07 38AUQ*08 16 cu.
- Page 11 EQUALIZER LINE INDOOR SENSING COIL CKT 2 BULB SIGHT GLASS LOCATION Factory FILTER DRIER 15 DIAMS AIRFLOW CKT 2 LOCATION High-Flow DIAMS Access Port 8 DIAMS Field Service Access Port (Schrader core) SENSING INDOOR BULB COIL CKT 1 Service Valve AIRFLOW 15 DIAMS CKT 1...
-
Page 12: Step 6 - Install Accessories
Make field power connections directly to line For linear line lengths longer than 100 ft (30.5 m), contact connection pressure lugs only. your local Carrier representative for system charge value. WARNING Step 6 — Install Accessories Accessories requiring modifications to unit wiring should FIRE HAZARD be completed now. - Page 13 Such operation would invalidate control box. The manual switch handle is accessible any applicable Carrier warranty. through an opening in the access panel. Convenience Outlets All Units - All field wiring must comply with NEC and all local codes.
- Page 14 a utility box and mounted on a bracket behind the Using unit-mounted convenience outlets: Units with convenience outlet; access is through the unit’s control unit-mounded convenience outlet circuits will often box access panel. See Fig. 10. require that two disconnects be opened to de-energize all power to the unit.
- Page 15 The 38AUQ unit requires an external temperature control O/B/Y2 device. This device can be a thermostat (field-supplied) or a PremierLink controller (available as a field-installed accessory, for use on a Carrier Comfort Network or as a stand alone control). Thermostat — Install a Carrier-approved accessory thermostat according to installation instructions included with the accessory.
- Page 16 POWER SUPPLY DISCONNECT SIZE SUPPLY UNIT Fuse or V--- Ph--- Hz HACR Brkr 208/230---3---60 19.6 28/28 45/45 26/26 142/142 38AUQA/B07 Units produced 460 ---3 ---60 on or after 02/09/2015 575 ---3 ---60 208/230---3---60 19.0 26.8/26.8 45/45 25/25 129/129 38AUQA/B*07 Units produced 460 ---3 ---60 13.7...
-
Page 17: Step 8 - Wind Baffles For Low Ambient Control
Legend and Notes for Table 8 Example: Supply voltage is 230-3-60 LEGEND: BRKR --- Circuit breaker max voltage deviation from average voltage --- Convenient outlet % Voltage Imbalance = 100 x --- Full Load Amps average voltage --- Locked Rotor Amps --- Minimum Circuit Amps AB = 224 v Protection... -
Page 18: Pre-Start-Up
PRE-START-UP CAUTION IMPORTANT: Before beginning Pre-Start-Up or UNIT DAMAGE HAZARD Start-Up, review Start-Up Checklist at the back of this book. The Checklist assures proper start-up of a Failure to follow this caution may result in equipment damage. unit and provides a record of unit condition, application requirements, system information, and Prior to starting compressor, a preliminary charge of operation at initial start-up. - Page 19 Motormaster function. Adjust Refrigerant Charge — The unit must be charged in Cooling mode only. Refer to Cooling Charging Charts, Fig. 16 through Fig. 20. For applications with line lengths greater than 100 ft, contact Carrier representative. Vary refrigerant until conditions of the chart are met.
- Page 20 6 Ton Heat Pump Charging Chart R410a Refrigerant Add Charge if Above the Curve Remove Charge if Below the Curve 1050 1400 1750 2100 2450 2800 3150 3500 3850 Pressure at Liquid Valve (PSIG / Kpa) 38AU500364 C150421 Fig. 16 - - 38AUQA/B07 Charging Chart...
- Page 21 6 TON HEAT PUMP DUAL STAGE CHARGING CHART PURON (COMPRESSOR FULL LOAD, ALL CONDENSER FANS OPERATING) Add Charge if Above the Curve Remove Charge if Below the Curve 1050 1400 1750 2100 2450 2800 3150 3500 3850 Pressure at Liquid Valve (PSIG / Kpa) PN: 38AU000485 REV - C150343 Fig.
- Page 22 7.5 Ton Heat Pump Charging Chart R410a Refrigerant Add Charge if Above the Curve Remove Charge if Below the Curve 1050 1400 1750 2100 2450 2800 3150 3500 3850 Pressure at Liquid Valve (PSIG / Kpa) 38AU500793 C150422 Fig. 18 - - 38AUQ*08 Charging Chart...
- Page 23 10 Ton Heat Pump Charging Chart R410a Refrigerant Add Charge if Above the Curve Remove Charge if Below the Curve 1050 1400 1750 2100 2450 2800 3150 3500 3850 Pressure at Liquid Valve (PSIG / Kpa) 38AU500794 C150423 Fig. 19 - - 38AUQA/B*12 Charging Chart...
- Page 24 10 TON HEAT PUMP DUAL STAGE CHARGING CHART PURON (COMPRESSOR FULL LOAD, ALL CONDENSER FANS OPERATING) Add Charge if Above the Curve Remove Charge if Below the Curve 1050 1400 1750 2100 2450 2800 3150 3500 3850 Pressure at Liquid Valve (PSIG / Kpa) PN: 38AU000486 REV - C150344 Fig.
- Page 25 C11043 Fig. 21 - - 38AUQA/B07- - 12 Single Circuit / Single Stage Wiring Diagram (208/230-3-60 shown)
- Page 26 C150345 Fig. 22 - - 38AUQD/E07 Single Circuit / Two Stage Wiring Diagram (208/230, 460-3-60 shown)
- Page 27 C150346 Fig. 23 - - 38AUQD/E12 Single Circuit / Two Stage Wiring Diagram (208/230, 460-3-60 shown)
-
Page 28: Operating Sequence
OPERATING SEQUENCE 38AUQ(D,E)12 uses two compressors in tandem on a single circuit in conjunction with two single- - stage Base Unit Controls Comfort Alert Modules (CADM). 38AUQ(D,E)07 Indoor (Supply) Fan — When thermostat calls for Stage 1 Cooling, terminal Y1 is The indoor fan contactor (IFC) is remotely located at the energized. -
Page 29: Fan Cycling
Heating — position. Output PL3- - 10 (COMP1, 24- - v) is received at CADM1 terminal Y. If anti- - recycle time delay period has When the thermostat calls for first stage heating, terminal not expired, safety pressure switches are open, and/or W1 is energized. -
Page 30: Routine System Maintenance
ROUTINE SYSTEM MAINTENANCE During the Defrost cycle, output EHEAT is also energized (if not already energized by a thermostat W2 demand); supplemental heater will be energized. During the Defrost These items should be part of a routine maintenance Cycle, LED1 on the DFB will be illuminated. The Defrost program, to be checked every month or two, until a cycle ends when DFT opens (as liquid temperature exiting specific schedule for each can be identified for this... -
Page 31: Service
SERVICE 3. Place terry cloth shop towel inside unit immediately under component(s) to be serviced and prevent lubri- Refrigeration System cant run-offs through the louvered openings in the base pan. CAUTION 4. Perform required service. 5. Remove and dispose of any oil contaminated material per local codes. -
Page 32: Refrigerant System Pressure Access Ports
SEAT CORE (Part No. EC39EZ067) 1/2-20 UNF RH 0.596 45° 30° WASHER DEPRESSOR PER ARI 720 O-RING 1/2" HEX +.01/-.035 5/8” HEX FROM FACE OF BODY This surface provides a metal to metal seal when 7/16-20 UNF RH torqued into the seat. Appropriate handling is required to not scratch or dent the surface. - Page 33 Table 9 – 38AUQ Defrost Board I/O and Jumper Configurations Inputs Point Name Type of I/O Connection Pin Number Unit Connection Note G Fan DI, 24-vac P2-3 Not used Y1 Cool 1 DI, 24-vac P2-5 TB-Y1 W1 Heat 1 DI, 24-vac P2-7 TB-W1 Y2 Cool 2...
- Page 34 C11044 Fig. 25 - - Defrost Control Board (DFB) Location The continuous run period is a fixed time period between the end of the last defrost cycle (or start of the current Heating cycle) during which no defrost will be permitted. This period can be set at 30, 60, 90 or 120 minutes by changing the positions of DIP switches SW1 and SW2 (see Fig.
- Page 35 the potential to form frost or ice on the outdoor coil; this The DFT switch closes on temperature drop at 30_F (- - 1_C) condition will initiate a Defrost cycle at the next DFB test and resets open on temperature rise at 80_F (27_C). period.
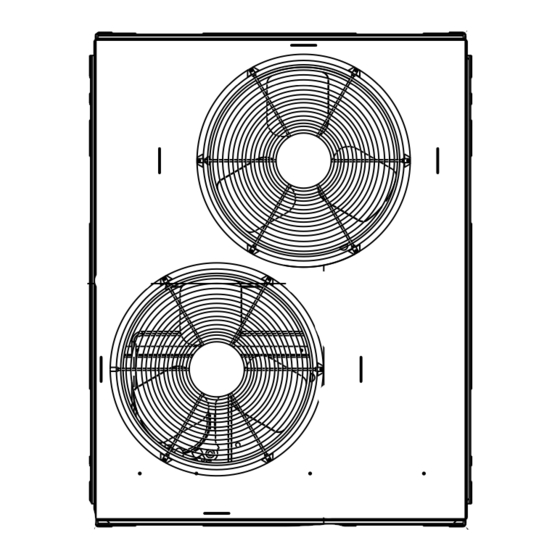
- Page 36 Fans Service Valves C11045 Fig. 29 - - 38AUQ*07 Exterior Outdoor Coil Defrost Thermostat (DFT) High Flow Access Ports C150032 Fig. 30 - - 38AUQ*07 Interior...
- Page 37 Fans Service Valves C11047 Fig. 31 - - 38AUQ*08 Exterior Outdoor Coil Defrost Thermostat (DFT) High Flow Access Ports C150033 Fig. 32 - - 38AUQ*08 Interior...
- Page 38 Fans Service Valves C11049 Fig. 33 - - 38AUQ*12 Exterior Outdoor Coil Defrost Thermostat (DFT) High Flow Access Ports C150034 Fig. 34 - - 38AUQA/B12 Interior...
- Page 39 Defrost Thermostat (DFT) High Flow Access Ports C150424 Fig. 35 - - 38AUQD/E12 Interior...
-
Page 40: Comfort Alert Diagnostic Module
COMFORT ALERT DIAGNOSTIC POWER (GRN) MODULE The Comfort Alert Diagnostic Module (CADM) monitors and analyzes data from the Copeland Scroll three-phase compressor and the thermostat demand. The CADM also provides a 3-minute anti-recycle time delay to compressor cycling. The CADM detects causes for electrical and system ALERT (YEL) related failures. - Page 41 Table 11 – LED Status Codes Status LED Status LED Description Status LED Troubleshooting Information Green “POWER” Module has power Supply voltage is present at module terminals Compressor protector is open Red “TRIP” LED On Solid Thermostat demand signal Y is present, but the Condensing unit power disconnect is open compressor is not running.
-
Page 42: Lubrication
Table 12 – CADM Troubleshooting Miswired Module Indication Recommended Troubleshooting Action Green LED is not on, Determine if both R and C module terminals are connected. Verify voltage in module does not power up present at module’s R and C terminals. NOTE: The CADM requires a constant nominal 24VAC power supply. - Page 43 This Application Instructions: cleaner available from Carrier Replacement NOTE: Proper eye protection such as safety glasses is Components Division as part number P902-0301 for one recommended during mixing and application.
-
Page 44: Service Parts
Service Parts 5. Mix Totaline environmentally sound coil cleaner in a gallon garden sprayer according to the instruc- Listings of service parts for all units are available from the tions included with the cleaner. The optimum solution Replacement Components Division’s Electronic Parts temperature is 100F (38C). -
Page 45: Troubleshooting
TROUBLESHOOTING PROBLEM CAUSE REMEDY Compressor and Power failure. Call power company. Outdoor Fan Fuse blown or circuit breaker tripped. Replace fuse or reset circuit breaker. Determine root cause. Will Not Start. Defective thermostat, contactor, transformer, Replace component. control relay, or capacitor. Insufficient line voltage. -
Page 46: Air Conditioner And Heat Pump With Puron R
72 hours. rated working pressures greater than 600 psig. APPENDIX B WIRING DIAGRAM LIST Cooling Unit Electrical Characteristics Diagram Number Stages 208/230-3-60 38AU500363 460-3-60 38AU500362 38AUQA/B07 575-3-60 38AU500435 208/230-3-60 38AU000443 460-3-60 38AU000443 38AUQD/E07 575-3-60 38AU000444 208/230-3-60 38AU500363 460-3-60... -
Page 47: Low Ambient Option - Factory Installed
APPENDIX C Low Ambient Option — Factory Installed Troubleshooting — OBSERVATION POSSIBLE REMEDY Units with the factory installed low ambient option are Check power & wiring equipped with a Motormaster solid- - state head pressure Check sensor location control which regulates fan speed. A temperature sensor, Fans won’t start Check sensor resistance mounted on circuit 1 of the outdoor coil (see Fig. - Page 48 C10801 Fig. 39 - - Sensor Locations Table 14 – Wind Baffle Dimensions DIMENSIONS --- INCHES UNIT BAFFLE LEFT SIDE 38AUQ* 07 BACK LEFT SIDE 38AUQ* 08 BACK RIGHT SIDE LEFT SIDE BACK 38AUQ *12 RIGHT SIDE DIMENSIONS --- MM UNIT BAFFLE LEFT SIDE...
- Page 49 C10800 Fig. 40 - - Wind Baffles...
- Page 50 E 2019 Carrier Corporation Manufacturer reserves the right to discontinue, or change at any time, specifications or designs without notice and without incurring obligations. Catalog No. 04 ---53380035 ---01 Printed in U.S.A. Form 38AUQ---7 ---12 ---03SI 9 ---19 Replaces 38AUQ---7 ---12 ---02SI...
-
Page 51: Start Up Checklist
START UP CHECKLIST I. PRELIMINARY INFORMATION OUTDOOR: MODEL NO. SERIAL NO. INDOOR: MODEL NO. SERIAL NO. ADDITIONAL ACCESSORIES II. PRE-START-UP OUTDOOR UNIT IS THERE ANY SHIPPING DAMAGE? (Y/N) IF SO, WHERE: WILL THIS DAMAGE PREVENT UNIT START-UP? (Y/N) CHECK POWER SUPPLY. DOES IT AGREE WITH UNIT? (Y/N) HAS THE GROUND WIRE BEEN CONNECTED? (Y/N) - Page 52 COMPRESSOR 1 AMPS (L1/L2/L3) COMPRESSOR 2 AMPS (L1/L2/L3) NOTES: E 2019 Carrier Corporation Manufacturer reserves the right to discontinue, or change at any time, specifications or designs without notice and without incurring obligations. Catalog No. 04 ---53380035 ---01 Printed in U.S.A.
Need help?
Do you have a question about the 38AUQA/B07 and is the answer not in the manual?
Questions and answers
Hi what is the design subcooling for a 38auq heat pump split system 410 a?