Table of Contents
Advertisement
Quick Links
Advertisement
Table of Contents

Related Manuals for Alfa Romeo TONALE 2023


Summary of Contents for Alfa Romeo TONALE 2023
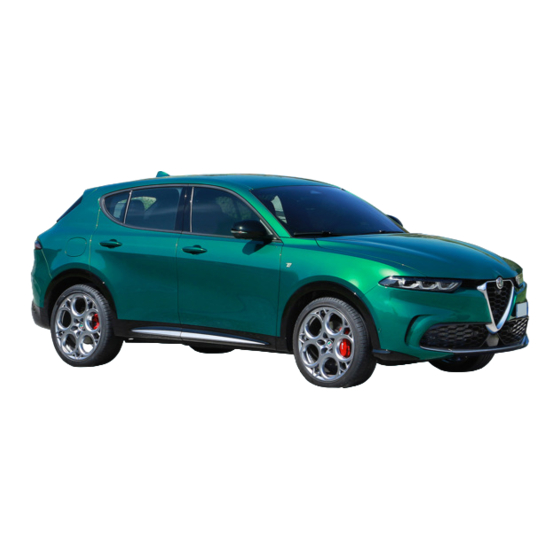
- Page 1 TONALE 2 0 2 3 O W N E R H A N D B O O K...
- Page 2 This Owners Handbook illustrates and describes the operation of features and equipment that are either standard or optional on this vehicle. This manual may also include a description of features and equipment that are no longer available or were not ordered on this vehicle. Please disregard any features and equipment described in this manual that are not on this vehicle.
- Page 3 INTRODUCTION INTERIOR EXTERIOR Page 4 Page 7 Page 32 EMERGENCY SPECIFICATIONS INDEX Page 36 Page 50 Page 55...
-
Page 4: Table Of Contents
INTRODUCTION Electrical Power Outlets ...........13 Electric Park Brake (EPB) ........30 PERFORMANCE FEATURES........31 Wireless Phone Charging...........14 OWNER’S HANDBOOK INTRODUCTION ....4 USB ..................15 Alfa DNA System............31 SYMBOLS KEY .............. 4 INSTRUMENT CLUSTER ..........16 Alfa Active Suspension (AAS) — CUSTOMER ASSISTANCE .......... 5 Getting To Know Your Instrument Cluster..16 If Equipped ..............31 FCA US LLC Customer Center........ - Page 5 SPECIFICATIONS FLUID CAPACITIES ..........51 Maintenance Plan............53 ENGINE FLUIDS AND LUBRICANTS ..... 52 Oil Change Reset ............53 ENGINE COMPARTMENT OVERVIEW ....50 CHASSIS FLUIDS AND LUBRICANTS ....52 Engine Break-In Recommendations......53 2.0L Engine ..............50 SERVICING AND MAINTENANCE ......53 TRAILER TOWING ..........54...
-
Page 6: Introduction
SYMBOLS KEY INTRODUCTION These statements apply to operating procedures Thank you for choosing Alfa Romeo. This Owner’s Handbook has been WARNING! that could result in a collision, bodily injury and/or prepared to help you quickly become acquainted with important features of death. -
Page 7: Customer Assistance
CUSTOMER ASSISTANCE FCA C Out Of Gas/Fuel Delivery - This service is limited ANADA USTOMER ENTER to two occurrences in a 12-month period. Up to FCA US LLC and its authorized dealers are vitally P.O. Box 1621 two gallons of fuel will be provided by a service interested in your satisfaction. -
Page 8: Warranty Information
WARRANTY INFORMATION This device must accept any interference received, HANGE WNERSHIP DDRESS including interference that may cause undesired Use this QR code to access your *If you have purchased this vehicle used or have operation. digital experience. changed your address, please provide the Le présent appareil est conforme aux CNR following information and mail to: d`Innovation, Science and Economic Development... -
Page 9: Interior Overview
INTERIOR OVERVIEW INTERIOR Garage Door Opener (HomeLink®) page 28 Uconnect Radio Screen Display page 10 12. Alfa DNA Selector page 31 Ú Ú Ú Assist & SOS Buttons Ú page 36 Cruise Control Buttons page 26 13. Stop/Start Off Switch page 9 Ú... -
Page 10: Starting And Operating
STARTING AND OPERATING To Remove The Emergency Key WARNING! You can remove the emergency key by pushing Do not start or run an engine in a closed both sides of the key fob inward while sliding the garage or confined area. Exhaust gas contains back cover downward. -
Page 11: Keyless Enter 'N Go™ - Passive Entry
‘ ™ — P How To Turn Off The Stop/Start System NOTE: EYLESS NTER ASSIVE NTRY DO NOT grab the door handle when pushing the Did you know you can manually turn off your Stop/ Keyless Enter ‘n Go™ — Passive Entry allows you to lock button. -
Page 12: Multimedia & Phone Connectivity
MULTIMEDIA & PHONE CONNECTIVITY CONNECT YSTEM Uconnect 5/5 NAV With 10.25-inch Display 1 — Home Button 4 — Phone Button 2 — Radio/Media Button 5 — Comfort Button 3 — Navigation Button 6 — Vehicle Button NOTE: Use this QR code to access your digital experience. -
Page 13: Uconnect Settings
Display — Customize features such as your Audio — Did you know you can customize your CONNECT ETTINGS display brightness, or even allow navigation vehicle’s audio? Press the Audio button to begin instructions to appear on your instrument tuning your vehicle’s audio to your liking. -
Page 14: Apple Carplay
system. You have no need to plug your device in if NOTE: it is paired with the system. To use Android Auto™, make sure you are in an area with cellular coverage. Android Auto™ may Once the device is connected and recognized, the use cellular data, and your cellular coverage is Phone icon on the menu bar changes to the Apple shown in the upper right corner of the touchscreen. -
Page 15: Performance
CHARGING & OUTLETS Basic Voice Commands ERFORMANCE AGES The following basic voice commands can be given LECTRICAL OWER UTLETS at any point while using your Uconnect system. Your vehicle may be equipped with 12 Volt Push the VR button or, for the Uconnect (13 Amp) power outlets that can be used to power 5/5 NAV, say the vehicle’s “Wake Up”... -
Page 16: Wireless Phone Charging
Power outlets labeled with a key symbol are CAUTION! powered when the ignition is in the ON/RUN position. Accessories that draw higher power (i.e., coolers, vacuum cleaners, lights, etc.), will WARNING! discharge the battery even more quickly. Only use these intermittently and with greater To avoid serious injury or death: caution. -
Page 17: Usb
Did you know your vehicle may be equipped with a CAUTION! wireless charging pad located below the center stack, within the storage compartment? It is The key fob should not be placed on the ® charging pad or within 6 inches (15 cm) of it. designed to easily charge your Qi enabled mobile Doing so can cause excessive heat buildup and... -
Page 18: Instrument Cluster
To disable Android Auto™ or Apple CarPlay®, Speedometer ONTROLLING NSTRUMENT LUSTER navigate to “Device Manager” in the “Phone/ Indicates vehicle speed. ISPLAY Bluetooth®” section of your Uconnect settings. For Instrument Cluster Display further information, refer to “Android Auto™” or The instrument cluster display features a driver “Apple CarPlay®”... -
Page 19: Warning Lights And Messages
ARNING IGHTS ESSAGES These symbols are warning/indicator lights that illuminate to signify various conditions with your vehicle, ranging from potentially critical faults to merely informing you that a feature has been engaged. Warning and Indicator lights are different based upon equipment options and current vehicle status. Some telltales are optional and may not appear. - Page 20 Warning Lights Electronic Stability Control Engine Check/Malfunction Electric Park Brake (EPB) (ESC) Active Warning Service Forward Collision Tire Pressure Monitoring Vehicle Security Warning (FCW) System (TPMS) Low Fuel Service LaneSense Service Stop/Start System Adaptive Cruise Control Forward Collision Warning Cruise Control Fault (ACC) Fault (FCW) Off Indicator Lights...
-
Page 21: Drowsy Driver Detection (Ddd) - If Equipped
Indicator Lights LaneSense Front Fog Lights Cruise Control Set Cruise Control Ready Hill Descent Control (HDC) LaneSense Adaptive Cruise Control High Beam (ACC) Ready (DDD) — ROWSY RIVER ETECTION RAFFIC ECOGNITION WARNING! QUIPPED Your Traffic Sign Recognition (TSR) system uses a The DDD system is an aid for driving and does camera mounted on the windshield, as well as map not relieve the driver of the responsibility of... -
Page 22: Interior Comfort Settings
INTERIOR COMFORT You will see the detected traffic signs in the CAUTION! instrument cluster display. A combination of signs SETTINGS can be displayed at one time (e.g. speed limit, Functionality may be limited or the system supplemental info, and no passing zone signs), may not work if the sensor is obstructed. -
Page 23: Automatic Climate Control Descriptions And Functions
Rear Defrost Button SYNC Button UTOMATIC LIMATE ONTROL ESCRIPTIONS UNCTIONS Push the button to turn on the rear Press the SYNC button on the window defroster and heated mirrors. touchscreen to synchronize the driver MAX A/C Button and front passenger temperature settings. -
Page 24: Automatic Temperature Control (Atc)
Climate Control OFF Button ATC display will turn off when the system is in the manual mode. Floor Mode Press the button to turn the climate LIMATE OICE ECOGNITION control system off. You can adjust your vehicle’s temperature hands-free while you’re driving. Defrost Mode Push the VR button on the steering wheel. -
Page 25: Front Ventilated Seats
RIVER EMORY ETTINGS WARNING! This feature allows you to save up to two different Do not place anything on the seat or seatback memory profiles for easy recalling through a that insulates against heat, such as a blanket or memory switch. -
Page 26: Head Restraints
Push and release the (2) button on the memory switch, and then push the desired memory profile button (1 or 3) within five seconds. A beep will sound to confirm the memory profile has been successfully stored. Use this QR code to access your digital experience. -
Page 27: Lighting Operation
LIGHTING OPERATION WINDSHIELD WIPERS & UTOMATIC EAMS WASHERS Did you know your vehicle can automatically EADLIGHT WITCH switch from high beams to low beams until an The headlight switch is located on the left side of The windshield wiper/washer controls are located approaching vehicle is out of view? the instrument panel and is used to control your on the windshield wiper/washer lever on the right... -
Page 28: Rain Sensing Wipers
Windshield Washers Rotate the end of the multifunction lever to the WARNING! Low Sensitivity Rain Sensing or High Sensitivity To use the washer, pull the windshield wiper lever Rain Sensing position, and tap the lever upwards, The ACC system: toward the steering wheel and hold. - Page 29 To Set A Desired ACC Speed WARNING! When the vehicle has reached the desired The Resume function should only be used if speed, push the SET switch up or down traffic and road conditions permit. Resuming a briefly, then release. set speed that is too high or too low for prevailing traffic and road conditions could WARNING!
-
Page 30: Garage Door Opener (Homelink®)
GARAGE DOOR OPENER While the car is ON, hold the handheld garage If you have any problems, or door transmitter 1-3 inches from the require additional assistance, (HOMELINK®) HomeLink® button you want to program in the please call toll-free vehicle. 1-800-355-3515 or visit HomeLink.com Push and hold both the HomeLink®... -
Page 31: Troubleshooting Tips
PARKING ASSISTANCE ROUBLESHOOTING WARNING! If you are having trouble programming HomeLink®, ARKSENSE RONT SSIST Drivers must be careful when backing up even here are some of the most common solutions: when using ParkSense. Always check carefully YSTEM behind your vehicle, look behind you, and be ... -
Page 32: Electric Park Brake (Epb)
CAUTION! WARNING! WARNING! Driving the vehicle with the parking brake The vehicle must be driven slowly when using Never use the PARK position as a substitute engaged, or repeated use of the parking brake to ParkSense in order to be able to stop in time for the parking brake. -
Page 33: Performance Features
PERFORMANCE FEATURES (AAS) — Just rotate the selector to the desired mode to CTIVE USPENSION activate. When the engine is stopped, the selector QUIPPED DNA S YSTEM will return to “n” Natural Mode. Your vehicle has two types of suspension Your vehicle is equipped with an Alfa DNA system WARNING! calibration to choose from: a sportier or a more... -
Page 34: Exterior
EXTERIOR OVERVIEW EXTERIOR Exterior Camera Locations page 33 Emergency Fueling page 43 Hands-Free Liftgate page 34 Ú Ú Ú Liftgate Release Button Ú page 34 Emergency Tow Hook Ú page 47 E X T E R I O R... -
Page 35: Exterior Camera Views
EXTERIOR CAMERA VIEWS CAUTION! WARNING! AMERA To avoid vehicle damage, ParkView should Drivers must be careful when backing up even when using the Surround View Camera. Always only be used as a parking aid. The ParkView The ParkView Rear Back Up Camera allows you to check carefully behind your vehicle, and be sure camera is unable to view every obstacle or see an on-screen image of the rear surroundings of... -
Page 36: Liftgate
LIFTGATE ANDS IFTGATE You can open your Hands-Free Liftgate by kicking IFTGATE ELEASE UTTON your leg in a straight in and out motion under the You can open your liftgate in any of the following vehicle activation zone that is located below the ways: rear license plate. - Page 37 If the liftgate is already opened, kicking your leg WARNING! CAUTION! under the activation zone will close the liftgate completely. Driving with the liftgate open can allow The Hands-Free Liftgate can be turned off manually in the Uconnect system to avoid poisonous exhaust gases into your vehicle.
-
Page 38: Sos And Assist System - If Equipped
SOS AND ASSIST SYSTEM — Once a connection between the vehicle and a SOS ator should be able to speak with you or EMERGENCY operator is made, the SOS Call system may transmit other vehicle occupants and hear sounds If Equipped the following important vehicle information to a occurring in the vehicle. - Page 39 Making an ASSIST Call WARNING! WARNING! The vehicle is equipped with an on board assist, Ignoring the overhead console light could The SOS Call system is embedded into the which is located within the Uconnect system. The vehicle’s electrical system. Do not add after- mean you will not have SOS Call services.
-
Page 40: Jacking And Tire Changing - If Equipped
JACKING AND TIRE NOTE: REPARATIONS ACKING CHANGING — IF EQUIPPED Passengers should not remain in the vehicle Park on a firm, level surface (avoid ice or when the vehicle is being raised or lifted. slippery areas). Do not attempt to change a tire on the side of WARNING! WARNING! the vehicle close to moving traffic. - Page 41 Tire Service Kit - If Equipped If a tire is punctured, you can make an emergency repair using the Tire Service Kit located beneath the load floor in the rear cargo area. Jack And Tools Spare Tire 1 — Tow Eye Remove the fastener securing the spare tire by turning it counterclockwise.
-
Page 42: Jacking Instructions
An instruction pamphlet for reference and WARNING! correct use of the Tire Service Kit, which must be then given to the personnel dealing with the Do not let anyone sit in the vehicle when it is sealant-treated tire. on a jack. - Page 43 Remove the wheel bolts and tire. Finish tightening the wheel bolts. Push down on the wrench while at the end of the handle for increased Mount the spare tire. leverage. Tighten the wheel bolts in a star pattern until each wheel bolt has been tightened twice. If in CAUTION! doubt about the correct tightness, have them Be sure to mount the spare tire with the valve...
-
Page 44: Jump Starting
NOTE: WARNING! WARNING! When using a portable battery booster pack, follow A loose tire or jack thrown forward in a collision the manufacturer's operating instructions and Do not allow vehicles to touch each other as or hard stop could endanger the occupants of precautions. -
Page 45: Refueling In Emergency
Connecting The Jumper Cables WARNING! CAUTION! Connect the positive (+) end of the jumper cable Do not connect the jumper cable to the negative Accessories plugged into the vehicle power to the positive (+) post of the discharged (-) post of the discharged battery. The resulting outlets draw power from the vehicle’s battery, vehicle. -
Page 46: If Your Engine Overheats
NOTE: WARNING! In certain cold conditions, ice may prevent the fuel door from opening. If this occurs, lightly push on Never have any smoking materials lit in or near the outside center of the fuel door to break the ice the vehicle when the fuel door is open or the buildup. -
Page 47: Freeing A Stuck Vehicle
You can also turn the temperature control to Then shift back and forth between DRIVE (D) and WARNING! maximum heat, the mode control to floor and REVERSE (R), while gently pressing the accelerator. the blower control to high. This allows the heater You or others can be badly burned by hot engine Shifts between DRIVE and REVERSE can only be coolant (antifreeze) or steam from your radiator. -
Page 48: Towing A Disabled Vehicle
CAUTION! Racing the engine or spinning the wheels may lead to transmission overheating and failure. Allow the engine to idle with the transmission in NEUTRAL for at least one minute after every five rocking-motion cycles. This will minimize overheating and reduce the risk of transmission failure during prolonged efforts to free a stuck vehicle. ... -
Page 49: Towing In An Emergency
If the vehicle’s battery is discharged, instructions Gear Selector Override Press and maintain firm pressure on the brake on shifting the automatic transmission out of PARK pedal. If a malfunction occurs, and the gear selector so that the vehicle can be moved page 47. - Page 50 Tow Eye Usage Tow Eye Usage Precautions WARNING! Your vehicle may be equipped with tow eyes that CAUTION! Stand clear of vehicles when pulling with tow can be used to move a disabled vehicle. eyes. The tow eye must only be used for roadside When using the tow eyes, see the following ...
- Page 51 Installing The Tow Eye The tow eye must be securely seated to the attaching bracket through the rear fascia/bumper. The front and rear tow eye receptacles are located If the tow eye is not securely seated to the behind a door on the passenger’s side of the fascia/ attaching bracket, the vehicle should not be bumpers.
-
Page 52: Specifications
ENGINE COMPARTMENT OVERVIEW SPECIFICATIONS 2.0L E NGINE 1 — Engine Oil Fill 6 — Intercooler Coolant Reservoir Cap 2 — Engine Air Cleaner Filter 7 — Engine Oil Dipstick 3 — Brake Fluid Reservoir Cap 8 — Engine Coolant Pressure Cap 4 —... -
Page 53: Fluid Capacities
FLUID CAPACITIES Metric Fuel (Approximate) All Engines 13.5 gal 51 L Engine Oil With Filter 2.0L Engine 5 qt 4.73 L Cooling System* 2.0L Engine 7 qt 6.6 L 2.0L Low Temp 2.3 qt 2.17 L * Includes heater and coolant recovery bottle filled to MAX level. S P E C I F I C A T I O N S 51... -
Page 54: Engine Fluids And Lubricants
ENGINE FLUIDS AND LUBRICANTS We recommend using the following fluids and lubricants: Component Fluid, Lubricant, or Genuine Part We recommend using Mopar® Antifreeze/Coolant 10 Year/150,000 Miles Engine Coolant (240,000 Kilometers) Formula OAT (Organic Additive Technology) meeting the requirements of the manufacturer Material Standard MS.90032. We recommend using Mopar®... -
Page 55: Servicing And Maintenance
SERVICING AND Fully press the accelerator pedal, slowly, three WARNING! times within ten seconds. MAINTENANCE You can be badly injured working on or around Cycle the ignition to the OFF position. a motor vehicle. Do only service work for AINTENANCE NOTE: which you have the knowledge and the right... -
Page 56: Trailer Towing
TRAILER TOWING Trailer Towing Weights (Maximum Trailer Weight Ratings) Engine/Transmission GCWR Maximum GTW Maximum Trailer TW (See Note) 2.0L / 9 Speed Auto 6,503 lb (2950 kg) 2,000 lb (907 kg) 154 lb (70 kg) Refer to local laws for maximum trailer towing speeds. Trailer brakes are recommended for trailers over 1,000 lb (453 kg) and required for trailers in excess of 1,543 lb (700 kg). - Page 57 INDEX Engine Overview ............50 Climate Control............20 Automatic ..............21 Exterior Lights............. 25 Adaptive Cruise Control (ACC) Climate Controls ...........20 (Cruise Control) ............26 Contract, Service............5 Adaptive Cruise Control (ACC) ...... 27 Cooling System Air Conditioning ............21 Filters Cooling Capacity ........... 51 Alfa Active Suspension (AAS) .......
- Page 58 Jack Location ...............38 New Vehicle Break-In Period ......... 53 Seats Jacking Instructions ..........40 Memory ..............23 Jump Starting ..............42 Power................. 23 Second Row USB ............15 Oil Change Indicator Selection Of Coolant (Antifreeze)....... 52 Reset ................53 Service Assistance ............5 Key Fob ................
- Page 59 Uconnect System............10 Uconnect System ..........10 Uconnect Warning Lights And Messages.......17 USB ................... 15 Uconnect Settings ..........11 Warranty Information ..........6 Uconnect Phone ............11 Windshield Washers ..........25 Pair (Link) Uconnect Phone To Windshield Wipers .............25 A Mobile Phone ............11 Wipers, Rain Sensitive ..........26 Vehicle Settings............
- Page 63 Some states or provinces prohibit the use of cellular telephones or texting while driving. It is always the driver’s responsibility to comply with all local laws. This Owner Handbook has been prepared to help you get acquainted with your new Alfa Romeo brand vehicle and to provide a convenient reference source for common questions.
- Page 64 ©2022 FCA US LLC. All Rights Reserved. ALFA ROMEO is a registered trademark of FCA Group Marketing S.p.A., used First Edition with permission. App Store is a registered trademark of Apple Inc. Google Play Store is a registered trademark of Google.
Need help?
Do you have a question about the TONALE 2023 and is the answer not in the manual?
Questions and answers