Table of Contents
Advertisement
Available languages
Available languages
Quick Links
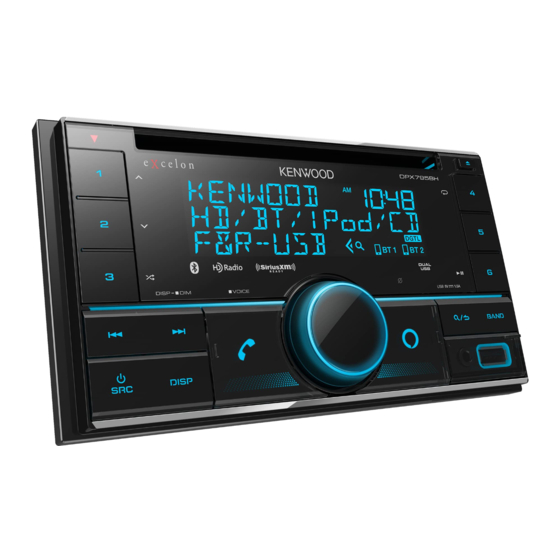
DPX795BH
DUAL DIN SIZED CD RECEIVER
Quick Start Guide
RECEPTEUR CD FORMAT DUAL DIN
Guide de démarrage rapide
RECEPTOR DUAL DE CD TAMAÑO DIN
Guía de inicio rápido
For your records
Record the serial number, found on the back of the unit, in the spaces designated on the warranty card, and in the space provided below. Refer to the model and serial numbers whenever you call
upon your Kenwood dealer for information or service on the product.
Model DPX795BH
Serial number
US Residents Only
© 2022 JVCKENWOOD Corporation
Register Online
Register your Kenwood product at https://www.kenwood.com/usa/
For detailed operations and information, refer to the INSTRUCTION MANUAL on the following website:
Pour les opérations et les informations détaillées, reportez-vous au MODE D'EMPLOI sur le site web
suivant:
Para obtener más información y detalles sobre las operaciones, consulte el MANUAL DE
INSTRUCCIONES en el siguiente sitio web:
<https://www.kenwood.com/cs/ce/>
ENGLISH
FRANÇAIS
ESPAÑOL
B5K-0896-00 [KN]
Advertisement
Table of Contents

Related Manuals for Kenwood DPX795BH


Summary of Contents for Kenwood DPX795BH
- Page 1 Record the serial number, found on the back of the unit, in the spaces designated on the warranty card, and in the space provided below. Refer to the model and serial numbers whenever you call upon your Kenwood dealer for information or service on the product.
- Page 2 Los equipos eléctricos y electrónicos al final Products: DUAL DIN SIZED CD RECEIVER de la vida útil, deberán ser reciclados en instalaciones que puedan dar el tratamiento Model Name: DPX795BH adecuado a estos productos y a sus subproductos residuales correspondientes. Responsible Party: JVCKENWOOD USA CORPORATION Póngase en contacto con su administración local para obtener información sobre el...
- Page 3 ISED Caution CAUTION This device contains licence-exempt transmitter(s)/receiver(s) that comply with Innovation, Science This equipment complies with FCC/ISED radiation exposure limits set forth for an uncontrolled and Economic Development Canada’s licence-exempt RSS(s). Operation is subject to the following two environment and meets the FCC radio frequency (RF) Exposure Guidelines and RSS-102 of the ISED radio conditions: frequency (RF) Exposure rules.
- Page 4 SOFTWARE LICENSE AGREEMENT Article 4 Right pertaining to the Licensed Software The software embedded in the Product (hereinafter the "Licensed Software") provided by Licensor is Any and all copyrights and other rights pertaining to the Licensed Software and related documents copyrighted to or sublicensable by the Licensor, and this Agreement provides for the terms and conditions shall belong to the Licensor or the original holder of the right who granted to the Licensor the license or which Users shall follow in order to use the Licensed Software.
-
Page 5: Important Notice Concerning The Software
Important Notice concerning the Software Article 9 Destruction of the Licensed Software If this Agreement is terminated pursuant to the provision of Article 8, the User shall destroy the Licensed -jansson Software, any related documents and copies thereof within two (2) weeks from such date of termination. Copyright (c) 2009-2012 Petri Lehtinen <petri@digip.org>... - Page 6 -CMP sha2 AUTHOR: Aaron D. Gifford - http://www.aarongifford.com/ The MIT License (MIT) Copyright (c) 2014 Charles Gunyon Copyright (c) 2000-2001, Aaron D. Gifford All rights reserved. Permission is hereby granted, free of charge, to any person obtaining a copy of this software and associated documentation files (the "Software"), to deal in the Software without restriction, including without You may obtain a copy of the license at limitation the rights to use, copy, modify, merge, publish, distribute, sublicense, and/or sell copies of the...
- Page 7 Copyright (c) 1995, 1996 Carnegie-Mellon University. All rights reserved. T-Kernel 2.0 This product uses the source code of T-Kernel 2.0 under T-License 2.0 granted by T-Engine Forum Author: Chris G. Demetriou (www.tron.org) Permission to use, copy, modify and distribute this software and its documentation is hereby granted, BSD-3-Clause provided that both the copyright notice and this permission notice appear in all copies of the software, Copyright (c) 2000-2001, Aaron D.
-
Page 8: Basic Procedure
Installation/Connection Basic procedure Remove the key from the ignition switch, then disconnect the terminal of the car battery. This section is for the professional installer. Connect the wires properly. See “Wiring connection” on page 3. For safety’s sake, leave wiring and mounting to professionals. Consult the Install the unit to your car. -
Page 9: Part List
Part list Wiring connection (A) Mounting sleeve (×1) (E) Round head screw (×6) (B) Trim plate (×1) (M5 × 8 mm) (C) Trim plate (only for Toyota car) (×1) (F) Flat head screw (×6) (D) Extraction key (×2) (M5 × 8 mm) (G) Wiring harness (×1) Antenna terminal Fuse (10 A) -
Page 10: Before Use
Before Use Basics IMPORTANT Faceplate • To ensure proper use, please read through this Guide before using this product. It is especially important that you read and observe Warnings and Cautions in this Guide. • Please keep the Guide in a safe and accessible place for future reference. WARNING Do not operate any function that takes your attention away from safe driving. -
Page 11: Getting Started
To adjust the clock On the faceplate Turn the volume knob to select [CLOCK ADJUST], then press the knob. Turn on the power Press B SRC. Turn the volume knob to make the settings, then press the knob. • Press and hold to turn off the power. Set the time in the order of “Hour” ... -
Page 12: Hd Radio™ Tuner
Default: [XX] CD/USB/iPod [SYSTEM] Selectable source: [KEY BEEP] [ON]: Activates the keypress tone. ; [OFF]: Deactivates. CD/USB FRONT/USB REAR/iPod FRONT/iPod REAR or iPod BT [FACTORY RESET] [YES]: Resets the settings to default (except the stored station). ; Start playback [NO]: Cancels. The source changes automatically and playback starts when you load a disc [ENGLISH] Select the display language for [FUNCTION] menu and music... -
Page 13: Functions Settings
Turn the volume knob to select [AUDIO CONTROL], then press the knob. • Refer to the INSTRUCTION MANUAL on the following website for the detailed explanation of each item: <https://www.kenwood.com/cs/ce/> Turn the volume knob to select [SUBWOOFER SET], then press the knob. -
Page 14: Illumination Color Setting
Press the volume knob to enter [FUNCTION]. For playback operations of AUX, SiriusXM® Radio, and AMAZON ALEXA sources, refer to the INSTRUCTION MANUAL on the following website: <https://www.kenwood.com/cs/ce/> Turn the volume knob to select [DISPLAY], then press the knob. Note for specifications Bluetooth Frequency Range: Turn the volume knob to select [COLOR SELECT], then press the knob. -
Page 15: Connect The Microphone
Pair and connect a Bluetooth device for the first time Reverse skip/Forward skip Press Press B SRC to turn on the unit. Reverse/Fast-forward Press and hold Search and select the name of your receiver (“DPX795BH”) on the Repeat play Press 4 repeatedly. Bluetooth device. “PAIRING”... -
Page 16: Procédure De Base
Installation/Connexion Procédure de base Retirez la clé de contact, puis déconnectez la borne de la batterie de la voiture. Cette section est réservée aux installateurs professionnels. Connectez les fils correctement. Voir “Connexions” à la page 3. Pour des raison de sécurité, laissez le travail de câblage et de montage des Installez l’appareil dans votre voiture. -
Page 17: Liste De Pièces
Liste de pièces Connexions (A) Manchon de montage (×1) (E) Vis à tête ronde (×6) (B) Plaque de garniture (×1) (M5 × 8 mm) (C) Plaque d’assemblage (uniquement pour (F) Vis à tête plate (×6) les voitures Toyota) (×1) (M5 × 8 mm) (D) Clé... -
Page 18: Avant L'utilisation
Avant l’utilisation Fonctionnement de base IMPORTANTES Façade • Pour utiliser correctement l’appareil, veuillez lire ce Guide complément avant de l’utiliser. Il est particulièrement important que vous lisiez et acceptiez les avertissements et les précautions de ce Guide. • Veuillez garder ce Guide dans un endroit sûr et accessible pour une utilisation future. -
Page 19: Prise En Main
Pour ajuster l’horloge Pour Sur la façade Tournez le bouton de volume pour choisir [CLOCK ADJUST] , puis appuyez sur Mettez l’appareil sous tension Appuyez sur SRC. le bouton. • Maintenez la touche enfoncée pour Tournez le bouton de volume pour faire les réglages, puis appuyez sur le mettre l’appareil hors tension. -
Page 20: Tuner Hd Radio
[XX] CD/USB/iPod Défaut: [SYSTEM] Source sélectionnable: [KEY BEEP] [ON] [OFF] : Met en service la tonalité des touches. ; : Met hors service la CD/USB FRONT/USB REAR/iPod FRONT/iPod REAR ou iPod BT fonction. Démarrez la lecture [FACTORY RESET] [YES] : Réinitialise les réglages aux valeurs par défaut (sauf la station mémorisée). -
Page 21: Réglages Des Fonctions
Pour retourner à l’option de réglage précédente, appuyez sur • Reportez-vous au MODE D’EMPLOI sur les sites web suivant pour une explication détaillée de chaque élément: <https://www.kenwood.com/cs/ce/> Tournez le bouton de volume pour choisir [SUBWOOFER SET] , puis appuyez sur le bouton. -
Page 22: Réglage De La Couleur D'éclairage
Pour les opérations de lecture de sources AUX, Radio SiriusXM® et AMAZON Appuyez sur le bouton de volume pour entrer [FUNCTION] ALEXA, reportez-vous au MODE D’EMPLOI sur le site web suivant: <https://www. kenwood.com/cs/ce/> Tournez le bouton de volume pour choisir [DISPLAY] , puis appuyez sur le Remarque pour les spécifications... -
Page 23: Répondre À Un Appel
Saut vers l’arrière/saut vers l’avant Appuyez sur Appuyez sur SRC pour mettre l’appareil sous tension. Recherche rapide vers l’arrière/ Maintenez enfoncée Recherchez et sélectionnez le nom de votre récepteur (“DPX795BH”) sur le vers l’avant périphérique Bluetooth. “PAIRING” “PASS XXXXXX” “Nom du périphérique”... -
Page 24: Procedimiento Básico
Instalación/Conexión Procedimiento básico Quite la llave del interruptor de encendido; después, desconecte el terminal de la batería del automóvil. Esta sección es para los instaladores profesionales. Conecte los cables correctamente. Consulte “Conexión del cableado” en la Para fines de seguridad, deje que un profesional realice el cableado y el página 3. -
Page 25: Lista De Piezas
Lista de piezas Conexión del cableado (A) Manguito de montaje (×1) (E) Tornillos de cabeza esférica (B) Placa embellecedora (×1) (×6) (C) Placa embellecedora (solo para coches (M5 × 8 mm) Toyota) (×1) (F) Tornillo de cabeza plana (×6) (D) Herramienta de extracción (×2) (M5 ×... -
Page 26: Antes Del Uso
Antes del uso Puntos básicos IMPORTANTE Placa frontal • Antes de utilizar este producto y para asegurar su uso correcto, lea esta guía por completo. En especial, lea y observe las Advertencias y Precauciones incluidas en esta guía. • Guarde la guía en un lugar seguro y accesible para futuras consultas. ADVERTENCIA No utilice ninguna función que pueda desviar su atención mientras está... -
Page 27: Procedimientos Iniciales
Para ajustar el reloj Para En la placa frontal Gire la rueda de volumen para seleccionar [CLOCK ADJUST] y, a continuación, Encender la unidad Pulse SRC. pulse la rueda. • Pulse y mantenga pulsado para apagar Gire la rueda de volumen para realizar los ajustes y, a continuación, pulse la la unidad. -
Page 28: Sintonizador Hd Radio
[XX] CD/USB/iPod Predeterminado: [SYSTEM] Fuente seleccionable: [KEY BEEP] [ON] [OFF] : Activa el tono de pulsación de teclas. ; : Se desactiva. CD/USB FRONT/USB REAR/iPod FRONT/iPod REAR o iPod BT [FACTORY RESET] [YES] : Se restablecen los ajustes predeterminados (excepto la emisora Inicie la reproducción memorizada). - Page 29 Para volver al elemento de ajuste anterior, pulse continuación, pulse la rueda. • Para obtener más detalles sobre cada una de las opciones, consulte el MANUAL DE INSTRUCCIONES en el siguiente sitio web: <https://www.kenwood.com/cs/ce/> Gire la rueda de volumen para seleccionar [SUBWOOFER SET] y, a Opciones del menú...
-
Page 30: Ajuste Del Color De Iluminación
Con respecto a las operaciones de reproducción de las fuentes AUX, Radio Pulse la rueda de volumen para ingresar en [FUNCTION] SiriusXM® y AMAZON ALEXA, consulte el MANUAL DE INSTRUCCIONES en el siguiente sitio web: <https://www.kenwood.com/cs/ce/> Gire la rueda de volumen para seleccionar [DISPLAY] y, a continuación, pulse la Nota sobre las especificaciones rueda. -
Page 31: Contestar Una Llamada
Bluetooth hacia delante Pulse SRC para encender la unidad. Retroceder/avanzar rápidamente Pulse y mantenga pulsado Busque y seleccione el nombre de su receptor (“DPX795BH”) en el dispositivo Bluetooth. Repetir reproducción Pulse 4 repetidamente. En la pantalla aparece los mensajes “PAIRING”... - Page 32 • Windows Media is a registered trademark or trademark of Microsoft Corporation in the United States and/or other countries. This product is protected by certain intellectual property rights of Microsoft. Use or distribution of such technology outside of this product is prohibited without a license from Microsoft. •...
Need help?
Do you have a question about the DPX795BH and is the answer not in the manual?
Questions and answers