Advertisement
The Caroma Electronic Flush valve – Series II has several modes to allow the installer to configure the device,
as well as monitor its performance and assist in servicing of the product.
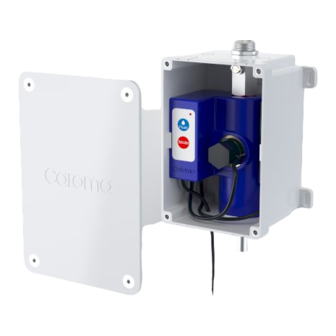
Please ensure that the product has been installed according to the supplied Installation Instructions.
Installation must be done in accordance with AS/NZS 3500.2
Note: All changes to the unit's settings will be retained in the event of a power outage.
Flush Volume Setting
Default: 0.8L per Flush at 300kPa Supply Pressure.
Allow the installer to select the unit's flush volume.
• Press & HOLD
through the preset volumes, in the following
sequence:
0.8L (Default) 2 Flashes
1.0L
1.5L
2.0L
0.5L
• The indicator LED will flash to indicate the selected
Flush Volume.
IS1393 C
Electronic Flush Valve - Series II
User Manual
Button for 1 second to CYCLE
3 Flashes
4 Flashes
5 Flashes
1 Flash
Inlet Pressure Setting
Default: 300kPa Supply Pressure
This setting will allow the installer to select the current
water supply pressure to the unit. This information is
used by the controller to determine the duration
required to achieve the preset Flush Volume.
• Press and HOLD
Pressure Setting function.
• The indicator LED will activate once for 5 seconds to
acknowledge that the Pressure Setting function has
been selected.
• Release the button.
• The LED will flash to indicate the current pressure
setting:
300kPa = 1 LONG Flash; 500kPa = 2 SHORT Flashes
• Press & HOLD
through the two preset pressure settings;
300kPa (DEFAULT) and 500kPa.
• Release the button.
• The LED will flash to indicate the selected pressure
setting:
300kPa = 1 LONG Flash; 500kPa = 2 SHORT Flashes
button for 5 seconds to enter
button for 5 seconds to CYCLE
PAGE
1 OF 4
Advertisement
Table of Contents

Related Manuals for Caroma II Series

Summary of Contents for Caroma II Series
- Page 1 Electronic Flush Valve - Series II User Manual The Caroma Electronic Flush valve – Series II has several modes to allow the installer to configure the device, as well as monitor its performance and assist in servicing of the product.
- Page 2 Usage Statistics Mode Diagnostic Mode: Allows the installer to identify the number of uses the The controller can perform internal diagnostic checks product has experienced per day during the previous of the main system components and display their 30 day period. current status.
- Page 3 Setting: Usage Duration Setting: Stadium Mode Default: 5 seconds. Default: ENABLED. The sensor will sense urinal usage for a pre- To conserve water in HIGH FREQUENCY usage determined duration before sending a signal to the environments (i.e.: 5 uses in less than 60 seconds), flush valve.
- Page 4 “Smart Flush” Mode RESET : Factory Default Settings Default: DISABLED. A new water saving mode “Smart Flush” is available This function will restore the unit to the factory preset to minimise the product’s water usage. defaults. During normal use (i.e.: a minimum of 10 minutes between uses) the water will flush after every use.
Need help?
Do you have a question about the II Series and is the answer not in the manual?
Questions and answers