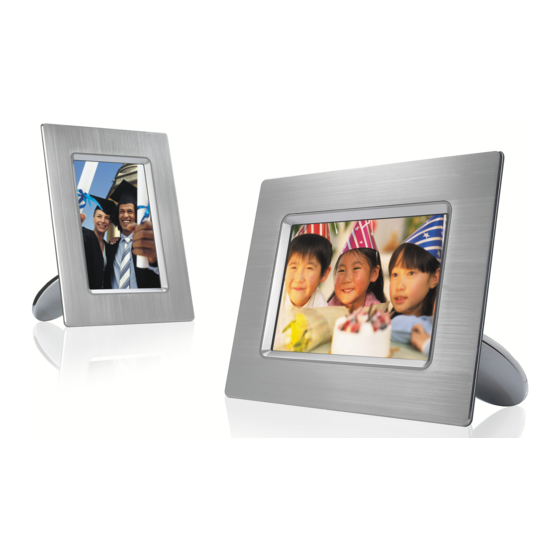
Philips 7FF1CME Getting Started
Philips 7ff1cme: user guide
Hide thumbs
Also See for 7FF1CME:
- User manual (50 pages) ,
- Supplementary manual (17 pages) ,
- Specifications (2 pages)
Table of Contents
Advertisement
•
Packing list
•
Initial setup
Getting started
•
Specification
Packing List
What else you'll need
Power outlet
©2005 Koninklijke Philips Electronics NV
All rights reserved. Reproduction, copying, use, modification, hiring, renting, public performance,
transmission and/or broadcasting in whole or in part is prohibited without written consent of Philips
Electronics NV
Digital Photo Frame
Quick start guide
Power adaptor
Digital Photos, memory card or PC
Photo Frame Stand
User manual CD
USB Cable to PC
(male A type plug)
Advertisement
Table of Contents

Related Manuals for Philips 7FF1CME


Summary of Contents for Philips 7FF1CME
-
Page 1: Packing List
Power outlet ©2005 Koninklijke Philips Electronics NV All rights reserved. Reproduction, copying, use, modification, hiring, renting, public performance, transmission and/or broadcasting in whole or in part is prohibited without written consent of Philips Electronics NV Photo Frame Stand User manual CD... -
Page 2: Getting Started
• Specification Philips digital Photo Frame can be placed either vertically or horizontally to fit the photos on display. Its internal rechargeable battery provides you the freedom to pass it around and show photos without the power cord. Or, you can place it somewhere in the room for constant Photo Frame by connecting it to the main. - Page 3 LCD display also shows the function icon for each key at the same position. • Previous/Left Next/ Right Down C. Turning on Photo Frame • Slide the power switch up to the ON position. The power LED will be green and the Startup screen will appear. D.
- Page 4 Getting started • Packing list • Initial setup • Specification Specification Picture/Display Effective display area: 137 x 91 mm (5.4" x 3.6"), 6.5" diagonal Vertical dot pitch: 0.1905 mm Horizontal dot pitch: 0.1905 mm Resolution: 720 x 480 pixels Brightness: 200 nits Viewing angle (CR>5): Horizontal (-85°~85°), Vertical (-85°~85°) Backlight Half-Life time: 20,000 hours Connectivity...
- Page 5 Photo menu:...
- Page 6 OSD languages: English, French, German, Italian, Spanish, Simplified Chinese, Russian, Japanese Plug & Play compatibility: Windows 2000/XP or later, Mac OS X or later, Linux Accessories Included accessories: AC power adaptor (AC 100~240V 50/60 Hz 0.36A-->DC 5V 2.5A), USB cables, Quick start guide User manual: Yes (in CD-ROM) Power Power LED indicator Green (power on), Off (power off)
-
Page 7: Enjoying Photos
Enjoying photos • Viewing photos • Copying Viewing Photos photos • Viewing photo slideshows When there is no memory card in photo Frame, it displays photos stored in local memory • Deleting When a memory card is inserted to Photo Frame, it will display photos from most recently connected media in a "Last-in, First-display"... - Page 8 G Total photo count H Resolution of current photo (in pixels). Date current photo was taken Source of displayed photos. SLIDESHOW- Automatic, Rotating display of photos. BROWSE—Manual viewing of photos one-by-one. (Displays size and date) Each icon represents the function of the corresponding key in the rear of Photo Frame.
- Page 9 Each icon represents the function of the corresponding key in the rear of Photo Frame. B Source of photos on screen Memory stick SD, MMC C Current Photo number D Total photo count E Resolution of current photo (in pixels) F Date current photo was taken Viewing photos on Photo Frame •...
-
Page 10: Copying Photos
Enjoying photos • Viewing photos • Copying Copying Photos photos • Viewing photo slideshows You can copy photos stored on a memory card, or PC to Photo Frame. Photo Frame will • Deleting then internally store a resized copy of the original photo. This resized copy will remain inside Photo Frame until you delete it from Photo Frame. - Page 11 For copying photos from a PC to the Photo Frame , install the Auto Run software Photo Frame manager Philips Auto Run Program for Photo Frame is a windows based application for user to manage photos between Philips Photo Frame and PC. It provides easy-to-use user...
- Page 12 Enjoying photos • Viewing photos • Copying Viewing Photo Slideshows photos • Viewing photo slideshows When you set the Photo Frame view mode to Slideshow, it will automatically rotate the • Deleting Photo Frameed on screen. You may handpick the photos for slideshow and choose slideshow frequency –...
- Page 13 • Press the key to select Slideshow settings and use the the Frequency item. Next press the • Use the key to highlight the interval a photo remains on screen and press to confirm. • Now your selected setting is confirmed. •...
- Page 14 • Use the key to highlight the way one photo replaces the next on screen. Press to confirm your selection. Now your selected setting is confirmed. Press to leave this menu. Choosing photo order Note: This function applies to photos stored on all media. •...
- Page 15 • Press key to select Slideshow settings; press • Use the key to highlight how you want to place Photo Frame. Press confirm your selection. Now your selected setting is confirmed. • Press to leave this menu. Selecting correct photo orientation for Slideshow Note: This function only applies to photos stored on Photo Frame's internal memory.
- Page 16 • Use the key to move the highlight among different rotation angles until the thumbnail image on the left shows the desired orientation for the selected photo. • Press to confirm. Now your selected settings are confirmed. • Press to leave this menu.
-
Page 17: Rotating A Photo
Enjoying photos • Viewing photos • Copying Deleting and Rotating photos photos • Viewing photo slideshows Sometimes you may want to delete some photos stored on Photo Frame or change the • Deleting orientation of photos. Here is how: Rotating a photo Rotating photos Note: This function only applies to photos stored on Photo Frame's internal memory. - Page 18 • Use the key to highlight Delete Photo; Press • When you delete a photo, Photo Frame will show status and return to Brose mode after completion. Delete several photos at once in Thumbnail mode • Change view mode to Thumbnail. •...
- Page 19 Optimizing Photo Frame • Selecting brightness, language and set time Selecting brightness, language and set time functions functions • Checking Photo Use this section to select Photo Frame brightness levels and on-screen information display Frame language. You may also enter your local time and then set a different brightness level for status the evening hours from 6:00PM~6:00AM.
- Page 20 Press the key (the 3 key from the left on the rear of Photo Frame). A menu with general settings for Photo Frame will appear. • Use the key to highlight Time functions. Next press the • Press the key again to select Current Time. A clock will appear for you to set Hours, Minute, and AM/PM.
- Page 21 • Press the key (the 3 key from the left on the rear of Photo Frame). A menu with general settings for Photo Frame will appear. • Use the key to highlight Time functions. Next, press the • Use the key to highlight 6PM-6AM Brightness and press the •...
- Page 22 • Press to leave this menu. Digital Photo Frame will automatically turn off its display exactly at the Auto-off time, If the time has already passed today, it will go into Auto-off status at that time tomorrow. Choose on-screen language •...
- Page 23 • Use the key to choose your preferred language and press The new selected setting is effective immediately. • Press again to leave this menu. to confirm.
- Page 24 Optimizing Photo Frame • Selecting brightness, language and set time Checking Photo Frame status functions • Checking Photo You may check the status of your Photo Frame— whether the system is ON, if the battery is Frame charging, how many more photos can be stored, how much battery power remains, which status media are currently connected, or the Photo Frame software version.
- Page 25 Optimizing Photo Frame • Selecting brightness, language and set Taking care of your Photo Frame time functions • Checking 1) Do not drop Photo Frame Photo Frame is a complicated electronic device and cannot withstand shock from drops. status 2) Do not expose to moisture •...
-
Page 26: Frequently Asked Questions
Digital Photo Frame. Q: Can I switch between different slideshows photos by using different memory cards? A: Yes. When you connect your memory card to Digital photo frame, it will slideshow photos stored on that specific card. Q: How can I quick-charge my Photo Frame? A: Charge it with the system in OFF status. - Page 27 Reset button located at the lower-left corner on the back to restore the system. 14) Q: Why doesn't my Digital Photo Frame go into Auto-off status after I set it? A: First, please make sure you set Current Time, Auto-off at, and Auto-on at correctly.
-
Page 28: Troubleshooting
Part of photo is cropped on Photo Frame Keeping your Photo Frame up to date At times Philips will provide Software to keep your Photo Frame up to date. Please regis yourself to www.philips.com/register or visit www.p4c.philips.com for latest support new Recommended actions Recharge Photo Frame or turn off Photo Frame before can be recharged again. -
Page 29: Service And Warranty
12 months from date of purchase. This international Philips guarantee complements the existing national guarantee obligations to you of dealers and Philips in the country of purchase and does not affect your statutory rights as a customer. - Page 30 Website:http://www.philips.com...
-
Page 31: Philips Pixel Defect Policy
Philips Pixel Defect Policy Philips strives to deliver the highest quality products. We use some of the industry's most advanced manufacturing processes and practice stringent quality control. However, pixel or sub pixel defects on the TFT LCD panels used in flat panel monitors are sometimes unavoidable. - Page 32 One dark sub pixel Proximity of Pixel Defects Because pixel and sub pixels defects of the same type that are near to one another may be more noticeable, Philips also specifies tolerances for the proximity of pixel defects. BRIGHT DOT DEFECTS MODEL...
-
Page 33: Recycling Information For Customers
Philips establishes technically and economically viable objectives to optimize the environmental performance of the organization's product, service and activities. From the planning, design and production stages, Philips emphasizes the important of making products that can easily be recycled. At Philips, end-of-life management primarily entails participation in national take-back initiatives and recycling programs whenever possible, preferably in cooperation with competitors. -
Page 34: Banned Substance Declaration
Banned Substance Declaration This product comply with RoHs and Philips BSD (AR17-G04-5010-010) requirements CE Declaration of Conformity Philips Consumer Electronics declare under our responsibility that the product is in conformity with the following standards - EN60950:2000 (Safety requirement of Information Technology Equipment) -
Page 35: Commission Federale De La Communication (Fcc Declaration)
THIS CLASS B DIGITAL APPARATUS MEETS ALL REQUIREMENTS OF THE CANADIAN INTERFERENCE-CAUSING EQUIPMENT REGULATIONS. FCC Declaration of Conformity Model Number: 7FF1 Trade Name: Philips Responsible Party: Philips Consumer Electronics North America P.O. Box 671539 Marietta, GA 30006-0026 1-888-PHILIPS (744-5477) Declaration of Conformity for Products Marked with FCC Logo, United States Only This device complies with Part 15 of the FCC Rules. -
Page 36: Vcci Notice (Japan Only)
Toutes modifications n'ayant pas reçu l'approbation des services compétents en matière de conformité est susceptible d'interdire à l'utilisateur l'usage du présent équipement. Les raccordements à cet appareil doivent être réalisés avec des câbles blindés à protections métalliques pour les connecteurs RFI/EMI afin de maintenir la conformité avec les Règlements et la Législation du FCC. -
Page 37: Polish Center For Testing And Certification Notice
Polish Center for Testing and Certification Notice The equipment should draw power from a socket with an attached protection circuit (a three- prong socket). All equipment that works together (computer, monitor, printer, and so on) should have the same power supply source. The phasing conductor of the room's electrical installation should have a reserve short-circuit protection device in the form of a fuse with a nominal value no larger than 16 amperes (A). -
Page 38: Bsmi Notice (Taiwan Only)
Please find out about the local regulations on how to dispose of your old monitor from your local Philips dealer. (For customers in Canada and U.S.A.) PLASSERES, MÅ... -
Page 39: Waste Electronics And Electrical Equipment (Weee)
Dispose of in accordance to local-state and federal regulations. For additional information on recycling contact Waste Electronics and Electrical Equipment (WEEE) This product is labelled with this symbol in accordance with European Directive 2002/96/EG to indicate that it must not be disposed of with your other household waste.
Need help?
Do you have a question about the 7FF1CME and is the answer not in the manual?
Questions and answers