Table of Contents
Advertisement
Quick Links
Advertisement
Table of Contents

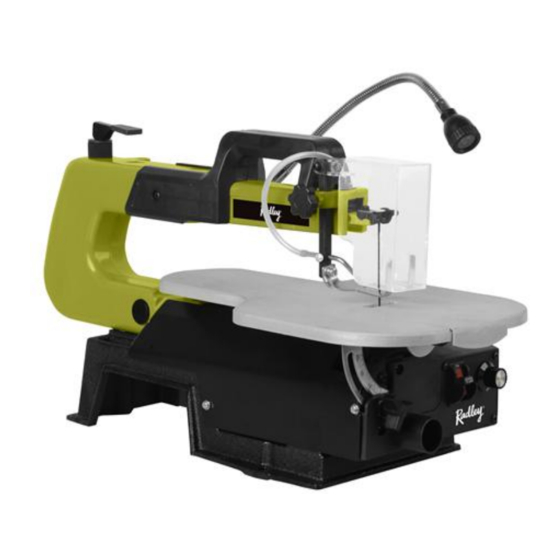
Summary of Contents for RADLEY 1345-000
- Page 1 OWNER’S MANUAL 226002 VS4005B...
- Page 2 " (127 " " " " Call us on our toll- free customer support line: 1-866-349-8665 (Monday through Friday 9am – 5pm Eastern Standard Time) Technical questions Replacement parts Parts missing from package...
- Page 3 Product Specifications……………………………………………………………………………………………………………………………………………….1 Table of Contents………………………………………………………………………………………………………………………………………………………2 General Safety Warnings………………………………………………………………………………………………………………………………………..3-5 Specific Safety Rules……………………………………………………………………………………………………………………………………………….5-6 Symbols…………………………………………………………………………………………………………………………………………………………………….7 Extension Cord Safety……………………………………………………………………………………………………………………………………………….8 Know Your Scroll Saw ……………………………………………………………………………………………………………………………………………….9 Assembly and Operation………………………………………………………………………………………………………………………………………9-13 Maintenance…………………………………………………………………………………………………………………………………………………………..14 Exploded view…………………………………………………………………………………………………………………………………………………………15 Parts List…………………………………………………………………………………………………………………………………………………………….16-19 Warranty………………………………………………………………………………………………………………………………………………………………..20...
-
Page 4: Flying Debris
WARNING: Before using this tool or any of its accessories, read this manual and follow all Safety Rules and Operating Instructions. The important precautions, safeguards and instructions appearing in this manual are not meant to cover all possible situations. It must be understood that common sense and caution are factors which cannot be built into the product. - Page 5 WARNING ! When using electric tools basic safety precautions should always be followed to reduce the risk of fire, electric shock and personal injury. Read all these instructions before attempting to operate this product. Save these instructions for future reference. 1.
- Page 6 Use the scroll saw on a firm, level surface with adequate space for handling and supporting the workpiece. Be sure the scroll saw cannot move when operated. Secure the scroll saw to a workbench or table with wood screws or bolts with washers and nuts. DO NOT OPERATE WITH ANY GUARD DISABLED, DAMAGED, OR REMOVED.
- Page 7 Have your tool repaired by a qualified person. This electric tool complies with the relevant safety rules. Repairs should only be carried out by a qualified person using original spare parts, otherwise this may result in considerable danger to the user. WARNING: ALL ELECTRICAL CONNECTIONS MUST BE DONE BY A QUALIFIED ELECTRICIAN.
- Page 8 WARNING: Some of the following symbols may appear on your tool. Study these symbols and learn their meaning. Proper interpretation of these symbols will allow for more efficient and safer operation of this tool. WARNING: Please read all the safety and operating instructions carefully before using this tool.
-
Page 9: Power Supply
POWER SUPPLY WARNING: YOUR TOOL MUST BE CONNECTED TO A 120V WALL OUTLET, WITH A MINIMUM 15-AMP. BRANCH CIRCUIT AND USE A 15-AMP TIME DELAY FUSE OR CIRCUIT BREAKER. FAILURE TO CONNECT IN THIS WAY CAN RESULT IN INJURY FROM SHOCK OR FIRE. GROUNDING Your tool must be properly grounded. -
Page 10: Fastening The Scroll Saw To A Stand, Workbench Or Plywood
1. Blade tension release lever 13. Work table 2. Sawdust blade blower 14. T-shaped hex wrench storage 3. Upper arm 15. Quick release table insert 4. Locking ON/OFF Switch 16. Motor 5. Table locking knob 17. Bevel scale 6. T-shaped hex wrench 18. -
Page 11: Adjusting Blade Tension
INSTALLING/REPLACING PINLESS (PLAIN END) BLADES (Fig. 1~4) 1. Turn the scroll saw OFF and unplug from the power source. 2. Loosen the tension by lifting the quick tension release lever (1-Fig .1). 3. Tilt the table to the 0˚ bevel setting and lock into position with the table locking knob (5-Fig. -
Page 12: Bevel Stop Adjustment
STORAGE (FIG. 6) The right rear side of the body (1) has a storage (2) designed to store the T-shaped hex wrench (3). The blade storage (4) is located on the right rear side of the scroll saw body. The blade storage can conveniently store extra pin-end and plain-end blades. -
Page 13: Blade Guard
THE DUST BLOWER (FIG. 10) The saw dust blower (4) must be positioned so that it points at the blade and workpiece to blow sawdust out of line of sight when cutting. It is not designed to blow all the sawdust off the worktable. VARIABLE SPEED KNOB (FIG. - Page 14 INTERIOR CUTTING (FIG. 13) 1. Lay out the design on the workpiece (1). Drill a 1/8” (3 mm) hole (4) through the workpiece. 2. Remove the blade (3) by turning the quick tension release lever (2) counterclockwise. Refer to BLADE REMOVAL AND INSTALLATION. 3.
- Page 15 GENERAL An occasional coat of paste wax on the work table will allow the wood being cut to glide smoothly across the work surface. MOTOR 1. If the power cord is worn, cut or damaged in any way, have it replaced immediately by authorized electrician.
- Page 17 Any attempt to repair or replace electrical parts on this saw may create a safety hazard unless repairs are performed by a qualified technician. For more information, call the Toll-free Helpline, at 1-866-349-8665. 1345-000-001 Philips Screw 1345-000-002...
- Page 18 1345-000-031 Blade 1345-000-032 Star Washer 1345-000-033 Hex Socket Screw 1345-000-034 Adaptor Fixing Plate 1345-000-035 Blade 1345-000-036 Hex Socket Screw 1345-000-037 Big Cushion 1345-000-038 Eccentricity Connector Assembly 1345-000-039 Ball Bearing 1345-000-040 Hex Nut,type I 1345-000-041 Connector Pressure Plate 1345-000-042 Philips Screw...
- Page 19 1345-000-064 Auxiliary Work Table 1345-000-065 Variable Speed Knob 1345-000-066 Hex Socket Screw 1345-000-067 Power Cord 1345-000-068 Hex Socket Screw 1345-000-069 Hex Socket Screw 1345-000-070 Eccentricity wheel 1345-000-071 DC Motor 1345-000-072 Switch Box 1345-000-073 Wire Clip 1345-000-074 Philips Screw M4x10 1345-000-075...
- Page 20 1345-000-097 Glass plate 1345-000-098 Lamp cover 1345-000-099 Lamp pipe 1345-000-100 Hex socket screw 1345-000-101 Wire clip 1345-000-102 Philips screw 1345-000-103 Led circuit boad 1345-000-104 Transformer box 1345-000-105 Flat Washer 1345-000-106 Hex Socket Screw 1345-000-107 M4 Philips Screw 1345-000-108 M6 Philips Screw...
- Page 21 16” VARIABLE SPEED SCROLL SAW If this Radley tool fails due to a defect in material or workmanship within three years from the date of purchase, return it to any Home Hardware store with the original bill of sale for exchange. Two years for battery and charger.
- Page 22 226002 VS4005B...


Need help?
Do you have a question about the 1345-000 and is the answer not in the manual?
Questions and answers