Table of Contents
Advertisement
Quick Links
Advertisement
Table of Contents

Related Manuals for Blaupunkt SM 02


Summary of Contents for Blaupunkt SM 02
- Page 1 User manual Mobile phone SM 02...
-
Page 2: Table Of Contents
Table of Contents 1. Safety instructions ............... 3 2. Technical Specifications .............. 6 3. Getting started ................8 3.1 Insert the memory card and SIM card ......... 8 3.2 Removing the memory card and the SIM card ....8 3.3 Unlock the device ..............9 4. - Page 3 12.1 Camera ................18 12.2 Photos ................18 12.3 Music .................. 19 13. Contacts ................... 20 14. Phone..................21 15. Search ..................22 16. Google Play Store ..............22 17. More applications ..............22 17.1 Clock ................... 22 17.2 E-mail ................. 23 17.3 File manager / Files Go .............
-
Page 4: Safety Instructions
1. Safety instructions ATTENTION: Please read this guide carefully. Failure to comply with the safety regulations may be dangerous or illegal, and the manufacturer can not be held liable for any malfunction resulting from improper use. Safe switch-on The owner of the device is responsible for the use of the device. Never switch the device on in areas where wireless devices are prohibited or radio interference may be dangerous. - Page 5 Use in hospitals Hospitals and other healthcare facilities can use devices that are particularly sensitive to RF signals. Switch off your phone if prohibited signals are instructed to do so, or hospital staff ask for Electrical medical devices Your phone is a radio transmitter that can interfere with electronic medical devices or implants such as hearing aids, pacemakers, insulin pumps, and so on.
- Page 6 sure that it does not contain metal and that the phone is slightly distracted from the body. When using other accessories, it is not possible to operate in accordance with radio frequency guidelines. If you do not use a case and do not hold the phone on your ear, keep it at least 2.5 cm away from your body, especially during data transfer.
-
Page 7: Technical Specifications
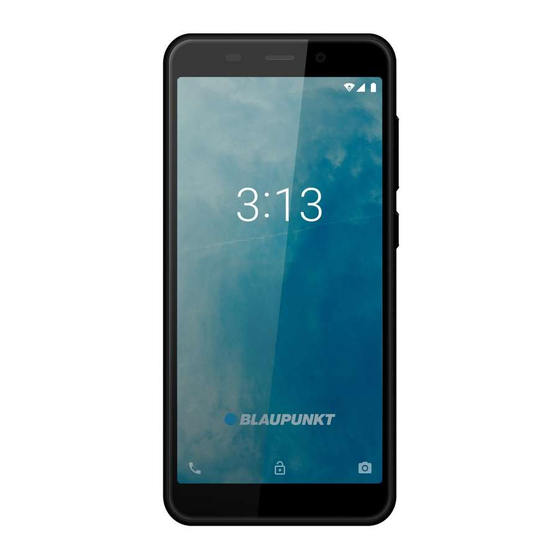
2. Technical Specifications Basic Features • Android 8.1 Go edition • 4.95” FWVGA+ display, 480x960 pixel • 5 MP front camera • 8 MP back camera • 1.28 GHz Quad Core processor • 1 GB RAM + 8 GB ROM memory •... - Page 8 Battery: • 2100 mAh; 3.8 V SAR value: • 0.319 W/Kg (Head) • 1.770 W/Kg (Body) The mains power socket used must be close to the charger/holder and easily accessible, so that it can be used as an on/off facility. Phone layout The following illustration of the phone is for informational purposes only;...
-
Page 9: Getting Started
3. Getting started 3.1 Insert the memory card and SIM card When subscribing to a service provider, they provides a SIM card to use the network. Your SIM card has a phone number and various services, but you can store data on it, for example. phone numbers. -
Page 10: Unlock The Device
press the OK button. If the device is turned off, remove the memory card and the SIM card. Do not try to remove the memory card while it is booting because the data may be corrupted. 3.3 Unlock the device To unlock the device, you may need the PIN (not the SIM card PIN), password, or pattern drawing. -
Page 11: Charging The Battery
4. Charging the battery ➢ Connect one end of the charger to the device. ➢ Connect the charger to the power outlet. ➢ Charging will start regardless of whether the device is turned on or not. ➢ When the phone is turned on, the movement of the battery icon in the upper right corner indicates charging. - Page 12 • Touch and hold: Touch and hold an item on the screen until an action occurs. • Drag: Touch and hold an item and move your finger on the screen until you reach the target position. • Swipe or slide: Quickly slide your finger across the surface of the screen, (without dragging an item).
-
Page 13: Using The Phone's Buttons
7. Using the Phone’s Buttons 7.1 Virtual buttons Button Description Apps: Opens the list of recent applications. Home: returns to Home screen. Pressed long opens the Google Assistant Back: returns to the previous screen you were working in 7.2 Menu icons Dialer Messaging Camera... -
Page 14: Manage Calls
8. Manage calls 8.1 Make calls ▪ Tap the icon on main menu or the home screen to dial the desired number. ▪ To dial an international number, touch and hold the 0 key to enter the Plus (+) symbol, and then enter the international country prefix, followed by the phone number. -
Page 15: The Home Screen
9. The Home screen When you sign in, the home screen opens. The Home screen is your starting point to access all the features on your phone. Touch the main menu icon at the bottom of the screen to view all installed applications. -
Page 16: Application Launcher
Close the notification bar: Drag the bottom of the notification panel to the top of the screen or simply press the back button. The notification panel will also close when responding to a notification. 9.2 Application Launcher Drag up the Main Menu arrow at the bottom of the screen to view all installed apps. -
Page 17: Connecting To The Internet
want to set up and confirm it by pressing the Wallpaper Setup at the top of the screen. You can set the selected image to the background of the Home screen, the Background screen of the Lock screen, or both. Creating folders: Easily group your apps on the Home screen by creating folders. -
Page 18: Access Internet Via Wi-Fi
listed by default, please contact your network provider for the same. To add any operator Access point Name, go to Settings Network & Internet > Mobile network > Access Point Name. 10.2 Access Internet via Wi-Fi Go to Settings > Network & Internet > Wi-Fi, then enable Wi-Fi. Next, select the WIFI connection listed under Wi-Fi networks. -
Page 19: Multimedia
When you edit a message, the default message type is SMS. As soon as you add an attachment or reach 10 SMS messages, the phone automatically switches to MMS. 11.2 Input methods The device contains various input modes. In Editing mode, press and hold [,] to display Input Options and to set the keyboard. -
Page 20: Music
12.3 Music To play music, on the Applications screen, select Play Music: In the Music Library, you can switch between the following categories: During music playback, you can scroll through the tracks forward, backward, pause playback, or press Options to add to the Playlist. During playback, you can use the following functions: Repeat Shuffle Play. -
Page 21: Contacts
13. Contacts On the Main Menu, select the Contacts icon. 1. To create a new contact, press the New contact icon or enter your Google Account synchronize your contacts. 2. Select a storage location and enter the contact details. 3. Save the contact. By opening the contact, the following functions are available: Add a contact to Favorites. -
Page 22: Phone
Additional features available on contacts: • Search: search between contacts. • Contacts to display: You can choose which accounts to be associated with which accounts. • Import / Export: Copy contacts between accounts. • Accounts: Manage Accounts. 14. Phone From the Main Menu or Standby screen, open the Phone icon to dial or make call settings. -
Page 23: Search
In this menu, you can set the ringtone, display format, quick answers, and Call settings below: Voicemail, Call divert, Call barring, More settings (Call Hold, Caller ID Settings). 15. Search Your device uses Google search on the Ready screen. Enter the search term in the search queue and press the search button: 16. -
Page 24: E-Mail
17.2 E-mail To set up an email account, go to Menu > Gmail, select the type of account you want to set up (Google, Outlook, Yahoo, Exchange, Other). Enter the email address and password, then follow the on-screen instructions. 17.3 File manager / Files Go In this menu, you can view, edit, or delete data stored on your device and SD card. - Page 25 o You can choose from the following network types: Only 2G, 3G only, 3G preferred (2G/3G). o Edit access points. o Manually search and choose a network. Data Usage ⚫ In this menu, you can review your data usage, and turn your mobile data on and off.
-
Page 26: Connected Devices
FM radio, GPS), but the multimedia features (Music, Video, Games) can still be used. 18.2 Connected devices Bluetooth ⚫ Your device supports Bluetooth, which allows you to send data wirelessly. Turn on the function. From the Available Devices list, select the device you want to exchange data with. -
Page 27: Battery
18.4 Battery We get information about the battery (current charge, last full upload time, Screen usage since full charge), and power management options (Standby intelligent power saving, Battery saver, Battery percentage, Adaptive brightness, Sleep). 18.5 Display Device Display and Display Settings: Brightness, Adaptive Brightness, Wallpaper, Sleep, Auto rotate screen, Font Size, Display Size 18.6 Sound... -
Page 28: Users And Accounts
SIM card lock ⚫ You can turn the PIN code on or off and change the SIM card PIN. 18.8 Users and Accounts You can add a new account (corporate, personal, other) to this device in this menu item. Select the account type from the list and follow the on-screen instructions. - Page 29 Do not short-circuit the battery. For example, a metallic object such as a coin, clip or pen may cause a short circuit. Do not leave the battery too hot (such as in a car in summer) or too cold (such as freezing), as it may reduce its service life. Try to store the battery between 15 °...
-
Page 30: Recycling Your Device
(electronic waste). 21. Declaration of Compliance The Blaupunkt SM02 model complies with the essential requirements and relevant provisions of the 2014/53/EU Directive and RoHS Directive 2011/65/EU. The Declaration of Conformity is available on our website. - Page 31 For more information on this product, visit our website at www.htmmobile.hu or www.blaupunkt.com. Google, Android and Google Play, is a trademark of Google LLC.
Need help?
Do you have a question about the SM 02 and is the answer not in the manual?
Questions and answers