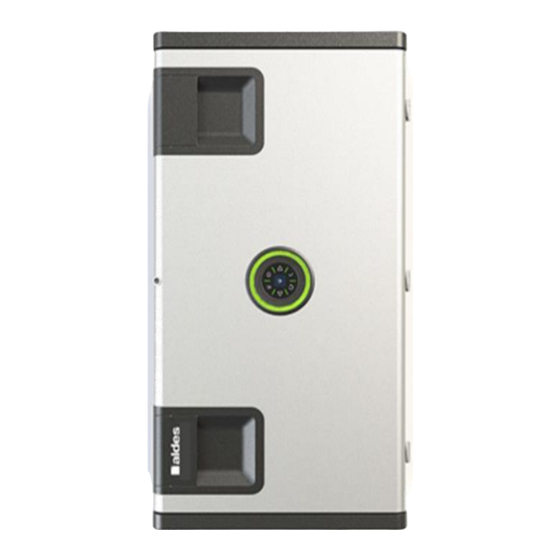
aldes InspirAIR Home Classic SC150 Manual
Air purification for individual dwellings
Hide thumbs
Also See for InspirAIR Home Classic SC150:
Table of Contents
Advertisement
Advertisement
Table of Contents

Related Manuals for aldes InspirAIR Home Classic SC150


Summary of Contents for aldes InspirAIR Home Classic SC150
- Page 1 Air purification Heat recovery ventilation ® InspirAIR Home Air purification for individual dwellings Description Intervention Exploded views and Parts Electrical wiring diagrams guide Maintenance instructions Repair guide Version - March 2019 Page 1 of 41...
- Page 2 Page 2 of 41...
-
Page 3: Table Of Contents
Contents General information ............................4 Related reference documents ........................4 General description ............................4 ® InspirAIR Home Heat recovery ventilation system ..................4 Typical example............................4 Product references and kit contents ......................5 Exploded view and parts list ........................6 Exploded view (Version 240/370 Premium right) .................. -
Page 4: General Information
1. General information 1.1 Related reference documents Document title Reference Installation and maintenance guide 11029515 Use and servicing manual 11027565 Classic keypad navigation manual 11027566 Premium keypad navigation manual 11027542 InspirAIR Home SC Modbus manual 11024829 2. General description 2.1 InspirAIR ®... -
Page 5: Product References And Kit Contents
2.3 Product references and kit contents ® ® ® InspirAIR Home InspirAIR Home InspirAIR Home Description Side Classic Modbus Premium InspirAIR® Home Right 11023453 11023457 11023455 SC150 Left 11023454 11023458 11023456 InspirAIR® Home Right 11023310 11023446 11023312 SC240 Left 11023311 11023447 11023313 Right... -
Page 6: Exploded View And Parts List
3. Exploded view and parts list 3.1 Exploded view (Version 240/370 Premium right) Page 6 of 41... -
Page 7: Exploded View (Version 150 Premium Right)
3.2 Exploded view (Version 150 Premium right) 3.3 Spare parts list Reference Description Reference Classic Modbus Premium S/E CONDENSATE TRAY 11100764 SC150 CONDENSATE TRAY SC240 11127734 RIGHT CONDENSATE TRAY SC240 11127733 LEFT CONDENSATE TRAY SC370 11127663 RIGHT CONDENSATE TRAY SC370 11127662 LEFT Page 7 of 41... - Page 8 Reference Description Reference Classic Modbus Premium 11100765 S/E ELEC. BOARD SC150 11100766 11127578 ELEC. BOARD SC240 11127579 11100521 ELEC. BOARD SC370 11100522 S/E CORE (V2) 11100771 SC150 / SC240/ SC370 S/E Clockwise Motor SC150 11100759 S/E Clockwise Motor SC240 11127750 S/E Clockwise Motor SC370 11127679 S/E ANTI-CLOCKWISE...
- Page 9 Reference Description Reference Classic Modbus Premium INSPIRAIR SC150 HEAT 11100772 EXCHANGER S/E HEAT EXCHANGER 11127719 SC240 S/E HEAT EXCHANGER 11127696 SC370 S/E BY-PASS SC150 11100763 S/E BY-PASS SC240 11127766 S/E BY-PASS SC370 11127695 11100768 S/E COVER SC150 11100769 11127759 COVER SC240 11127760 11127688 COVER SC370...
-
Page 10: Options & Accessories
3.4 Options & Accessories Filters: please refer to the user manual or the Aldes website ® ® ® InspirAIR InspirAIR InspirAIR Product Description Home SC150 Home SC240 Home SC370 "Blind" finishing trap 11023321 11023321 11023321 "Porthole" finishing trap 11023440... - Page 11 ® ® ® InspirAIR InspirAIR InspirAIR Product Description Home SC150 Home SC240 Home SC370 3-speed remote control 11023065 11023065 11023065 (wired) 4-speed remote control 11023334 11023334 11023334 (wired) Page 11 of 41...
-
Page 12: Electrical Wiring Diagrams
4. Electrical wiring diagrams Inspirair home SC150 Classic, SC240 Classic and SC370 Classic board: Temperature sensors By-pass Installer keypad Aldes Ibus Kitchen push button 0-10V input USB port Motor control 0-10 V (discharge) Motor control 0-10 V (fresh air) Motor supply... -
Page 13: Maintenance Instructions
5. Maintenance instructions • Check that the installation complies with the recommendations provided ("Installation Manual") • Check that the unit is configured to suit the installation ("Configuration Manual") • Check that all exhaust ducts and terminals are correctly connected. Flexible ducts must be taut and not crushed. -
Page 14: List Of Preventive Maintenance Operations Inspirair 240/370
5.1 List of preventive maintenance operations InspirAir 240/370 P-101 P-201 Cleaning heat Filter replacement exchanger Frequency: Frequency: Nbr.: Heat Nbr. Filters every nine 5min. every 3(+) exchanger months years List of steps: List of steps: - Step 4 - Step 1; 2; 3; 9; 10 5.2 List of curative maintenance operations InspirAir 240/370 C-201... -
Page 15: Operating Procedures Inspirair 240/370
C-205 C-206 Core replacement Reflash the regulator Standard tools Nbr.: Standard 30min Core 30min. and USB key + tools software List of steps: List of steps: - Step 1; 2; 11 - Step 12 5.3 Operating procedures Inspirair 240/370 Step No. 1 Switch the unit off - Switch the unit off using the electrical cabinet circuit breaker. - Page 16 Step No. 3 Remove the condensate tray Version without strap - Remove the two tray fastening screws Version with strap - Remove the holding strap - Remove the plug protecting the discharge of condensates - Unplug the condensate discharge pipe - Extract the tray Page 16 of 41...
- Page 17 Step No. 4 Change the filters (right-hand version here) - Open the access hatches to the filters and electronic box - Remove the filters - Insert the new filters - Watch out for the fitting direction for the pollen filters: the arrow must point in the same direction as the one of the box fan Step No.
- Page 18 Step No. 6 Replace the electronic board - Unplug all connectors from the board - Remove the two fastening screws - Fix the new board - Plug the connectors back in following the drawing in paragraph Step No. 7 Replace the by-pass (thermal cylinder) - Unplug the thermal cylinder connections - Remove the cylinder carefully...
- Page 19 Step No. 8 Change the sensor harness - Unplug the sensor connector from the electronic board - Remove the two sensors placed on the motors - Remove the two sensors near the electronic board and the by- pass or opposite side of the board if left-hand version.
- Page 20 Step No. 10 Clean the heat exchanger - Remove the impurities in the heat exchanger (cleaning with air advised) Step No. 11 Control core replacement - Remove the two foam pads on the inside of the door to access the fastening screws.
- Page 21 Step No. 12 Flash the control board with new software - Plug in the USB key containing the new running software - When the core displays "USB", select "UPDATING" and press the ✓ PREMIUM VERSION - When the keypad displays "EJT" you can safely remove the USB - When the keypad displays "FLS", ✓...
-
Page 22: List Of Preventive Maintenance Operations Inspirair 150
5.4 List of preventive maintenance operations InspirAir P-101 P-201 Cleaning the heat Filter replacement exchanger Frequency: Frequency: Nbr.: Heat Nbr. Filters every nine 5min. every 3(+) exchanger months years List of steps: List of steps: - Step 5 - Step 1; 2; 3; 4; 10; 11 5.5 List of curative maintenance operations InspirAir 150 C-201 C-202... - Page 23 C-205 C-206 Core replacement Reflash the regulator Standard tools Nbr.: Standard 30min Core 30min. and USB key + tools software List of steps: List of steps: - Step 1; 2; 3; 12 - Step 13 C-207 User keypad replacement (Classic version) Nbr.: Standard...
-
Page 24: Operating Procedures Inspirair 150
5.6 Operating procedures Inspirair 150 Step No. 1 Switch the unit off - Switch the unit off using the electrical cabinet circuit breaker. Step No. 2 Open the door Remove filter plugs - Remove the two fastening screws on the door giving access equipment's internal components... - Page 25 Step No. 4 Remove the condensate tray - Remove the central plate in advance (step 3) - Loosen the two screws Step No. 5 Change the filters (right-hand version here) - Open the access hatches to the filters electronic - Remove the filters - Insert the new filters - Watch out for the fitting direction for the pollen filters: the arrow...
- Page 26 Step No. 6 Replace a motor Caution: the two motors are different. - Remove the cover from the housing - Unplug the motor connections (extensions on the electronic board) - Remove the two screws + washers fixed to the PPE body to remove the motor sub-assembly - Remove the two screws fastening the motor to the metal...
- Page 27 Step No. 7 Replace the electronic board - Unplug all connectors from the board - Press the notches (using a flat screwdriver) to unclip the board from the support - Fix the new board - Plug the connectors back in following the drawing in paragraph 4 Step No.
- Page 28 Step No. 9 Change the sensor harness - Unplug the sensor connector from electronic board - Remove the blue (Discharge) and yellow (Fresh air, filter side) sensors - Remove the two sensors from the other side, red (Air supply) and green (recovery, at the By-pass) - Insert the new sensors and plug in the connector...
- Page 29 Step No. 11 Clean the heat exchanger - Remove the impurities in the heat exchanger (cleaning with air advised) Step No. 12 Control core replacement - Remove the fastening screws - Unclip the connector from the core - Reverse the steps to refit it Page 29 of 41...
- Page 30 Step No. 13 Flash the control board with new software - Plug in the USB key containing running software - When the core displays "USB", select "UPDATING" and press the ✓ PREMIUM VERSION - When the keypad displays "EJT" you can safely remove the USB - Select "FLS"...
- Page 31 Step No. 14 User keypad change (Classic version) - Remove the electronic board from its location - Disconnect the board's plug - Peel the keypad off carefully - Insert the new screen and reverse the steps to install it Page 31 of 41...
-
Page 32: Repair Guide
5.7 Repair guide Please refer to the relevant user manuals for handling the user keypad or control core. Code to access Expert level on the control core: 0405 List of error codes: Code Meaning Solution Exhaust motor-fan connection unplugged or - Refer to the breakdown flow chart on page 21 for motor out of service alarm 182... -
Page 33: Breakdown Flow Chart
5.5 Breakdown flow chart Page 33 of 41... - Page 34 Alarm 82 - The exhaust and supply motor-fans are stopped INSPIRAIR Problems: - Dutchwork - Supply temperature too low - Incorrect BCA wiring Phi safety MVE and Alarm 82 MVI stopped Check the ductwork (not plugged, no holes, etc.) Replace sensor harness Supply sensor ohm INSPIRAIR 240/370 = Step 1;...
- Page 35 Alarm 183 - Supply motor-fan is not working INSPIRAIR Problems : - Motor-fan connection unplugged - Motor out of service Supply motor-fan connection Alarms 183 Are the connections on the board correct? Make compliant (pushed in properly, not cut, etc.) Replace supply motor Check the power supply on the board Output voltage OK...
- Page 36 Alarm 182 - Exhaust motor-fan is not working INSPIRAIR Problems: - Motor-fan connection unplugged - Motor out of service Exhaust motor-fan connection Alarms 182 Are the connections on the board correct? (pushed in Make compliant properly, not cut, etc.) Replace exhaust motor Check the power supply on the Output voltage OK INSPIRAIR 240/370 = Etape 1;2;3;5 du guide...
- Page 37 Alarms 239, 240 241 and 251 - One or more sensors INSPIRAIR no longer working Problems: Incorrect position or incorrect wiring - Sensor out of service Alarms 239, 240, 241 and 251 Sensor fault Sensors Make positioned compliant correctly? Correct sensor Make harness compliant...
- Page 38 The measured airflow is less than the setpoint airflow INSPIRAIR Problems: - Electronic board - Leaking ductwork - Incorrect type of terminal Incoherence between setpoint and measurement Check the state of the ductwork (not leaking, connected properly, not plugged) Check the connection and cleanliness of clear tubes on the board Do the exhaust terminals match the type of control...
- Page 39 In addition to the RA number, request date of manufacturer Before October 2016 After October 2016 No problem, the new door can be Inappropriate hinges fitted as normal Aldes has modified the Replace door door hinges on the production line Replace door Version Creation date...
- Page 40 INSPIRAIR White bar on the unit core – Step 1,2; 11 of the intervention guide Problems: - Incorrect connection with the RJ connectors or RJ out of service - Electronic board out of service or loss of SOFTWARE Core problem Is the connection with the RJ conectors Make compliant, correct (board side and core side)?
- Page 41 Problem in pairing with Aldes Connect Box INSPIRAIR Problems: - Internet/Box connection - Board/modem communication Aldes Connect Box Red or pink light indicator (blocked in updating) communication error Check that the modem is connected properly to the board Pink light indicator...
Need help?
Do you have a question about the InspirAIR Home Classic SC150 and is the answer not in the manual?
Questions and answers