Advertisement
Quick Links
Owner's Manual & Safety Instructions
Save This Manual
operating, inspection, maintenance and cleaning procedures. Write the product's serial number in the
back of the manual (or month and year of purchase if product has no number). Keep this manual and the
receipt in a safe and dry place for future reference.
email our technical support at: productsupport@harborfreight.com
email our technical support at: productsupport@harborfreight.com
When unpacking, make sure that the product is intact
and undamaged. If any parts are missing or broken,
please call 1-888-866-5797 as soon as possible.
©
Copyright
2022 by Harbor Freight Tools
No portion of this manual or any artwork contained herein may be reproduced in
any shape or form without the express written consent of Harbor Freight Tools.
Diagrams within this manual may not be drawn proportionally. Due to continuing
improvements, actual product may differ slightly from the product described herein.
Tools required for assembly and service may not be included.
Keep this manual for the safety warnings and precautions, assembly,
Battery and charger sold separately
Battery and charger sold separately
Visit our website at: http://www.harborfreight.com
Visit our website at: http://www.harborfreight.com
®
. All rights reserved.
Read this material before using this product.
Failure to do so can result in serious injury.
SAVE THIS MANUAL.
22i
Advertisement

Related Manuals for Atlas 59172

Summary of Contents for Atlas 59172
- Page 1 Owner’s Manual & Safety Instructions Save This Manual Keep this manual for the safety warnings and precautions, assembly, operating, inspection, maintenance and cleaning procedures. Write the product’s serial number in the back of the manual (or month and year of purchase if product has no number). Keep this manual and the receipt in a safe and dry place for future reference.
-
Page 2: Table Of Contents
14. Store idle appliances indoors - When not in use, gloves. Use face or dust mask if appliances should be stored indoors in dry, and operation is dusty. high or locked-up place - out of reach of children. Page 2 For technical questions, please call 1-888-866-5797. Item 59172... - Page 3 7. Do not use a battery pack or power tool that is Battery Pack while charging. damaged or modified. Damaged or modified batteries may exhibit unpredictable behavior resulting in fire, explosion or risk of injury. Item 59172 For technical questions, please call 1-888-866-5797. Page 3...
- Page 4 Edger if any part is cracked or damaged. 2. Do not use in rain, snow, sprinklers, or wet grass. 5. Do not use appliance for other than intended use. Do not rinse off the Edger. Page 4 For technical questions, please call 1-888-866-5797. Item 59172...
- Page 5 Read the manual before set-up and/or use. Keep hands and feet WARNING marking away from the blade. concerning Risk of Fire. Do not cover Charger ventilation ducts. Charge on fireproof surface only. Item 59172 For technical questions, please call 1-888-866-5797. Page 5...
-
Page 6: Specifications
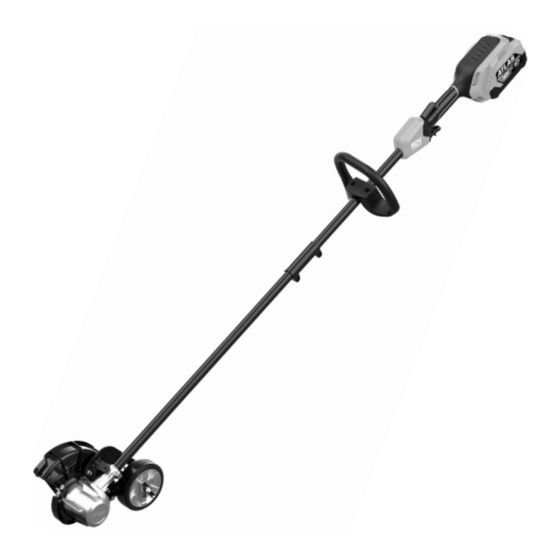
Specifications Battery Type Atlas Li-Ion 57014 or 58958 (sold separately) Charger Type Atlas Li-ion 56993 or 56997 (sold separately) No Load Speed 7000 RPM Maximum Cutting Depth 1.75" Setup - Before use: read the entire iMpOrtant SaFety inFOrMatiOn section at the beginning of this manual including all text under subheadings therein before set up or use of this product. - Page 7 3. Align the Release Button with the Positioning Detent and slide the Upper and Lower Shafts together. 4. Turn the Lower Shaft until the Release Button locks into the Positioning Detent. coupler release Button positioning Lower Detent Shaft Item 59172 For technical questions, please call 1-888-866-5797. Page 7...
- Page 8 Butterfly adjustment; correct if necessary. Knob 2. With the Edger held in the normal operating position, adjust the cut depth to where the Blade barely touches the ground. Wheel Blade Page 8 For technical questions, please call 1-888-866-5797. Item 59172...
-
Page 9: Operation
Guard of the debris. 7. When finished, to prevent accidents, remove Battery Pack, then clean and store push Button tool according to “Cleaning, Maintenance, Lockout and Lubrication” on page 10. trigger trigger Lock Item 59172 For technical questions, please call 1-888-866-5797. Page 9... -
Page 10: Maintenance
2. Remove the Nut cLOcKWiSe with the Washer included Wrench, then remove the Washer. Blade 3. Replace the Blade, Washer, and Nut. 4. Securely tighten the Nut cOuntercLOcKWiSe. Blade Lock Page 10 For technical questions, please call 1-888-866-5797. Item 59172... - Page 11 Hex Screw Flat Washer Guard projection 2. Replace the Rubber Flap; align the Slot with the Flap Position Guide and insert the Rubber Flap into the guard. Flap position Slot Guide Item 59172 For technical questions, please call 1-888-866-5797. Page 11...
-
Page 12: Parts List And Diagram
Self-Tapping Screw Flat Washer Blade Rubber Flap Blade Washer Guard Blade Nut Hex Socket Pan Head Screw Hex Key Spring Washer Blade Lock Rod Hex Socket Pan Head Screw Wrench Page 12 For technical questions, please call 1-888-866-5797. Item 59172... - Page 13 Diagram Item 59172 For technical questions, please call 1-888-866-5797. Page 13...
- Page 14 Some parts are listed and shown for illustration purposes only, and are not available individually as replacement parts. Specify UPC 193175458070 when ordering parts. Page 14 For technical questions, please call 1-888-866-5797. Item 59172...
-
Page 15: Warranty
This warranty gives you specific legal rights and you may also have other rights which vary from state to state. Item 59172 For technical questions, please call 1-888-866-5797. - Page 16 26677 agoura road • calabasas, ca 91302 • 1-888-866-5797...
Need help?
Do you have a question about the 59172 and is the answer not in the manual?
Questions and answers