Table of Contents
Advertisement
Quick Links
Advertisement
Table of Contents

Related Manuals for Z-World RabbitCore 2000


Summary of Contents for Z-World RabbitCore 2000
- Page 1 RabbitCore 2000 C-Programmable Core Module Getting Started 001004 - C...
- Page 2 RabbitCore 2000 Getting Started Part Number 019-0080 • 001004 - C • Printed in U.S.A. Copyright © 2000 Z-World, Inc. • All rights reserved. Z-World, Inc. reserves the right to make changes and improvements to its products with- out providing notice. Trademarks •...
-
Page 3: Table Of Contents
Table of Contents About This Manual 1. Installing Dynamic C ......................1 1.1 Requirements..........................2 1.2 Installation...........................2 1.3 Desktop Icons..........................6 2. Introduction to Dynamic C .....................7 2.1 The Nature of Dynamic C ......................8 2.1.1 Speed..........................8 2.2 Dynamic C Libraries ........................9 2.3 Using Dynamic C ........................10 2.4 Upgrading Dynamic C ......................11 2.4.1 Workarounds ......................11 2.4.2 Upgrades ........................12... - Page 4 RabbitCore 2000...
-
Page 5: About This Manual
2000 based on the Rabbit microprocessor. The Rabbit 2000 microprocessor is a new high-performance 8-bit microprocessor developed by Rabbit Semiconductor, a com- pany affiliated with Z-World. The Rabbit 2000 can handle C language applications of approximately 1 megabyte (50,000+ C statements). - Page 6 • Programming cable. The programming cable is used to connect your PC serial port directly to the RabbitCore 2000 to write and debug C programs that run on the Rabbit 2000.
-
Page 7: Installing Dynamicc
1. I NSTALLING YNAMIC Getting Started... -
Page 8: Requirements
Insert the CD in the CD-ROM disk drive on your PC. As long as auto-install is enabled, the CD installation will begin automatically. If not, issue the Windows Start > Run... command and type the following. The installation program will then guide you through the installation process described below. RabbitCore 2000... - Page 9 Click the Next > button to continue to the license agreement. After reading and agreeing to the terms of the license, continue with the button to Next > select the destination folder where the files will be installed. Click the button to continue the installation.
- Page 10 After choosing the installation, click the button to continue. The files selected for Next > installation are check-marked. Now select the PC COM port, usually, COM1. Click the button to continue. Next > RabbitCore 2000...
- Page 11 A status indicator shows the progress of the installation. Before the installation is complete, the installation wizard will ask you what icons to dis- play on your PC desktop. Separate icons are available for Dynamic C itself and for the manuals and other documents.
-
Page 12: Desktop Icons
Dynamic C and the documenta- tion. The default file locations for a typical installation are shown. to start Dynamic C • C:\DCRABBIT_652\DcRab652.exe to display the documentation screen. • C:\DCRABBIT_652\Docs\default RabbitCore 2000... -
Page 13: Introduction To Dynamicc
2. I NTRODUCTION TO YNAMIC Dynamic C is an integrated development system for writing embedded software. It runs on an IBM-compatible PC and is designed for use with Z-World controllers and other con- trollers based on the Rabbit microprocessor. Getting Started... -
Page 14: The Nature Of Dynamic C
Dynamic C compiles directly to memory. Functions and libraries are compiled and linked and downloaded on-the-fly. On a fast PC, Dynamic C might load 30,000 bytes of code in 5 seconds at a baud rate of 115,200 bps. RabbitCore 2000... -
Page 15: Dynamic C Libraries
2.2 Dynamic C Libraries With Dynamic C running, click > , and select . The following list of File Open Dynamic C libraries will be displayed. Let’s examine the libraries. —libraries specific to running a BIOS, apply to all controllers. Although the •... -
Page 16: Using Dynamic C
Chapter 4., “Sample Programs,” provides sample programs and explains how to use the basic features of Dynamic C. More complete information on Dynamic C is provided in the Dynamic C (Rabbit Version) User’s Manual. Functions specific to the RabbitCore 2000 are described in the Rabbit- Core 2000 User’s Manual. RabbitCore 2000... -
Page 17: Upgrading Dynamic C
2.4 Upgrading Dynamic C Dynamic C upgrades and patches are available from time to time. An upgrade may either enhance the features and libraries, or it may focus on bug fixes. Check the Web sites www.zworld.com/support/supportcenter.html /support.html www.rabbitsemiconductor.com for the latest updates, patches, workarounds, and bug fixes. 2.4.1 Workarounds Workarounds describe problems and recommended ways around them. -
Page 18: Upgrades
The default installation of an upgrade is to install the new release of Dynamic C in a direc- tory (folder) different from that of the original installation. Z-World recommends using a different directory so that you can verify the operation of the new release without over- writing the previous release. -
Page 19: Hardware Connections
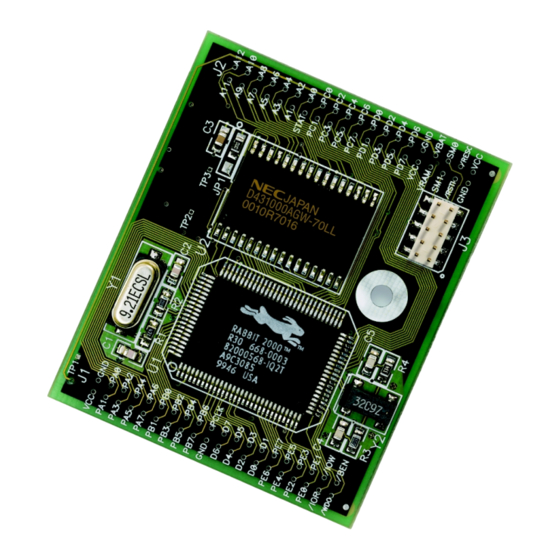
Before proceeding with the hardware connections described in this chapter, locate the fol- lowing items. • RabbitCore 2000 (model RCM2020) • RCM2000 Prototyping Board • Power supply (a 12 V, 500 mA power supply is included with Development Kits sold for the North American market) •... -
Page 20: Connections
1. Attach RabbitCore 2000 to Prototyping Board Turn the RabbitCore 2000 so that the Rabbit 2000 microprocessor is facing as shown below. Plug RabbitCore 2000 Headers J1 and J2 into the sockets of headers J1 and J3 on the Prototyping Board. - Page 21 Plug in the wall transformer. The power LED on the Prototyping Board should light up. The RabbitCore 2000 and the Prototyping Board are now ready to be used. A RESET button is provided on the Prototyping Board to allow a hardware reset.
-
Page 22: Starting Dynamic C
Dynamic C and any are using COM1, then Dynamic C should future upgrades. detect the RabbitCore 2000 and go through a sequence of steps to cold-boot the RabbitCore 2000 and to compile the BIOS. If an error message appears, you have probably connected to a different PC serial port such as COM2, COM3, or COM4. -
Page 23: Where Do I Go From Here
Rabbit Semiconductor Technical Support at (530)757-8400. If the sample program ran fine, you are now ready to go on to other sample programs in the next chapter or to the RabbitCore 2000 User’s Manual (click the documentation icon on your PC desktop or on in the Dynamic C directory). - Page 24 RabbitCore 2000...
-
Page 25: Sample Programs
4. S AMPLE ROGRAMS Getting Started... - Page 26 Each sample program has comments that describe the purpose and function of the program. Before running any of these sample program, make sure that your RabbitCore 2000 is con- nected to the Prototyping Board and to your PC as described in the RabbitCore 2000 Get- ting Started manual.
-
Page 27: Running Sample Program Flashled.c
4.1 Running Sample Program FLASHLED.C This sample program will be used to illustrate some of the functions of Dynamic C. First, open the file , which is in the folder. The FLASHLED.C Samples/CoreModule program will appear in a window, as shown in Figure 3 below (minus some comments). Use the mouse to place the cursor on the function name in the program and type WrPortI... -
Page 28: Single-Stepping
• The programming cable must be connected to the RabbitCore 2000. (The colored wire on the programming cable is closest to pin 1 on header J3 on the RabbitCore 2000, as shown in Figure 2.) The other end of the programming cable must be connected to the PC serial port. -
Page 29: Editing The Program
To remove the break point, type or select Toggle Breakpoint on the menu. To continue program execution, type or select from the menu. Now the LED should be flashing again since the program is running at full speed. You can set break points while the program is running by positioning the cursor to a state- ment and using the key. -
Page 30: Cooperative Multitasking
Dynamic C (Rabbit Version) User’s Manual. The sample program has two independent tasks. The first task flashes LED FLASHLEDS2.C DS2 2.5 times a second. The second task flashes DS3 every 1.5 seconds. RabbitCore 2000... - Page 31 #define DS2 0 // predefine for LED DS2 #define DS3 1 // predefine for LED DS3 This cofunction flashes LED on for ontime, then off for offtime cofunc flashled[4](int led, int ontime, int offtime) { for(;;) { waitfor(DelayMs(ontime)); // on delay WrPortI(PADR,&PADRShadow,(1<<led)|PADR);...
-
Page 32: Advantages Of Cooperative Multitasking
Our solution for that is called slicing, which is further described in the Dynamic C (Rabbit Version) User’s Manual. RabbitCore 2000... - Page 33 CHEMATICS Getting Started...
Need help?
Do you have a question about the RabbitCore 2000 and is the answer not in the manual?
Questions and answers