Advertisement
Available languages
Available languages
Table of Contents
Instruction Manual
FDL-300R-K01
THANK YOU FOR SELECTING THE NIGHTSTICK FDL-300R-K01
TACTICAL FIRE LIGHT W/ MULTI-ANGLE HELMET MOUNT!
PLEASE SAVE THESE INSTRUCTIONS
Please read these instructions before using your Nightstick FDL-
300R-K01 Tactical Fire Light w/ Multi-Angle Helmet Mount. They include
important assembly and operating instructions.
PACKAGE CONTENTS
1 – FDL-300R Tactical Fire Light
1 – NS-HMC1 Multi-Angle Helmet Mount
2 – CR-123 Lithium Batteries
1 – 5/16" - 18 x 1/4" Light Mounting Allen Set Screw (installed in mount)
2 – 5/16" - 18 x 1/4" Brim Mounting Allen Set Screws (installed in mount)
– for Fire Helmets
2 – 5/16" - 18 x 3/8" Brim Mounting Allen Set Screws (loose) – for Hard
Hats
1 – 5/32" Allen Wrench
APPLICATION
The FDL-300R-K01 Tactical Fire Light w/ Multi-Angle Helmet Mount is a
complete system for attaching the Tactical Fire Light to any Fire Helmet or
Hard Hat.
The Tactical Fire Light is rated at 180 Lumens and has a tight long-throw
beam that is distance rated at 190 meters. The light is IP-X7 waterproof and
is drop rated at 2 meters.
The Multi-Angle Helmet Mount can be attached to either side of virtually
any Fire Helmet or Hard Hat and provides 140 degrees of adjustability. This
adjustability allows the user to best position the light for purposes of providing
clearance around face shields, goggles or other potential obstructions.
Bayco Products, Inc. • 640 South Sanden Blvd. • Wylie, TX 75098 • 1-800-233-2155 • 1-469-326-9400 • www.mynightstick.com
INSTALLING BATTERIES INTO THE TACTICAL FIRE LIGHT
Image 1
To install the included CR-123 Lithium Batteries in the Tactical Fire Light,
begin by unscrewing and removing the tail-cap switch. (Image 1)
Insert both batteries into the handle of the light with the positive terminal
ends being inserted fi rst. (Image 2)
Re-install the tail-cap switch, being careful not to cross-thread the tail-cap.
(Image 3)
Tighten the tail-cap switch completely and then test the operation of the
light (see OPERATION below).
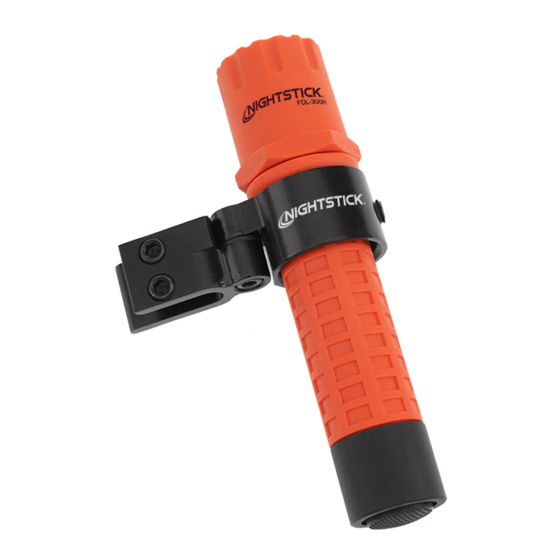
INSTALLING THE LIGHT INTO THE MULTI-ANGLE MOUNT
Image 4
Begin by deciding which side of the helmet the FDL-300R-K01 Tactical
Fire Light w/ Multi-Angle Helmet Mount is to be attached. This will determine
the proper orientation of the light in the mount. Additionally check that the
fi nal location on the helmet does not interfere with the normal operation of
face shields, goggles, etc.
Remove the 5/16" - 18 x 1/4" Light Mounting Allen Set Screw from the
Multi-Angle Helmet Mount and slip the Tactical Fire Light into the mount.
(Image 4)
NOTE: The Multi-Angle Helmet Mount may be positioned anywhere
along the length of the Tactical Fire Light. (Image 5)
Once the light is in the proper position, re-install the Light Mounting Allen
Set Screw and tighten, securing the Tactical Fire Light in place. (Image 6)
CAUTION: Be careful when tightening the Allen Set Screw. Do not
over-tighten. Doing so may damage the handle of the light. The Allen
Set Screw should only be tightened enough to prevent the light from
coming loose. Over time this screw may come loose. Periodically
check and re-tighten as needed.
SUGGESTION: Application of a thread locking solution (such as Loctite®
Threadlocker Blue) may be applied to secure the Allen Set Screw. Do not
use the "red" version of this product as it is designed for a more permanent
installation and would make it diffi cult to remove the Allen Set Screw in the
future.
INSTALLING THE FDL-300R-K01 ON TO THE HELMET
Image 7
INS-FDL-300R-K01-15
Image 2
Image 3
Image 5
Image 6
Image 8
Image 9
Advertisement
Table of Contents

Related Manuals for NightStick FDL-300R-K01


Summary of Contents for NightStick FDL-300R-K01
- Page 1 Image 5 Image 6 Begin by deciding which side of the helmet the FDL-300R-K01 Tactical Fire Light w/ Multi-Angle Helmet Mount is to be attached. This will determine the proper orientation of the light in the mount. Additionally check that the fi...
-
Page 2: Operation
To adjust the angle, simply loosen the Angle Lock Socket Head Cap Screw using the included 5/32” Allen Wrench. (Image 11) Please record your FDL-300R-K01 product information here for use with any warranty claim. Select the angle and then tighten the Angle Lock Socket Head Cap Screw securely. -
Page 3: Mise En Marche
COMPOSANTES AVERTISSEMENT : Soyez prudent lorsque vous serrez l’ensemble de La lampe de poche FDL-300R-K01 à voyant lumineux tactique et vis à têtes creuses. Ne pas trop serrer car vous risquez d’abîmer le dispositif pour casque à angles multiples est équipé d’un système complet manche de la lampe de poche. -
Page 4: Contenido Del Paquete
Comience por decidir de qué lado del casco de la Linterna Tactical Fire problèmes ou questionnements relatifs à la garantie. FDL-300R-K01 con Montura de Casco Multi-ángulo se va a unir. Esto va a ÉTENDUE DU TRAVAILCOUVERT PAR LA GARANTIE determinar la orientación correcta de la luz en la montura. Además revise que la ubicación fi... -
Page 5: Operación
REGISTRE SU INFORMACIÓN DE GARANTÍA OPERACIÓN Por favor registre la información de su producto FDL-300R-K01 aquí La Linterna Tactical Fire tiene dos modos de luz: momentáneos y para usar con cualquier reclamo de la garantía. encendido constante. La linterna tiene un solo interruptor de cola que Fecha de Compra __________________________________________ proporciona acceso a todos los modos.
Need help?
Do you have a question about the FDL-300R-K01 and is the answer not in the manual?
Questions and answers