
Subscribe to Our Youtube Channel
Related Manuals for Adaptive BETAbrite Director


Summary of Contents for Adaptive BETAbrite Director
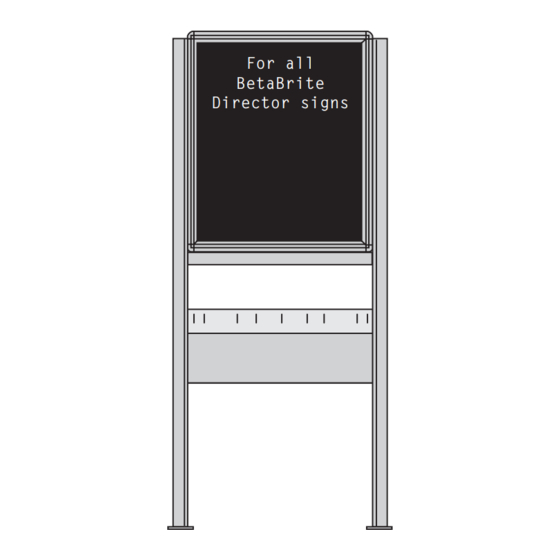
- Page 1 B E TA br it e ™ Di r ec to r Pro g ra m m i n g M an ual For all BetaBrite Director signs © 1998-2001 Adaptive Micro Systems Form No. 9702-2002B 2/9/01...
- Page 2 Copyright © 1998-2001 Adaptive Micro Systems, Inc. All rights reserved. The distinctive appearance of these products is a Trade Dress of Adaptive Micro Systems, Inc. The following are trademarks of Adaptive Micro Systems: Adaptive, Alpha, AlphaNet plus,...
-
Page 3: Table Of Contents
Assembly parts ..................5 How to mount a Director on a wall............6 How to mount a Director on a stand ............7 How to attach the brochure rack to a BetaBrite Director (optional) ..11 Connecting signs to a computer..............13 Sending messages to the Director..............14 Basic sign operation..............15... - Page 4 3. Fill out the Return Merchandise Authorization (RMA) Form on the following page. To obtain warranty service, this form including the RMA number must accompany the product. 4. Follow return instructions on the RMA form to return to Adaptive Micro Systems, Inc.
- Page 5 Any damage to the product during shipment is the responsibility of the freight company or the owner of the sign. 4. Ship the package, postage/shipping prepaid to: Adaptive Micro Systems, Inc. Attn: RMA No. ___________ 7840 North 86th Street Milwaukee, WI 53224 PLEASE WRITE THE RMA NUMBER ON THE LABEL OF THE SHIPPING BOX.
-
Page 7: Installation And Setup
BetaBrite Director User Manual Installation and setup The Director is an indoor LED sign that can display up to eight 16-character rows of text. The sign is capable of storing up to 26 “pages”, or screens, of text information. The sign can either be hung from a wall or mounted on a stand. -
Page 8: Technical Specifications
BetaBrite Director User Manual Technical specifications Power 115/230 VAC, 150 W, 50/60 Hz 22.5L x 3.12D x 27H (57.2L x 7.9D x 68.6H cm) without brochure rack and stand Dimensions 27L x 18D x 61H (68.6L x 45.7D x 154.9H cm) with brochure rack and stand 31.1 lbs. -
Page 9: Assembling The Director
BetaBrite Director User Manual Assembling the Director WARNING Hazardous voltage. Contact with high voltage may cause death or serious injury. Always disconnect power to sign prior to servicing. WARNING Fasten sign to floor. Otherwise sign may tip over causing serious injury or death. - Page 10 BetaBrite Director User Manual Setting the RS232/RS485 jumper Using the directions that follow, be sure the jumper in the Director is set as needed: To connect a sign to… set the jumper to… one computer RS232 a sign network RS485 1.
-
Page 11: Assembly Parts
BetaBrite Director User Manual Assembly parts These are in addition to the primary components shown on page 1. These are not drawn to scale. Part Quantity Component Wall-mounting bracket, end view and face view Crossbar Hex (Allen) wrench: 1 smaller and 1 larger Safety stop block, end view and face view 3/8”... -
Page 12: How To Mount A Director On A Wall
BetaBrite Director User Manual How to mount a Director on a wall Make sure a mounting bracket is attached to the back of the sign: Mounting bracket, factory-installed Electric socket Attach the wall-mounting bracket (supplied) to a wall. Then hang the sign from this bracket. -
Page 13: How To Mount A Director On A Stand
BetaBrite Director User Manual How to mount a Director on a stand Lay the two mounting poles for the stand on a flat surface. Slide the crossbar down the channels on the mounting poles. Crossbar, long ends pointed down Channels... - Page 14 BetaBrite Director User Manual Use the smaller Allen/hex wrench to tighten the crossbar to each mounting pole with the four pre-installed set screws. Then use the same wrench to tighten each safety stop with its two set screws, also pre-installed in each: Safety stop 25.5...
- Page 15 BetaBrite Director User Manual Place each of the sign’s mounting brackets in a channel on each mounting pole. Then slide the sign down until it rests on the safety stops. Finally, attach the post caps onto the tops of the mounting poles using two of the 3/8”...
- Page 16 BetaBrite Director User Manual Fasten the sign to the floor using four bolts or screws (not supplied) in the locations shown below: Top view of sign Plug the power cord into the back of the sign. Route the cord from the sign in such a way that it is not in an area where people will be walking.
-
Page 17: How To Attach The Brochure Rack To A Betabrite Director (Optional)
BetaBrite Director User Manual How to attach the brochure rack to a BetaBrite Director (optional) Using the larger Allen/hex wrench, attach the four shoulder bolts to the legs of the sign: Attach two shoulder bolts on each leg. Slip the plastic brochure rack over the four shoulder bolts. Then push the brochure rack down to secure it in place. - Page 18 BetaBrite Director User Manual Use the supplied plastic dividers as needed in the brochure rack to adjust for different sizes of literature. Dividers Installation and setup: Assembling the Director...
-
Page 19: Connecting Signs To A Computer
Connecting signs to a computer Connect the sign to a computer (as follows) in order to send messages to the sign using that computer running Adaptive messaging software. For a list of valid software, see “Sending messages to the Director” on page 14. -
Page 20: Sending Messages To The Director
BetaBrite Director User Manual Sending messages to the Director Messages can be sent to the Director signs with either of two methods. One way is to use messaging software: • BetaBrite Messaging Software • Alpha Messaging Software • AlphaNET plus •... -
Page 21: Basic Sign Operation
BetaBrite Director User Manual Basic sign operation Using the Remote Control The Remote Control is a hand-held keyboard which emits infrared light and is used to program a sign. The Remote Control needs four AAA batteries to operate. They should be installed in the back of the control. - Page 22 BetaBrite Director User Manual To use the Remote Control: • Stand at least 5 feet and no more than 30 feet from the sign. • Make sure nothing reflective is in front of the sign. (Light from the sign’s display that is reflected back can interfere with the Remote Control.)
-
Page 23: Turning A Sign On And Off
BetaBrite Director User Manual Turning a sign on and off When you plug in the sign’s power supply, the sign starts up automatically, and unplugging the power supply turns the sign off. However, instead of unplugging a sign, there is another way to turn a... -
Page 24: Setting A Sign's Time And Date
BetaBrite Director User Manual Setting a sign’s time and date Once set, a sign will remember the time and date for up to 30 days even if the sign is unplugged or interrupted by a power loss. This is because it is equipped with a battery-backed real-time clock. - Page 25 BetaBrite Director User Manual Press D to set the day of the week. Press H to set the hour. S E T W / D , H & M Press M to set the minute. TUESDAY 3:54 PM NOTE: Press SELECT, to change from 12-hour (AM/PM) to 24-hour mode (0 - 23).
-
Page 26: Clearing A Sign's Memory
BetaBrite Director User Manual Clearing a sign’s memory NOTE: Clearing a sign’s memory erases the password and all messages that have been programmed into the sign. Step When you do this... You see this... PROGRAM MODE THEN Press PROGRAM. PAGE A... -
Page 27: Setting A Sign's Password
BetaBrite Director User Manual Setting a sign’s password You can set a personal password to protect your messages from tampering by others. NOTE: DON’T FORGET YOUR PASSWORD! If you do, you won’t be able to operate the sign. However, if you do forget the password, see “What to do when you forget a sign’s password”... - Page 28 BetaBrite Director User Manual E N T E R 6 C H A R Press Y to set a password. * * * * * * Type a 6-character password. (Only asterisks will appear on the sign as you type.)
-
Page 29: What To Do When You Forget A Sign's Password
BetaBrite Director User Manual What to do when you forget a sign’s password Step When you do this... You see this... E N T E R P A S S W O R D Press PROGRAM. * * * * * *... -
Page 30: Using The Remote Control's Sound Control
BetaBrite Director User Manual Using the Remote Control’s sound control Normally, whenever you press a Remote Control key, the sign will beep. This lets you know that an action has been performed. To turn this feature off (or on again), hold down SHIFT and press RUN. - Page 31 BetaBrite Director User Manual SERIAL ADDRESS = Type a number, like 10. NOTE: A serial address is actually a number from 0 to 255 in hexadecimal (00 to FF). However, in typical use entering a number from 00 to 99 is fine.
-
Page 32: Beginning Text Messaging
BetaBrite Director User Manual Beginning text messaging This section shows you how to start creating messages on your sign. Example 1 — Using upper and lowercase text In this first example, you’ll display the following text on the sign: Your first... - Page 33 BetaBrite Director User Manual Type THIS IS YOUR THIS IS YOUR NOTE: If you make a mistake while typing, press BACK to erase a letter. Press RETURN to start on THIS IS YOUR the next line. Type FIRST MESSAGE. THIS IS YOUR...
- Page 34 BetaBrite Director User Manual PAGE B Your second message will be created in PAGE B. MODE: [AUT] SPEED:[SP4] (Your first message is still in PAGE A. You can create up to 26 separate Press B to switch to PAGE messages using pages A through Z.)
- Page 35 BetaBrite Director User Manual This is your Press RETURN to go to the next line. Press the round COLOR This is your key until the cursor color stays red. This is your Type second message. All these characters in second message.
- Page 36 BetaBrite Director User Manual Here’s how to insert a blank line between the two sentences above: This is your second message. The C PS key Hold down SHIFT and press E to move the cursor changes between up one line.
-
Page 37: Example 2 - Displaying Messages In Page Name Order (A, B, C, Etc.)
BetaBrite Director User Manual Example 2 — Displaying messages in PAGE name order (A, B, C, etc.) Once you’ve programmed messages into the sign, you may want to set the order or sequence in which messages appear. This method will display messages by their PAGE name (A, B, C, etc.) in the order you set... - Page 38 BetaBrite Director User Manual This will be the order (PAGE B, then PAGE A) Press B and then A in which messages are displayed on the sign. This is your second message. The CAPS key changes between PAGE B message upper &...
-
Page 39: Example 3 - Displaying Messages In Time Order
BetaBrite Director User Manual Example 3 — Displaying messages in time order In Example 2, you set the order of messages by PAGE letter (A, B, C, etc.). However, that method could not specify an exact time when a message would appear. - Page 40 BetaBrite Director User Manual Press RUN twice. PAGE B MODE: [WPUP] Then press PROGRAM. SPEED:[SP4] PAGE A Press A. MODE: [AUT] SPEED:[SP4] Hold down SHIFT and TEXT A ON press 9 for TIME. ALWAYS First we’ll set the ON time — or when this message will start on the sign:...
- Page 41 BetaBrite Director User Manual This is your second message. This message The CAPS key should appear continuously. changes between upper & lower case. Press RUN twice. This message should only THIS IS YOUR appear between FIRST MESSAGE. the ON and OFF times you set.
-
Page 42: Example 4 - Changing The Text Of An Existing Message
BetaBrite Director User Manual Example 4 — Changing the text of an existing message After typing in a message, you may want to add or remove text from it. The following is an example of this common situation: Step When you do this... - Page 43 BetaBrite Director User Manual How to move the cursor: SHIFT + E SHIFT + D SHIFT + F SHIFT + C Hold down SHIFT and press C to move the cursor down one line. THIS IS YOUR IRST MESSAGE. The cursor should be blinking over the first letter on the...
- Page 44 BetaBrite Director User Manual Finish the word VERY by THIS IS YOUR typing RY and a space. VERY IRST Hold down SHIFT and THIS IS YOUR press C to move down one VERY FIRST line. Then hold down SHIFT and press D until the cursor is at the start of the line.
-
Page 45: Example 5 - Deleting Messages
BetaBrite Director User Manual Example 5 — Deleting messages To delete all the messages in a sign, see “Clearing a sign’s memory” on page 20. However, if you only want to delete selected messages, then use the method shown in this example. -
Page 46: Advanced Text Messaging
BetaBrite Director User Manual Advanced text messaging Before attempting the following, make sure you’re familiar with the previous examples in the “Beginning text messaging” section of this manual. Example 6 — Displaying the time and date Step When you do this... - Page 47 BetaBrite Director User Manual Change the MODE to Wipe PAGE A Down. MODE: [WPDN] Use SHIFT + 2 to change the MODE. SPEED:[SP5] Set the message transition speed to its fastest — SP5. Use SHIFT + 8 to change the SPEED.
- Page 48 BetaBrite Director User Manual Now enter the rest of the PAGE A message: Press RETURN twice to skip down two lines. APR. 17, 2001 1:37 PM Press COLOR until the cursor always blinks red. Room Company Using CAPS when necessary, type Room, a...
- Page 49 BetaBrite Director User Manual Press RUN. Press SELECT until RUN appears. Type A and then B to set the order in which the two messages will appear. APR. 17, 2001 1:37 PM Room Company PAGE A E101 Applied Eng message...
-
Page 50: Example 7 - Using The Flash Mode To Highlight Information
BetaBrite Director User Manual Example 7 — Using the FLASH mode to highlight information FLASH is a mode that you shouldn’t overuse. However, it is very handy if you want to call attention to a single item, like a time or room... - Page 51 BetaBrite Director User Manual APR. 17, 2001 1:37 PM Room Company E101 Applied Eng Press A. E200 United Wire ACME Tool W130 Adv Maint APR. 17, 2001 1:37 PM Move the cursor here. Room Company Hold down SHIFT and E101 Applied Eng press C until the cursor is over the letter W in W20.
- Page 52 BetaBrite Director User Manual APR. 17, 2001 1:37 PM Room Company Move the cursor to in front E101 Applied Eng of ACME Tool. E200 United Wire Hold down SHIFT and ACME Tool press F to move the W130 Adv Maint cursor.
-
Page 53: Example 8 - Using Fonts And Colors
BetaBrite Director User Manual Example 8 — Using fonts and colors Fonts are the way characters are displayed on a sign. In the world of printing and publishing, fonts are given names like Times or Helvetica and qualities like serif or sans serif, font size (like 12 point or 14 point), bold or italic, etc. - Page 54 BetaBrite Director User Manual Press ADV. WELCOME! Hernia Movers “The potentate Type in the following of totin’ message. freight” WELCOME! Hernia Movers Pressing FONT Move the cursor in front of “ T H E P O T E N T A T E changes the entire line the “The potentate...
- Page 55 BetaBrite Director User Manual WELCOME! Press FONT again to make Hernia Movers the whole line the same “ T H E P O T E N T A T E font. O F T O T I N ’ Then position the cursor in F R E I G H T ”...
- Page 56 BetaBrite Director User Manual COLOR 0 should be red Type COLOR 0 to start. When displayed COLOR 0 in the message, it will Then press RETURN. cycle through several color schemes. Press COLOR one time. COLOR 0 Type COLOR 1 COLOR 1 COLOR 1 should be red.
- Page 57 BetaBrite Director User Manual COLOR 0 COLOR 1 Press COLOR six times. COLOR 2 COLOR 3 Type COLOR 6 COLOR 4 Then press RETURN. COLOR 5 Each character in COLOR 6 COLOR 6 should be a different color. Press RUN to see what all the colors look like in a running message.
-
Page 58: Example 9 - International Characters
BetaBrite Director User Manual Example 9 — International characters International characters—like ü and é—can be included in messages. NOTE: International characters can not be used with the small font. If you try, a question mark (?) will appear in place of the letter. -
Page 59: Appendices
BetaBrite Director User Manual Appendices Appendix A — Sign diagnostic test Your sign can do a self test to determine if all the LEDs are working properly. Step When you do this... You see this... PAGE A Press PROGRAM. MODE: [AUT]... -
Page 60: Appendix B - Updating The Sign's Firmware (Eprom)
BetaBrite Director User Manual Appendix B — Updating the sign’s firmware (EPROM) From time to time it may be necessary to update the sign’s internal firmware by replacing an EPROM inside the sign. To do this, follow these steps: Remove power from the sign. -
Page 61: Appendix C - Transferring A Sign's Memory From One Sign To Another
BetaBrite Director User Manual Appendix C — Transferring a sign’s memory from one sign to another You can transfer the messages from the memory of one sign to the memory of any another signs by completing the following steps. NOTE: To complete the transfer of memory from one sign to other signs, all signs must be connected together and all must have the RS232/RS485 jumper set to RS485. -
Page 62: Quick Reference Card
BetaBrite Director User Manual Quick Reference Card Message control keys ON - OFF SOUND PROGRAM COLOR APPEND CURSOR SPECIAL FONT WIDTH To turn the sign on or off, hold down SHIFT and then press PROGRAM. PROGRAM To enter messages, set the date and time, clear memory, etc., press PROGRAM and then BACK until the setting you want to change is shown.
Need help?
Do you have a question about the BETAbrite Director and is the answer not in the manual?
Questions and answers