Table of Contents
Advertisement
Advertisement
Table of Contents

Related Manuals for howen Hero ME40-02V3


Summary of Contents for howen Hero ME40-02V3
- Page 1 Hero ME40-02V3 Dash Camera User Manual...
-
Page 2: Table Of Contents
Content 1. Features.................................3 2. Dimension and Definition............................3 3. Quick start for using.............................4 3.1 Mobile APP Connect..........................4 3.2 Set up MDVR via APP..........................5 3.3 Record Setting............................6 3.3.1 General and Main-stream......................6 3.3.2 Sub-stream............................7 3.4 Time zone setting............................7 3.5 Connect to Platform..........................8 3.5.1 Device ID setting.......................... -
Page 3: Features
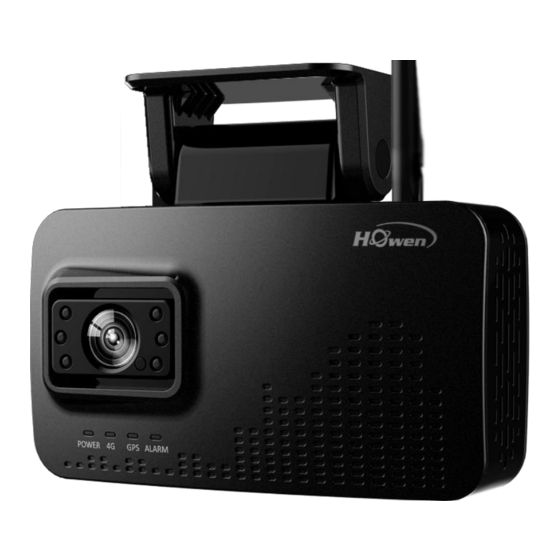
1. Features ✓ All-in-one design, built-in GPS, LTE, Wi-Fi, easy to install and maintain ✓ Brand-new design and optimized heat-sink ✓ Wide angle FHD video recording and streaming ✓ Easy configuration via mobile App ✓ Extendable for additional third camera ✓... -
Page 4: Quick Start For Using
Step3: Connect the dash camera to this Wi-Fi, input the password. Attention: Device will be at AP mode for 2 minutes then switch to Station mode. During this 2 minutes, if it connects via Howen-itool, it will stay at AP mode. Search Dash camera via APP Step1: Connect dash camera to Wi-Fi of your mobile phone. -
Page 5: Set Up Mdvr Via App
Fig.3.2 Search Fig.3.3 Login 3.2 Set up MDVR via APP Step 1: Click the settings button at the bottom, enter MDVR configuration homepage. Step 2: Input the password and login. (Fig.3.3) Step 3: Then you will get the homepage. (Fig.3.4) Default password is 111111. -
Page 6: Record Setting
Home page Fig.3.4 3.3 Record Setting 3.3.1 General and Main-stream Step 1: Enter the General page, select H.265 or H.264 (Some platforms do not support H.265), if there is no real-time preview, please confirm the TV system: PAL or NTSC (Fig.3.5) Step 2: Select Video →Main stream. -
Page 7: Sub-Stream
Channel setting Sub stream Fig.3.7 Fig.3.8 3.3.2 Sub-stream The sub-stream is used for live streaming. Video would be clearer with higher resolution, better frame rates and quality, but also consumes more cellular data. (Fig.3.8) Notice: Quality, 1 is the best, to save cellular data consumption, 5 or 6 is recommended. 3.4 Time zone setting Fig.3.9 Time... -
Page 8: Connect To Platform
In addition, recommended to set the plate number which matching that of the vehicle in which the dash camera will be installed. Device ID Fig.3.11 3.5.2 Network setting Network Setup page: Center settings, IP setting, Dial settings and Wi-Fi settings. The device will access the VSS (Howen platform) server or 3 party platform via 4G/Wi-Fi. - Page 9 Step 1: Settings → Network. Step 2: Click Center Settings. Step 3: Select server 1 or server 2, H-protocol. Step 4: Select the H-protocol, input the server IP address and port. (Fig.3.11) Server IP: It’s your server PC’s IP address which already deployed the platform. Port: 33000.
-
Page 10: Dial Setting
3.5.3 Dial setting Enable: On. Type: WCDMA / EVDO / TDDLTE / FDDLTE-1 / FDDLTE-2 for option. Access Point: Input Access Point name. Notice: Each telecom operator has various APNs , please consult your telecom operator first. Center No: Default setting is *99# In most cases, you don’t need to change it. User&Password: Set up SIM card service user name and password. -
Page 11: Add Device Onto Vss
3.5.5 Add device onto VSS Login to the VSS platform via Web or VSS client. (Fig.3.17 Device No. Input device ID. Device Name: Input Plate number. Device Type: Select the device model. Fleet: Need to create a fleet first. Then select this device. Audio-video Number: Channel numbers, set according to the video channel needed. - Page 12 Network Status Fig.3.18...
-
Page 13: Info Page
3.6 Info page In addition to the network status info, there are other important information. 3.6.1 Info Check Info page, where you get general information about the device, e.g. MCU and firmware version, device ID and plate number, GPS info etc. (Fig.3.19 &... -
Page 14: Disk
Location Status: It will show the longitude and latitude, satellites number. You can check more details for Satellites. (Fig.3.21) The signal intensity should be more than 30dB, satellite Number more than 4 satellites. INFO Satellites signal Fig.3.20 Fig.3.21 3.6.2 Disk Shows storage info. -
Page 15: Ai Authorization
3.6.3 AI Authorization ChipId: The Chip-set ID is for activating the DMS/ADAS function. DMS/ADAS Authorization Information: Activation status. 4. Installation Step1: Install Memory card and SIM card for device. Step2: Stick the bracket Tips: Before paste the bracket, please measure and mark the center of vehicle’s windshield at first. Wipe clean windshield (make sure there is no oil/dust) and dry it. - Page 16 Step3: Wiring connection Take out the power adaptor/box, connect to device first. Connect the red wire (power positive +) to BAT+ of vehicle, and orange wire (ACC) to ignition of vehicle, and the black wire (power negative -) to BAT- on the vehicle battery. Do check that all wires correctly connected, and make sure to wrap connection joints with electric tape when connection is finalized.
- Page 17 Step4: Adjust the ADAS camera If ADAS is activated, need go to ADAS calibration view, make a roughly adjustment firstly. Regarding how to calibrate ADAS accurately, please refer to Part 5.2. Tips: Connect your mobile phone to Wi-Fi shared by the device, open the APP to get the real-time preview, and make sure the calibration angle is right (Refer to the below picture, the horizon line should be lined up with the ground level 15-20m...
- Page 18 Use the screw-driver to adjust the view angle, till the images appear suitable. After calibrating/adjusting the cameras, tighten up the screw to fix the device. Step6: Wiring Connect the I/O, DMS camera, RS232 external device. 1. I/O connection To bring out the best of ADAS’s Lane Departure Warning (LDW) feature, need to connect I/O cable to turning signal lights of the vehicle.
- Page 19 2. Install the DMS camera If you purchased optional DMS features, connect the DMS camera provided by your supplier to extension cable and set it to CH3. Install the DMS camera 60-120cm away in front of the driver, make sure nothing laid between lens and driver.
-
Page 20: Calibration
If the steer wheel blocked the view of DMS camera, try the following 2 options (also refer to the pics below): 1. Install a holder to lift the DMS camera higher. 2. Move the DMS camera aside for 15-20cm or less than 15 degrees (towards vertical central line of the driver face), but shall not across the vertical central line of the windshield. -
Page 21: Adas Calibration
It will take a few seconds to enter calibration interface, please wait. Fig.5.1 DMS calibration 3. It will show “DMS Calibration successful” once done. If failed, make sure you face to the center of the lens, adjust the camera angle and try calibration again. Fig.5.2 DMS calibration success 5.2 ADAS Calibration... - Page 22 Fig.5.3 Location 2. Go to ADAS setting menu, point the ADAS channel to CH2. 3. Calibrate Horizon&Car Center A. Put a pole or ruler in the front of vehicle, the distance is 3~5m, and the pole or ruler should be in same line with camera center in vertical direction.
- Page 23 Fig.5.5 Horizon&Car middle Fig.5.6 ADAS Calibration Horizon: The horizontal level, which get from calibration as Step3, do not input manually. Unit:Pixel. Car Center: The offset (distance) from the camera center, calibrate as Step3. Unit: Pixel. (Fig.5.7) Fig.5.7 Car center Fig.5.8 Car Width Car Width: The width between the outter edge of tires.
-
Page 24: Face Recognition
Fig.5.9 Camera Height and Bumper Camera center: Set as 0 directly. Unit: cm. Camera2 Axle: The distance from camera to front wheel axle. Unit: cm. (Fig.5.8) Attention: Need to pay attention the negative/positive value. If the front wheel is behind the camera, need input negative value. -
Page 25: Driver Issue
Fig.5.11 Add driver Attention: The picture requirement: 1. JGEG/JPG format 2. Size:1280*720, 16:9 (Pictures taken by cell phone are normally 4:3, need to adjust). 3. Mug-shot, which just contains head and shoulder, it will cover 70-80% area of whole picture. 5.3.2 Driver issue Select the device to which you need to release, and select drivers which have been registered, then click release. -
Page 26: Main Menu
If released success, and driver recognize success, it will show the name on the OSD. 6. Main Menu 6.1 Search Make sure the device has TF card installed and recording function works well. Switch to homepage. Fig.6.1 Search Data Type:Normal recording, alarm recording, Image, Log file and Black box file. Start time:Select the start time for video search. -
Page 27: System
End time: End time for search, default is the current time. Select channel:Select the channel requested. Once video is available, you can export it to external USB drive (which need connect via OTG cable) or to your mobile phone. 6.2 System The system menu contains Terminal, User, Clock, Power, Sleep mode, Disk, Audio, Serial and parameter. -
Page 28: User
6.2.2 User Fig.6.3 User The default admin password is 111111, user password is 666666. Password enable:On/Off ON (Recommended): An administrator can set or change parameters, so if you need to set some parameters, login with this account. A user can only search and view the files. OFF: Password verification disabled. -
Page 29: Clock
6.2.3 Clock Fig.6.4 Date &Time Fig.6.5 Date Type: Use for selecting the date type, year - month - day, day - month - year, month - day - year. Time Sync: Time synchronize method: Off / GPS / NTP, default is GPS. Time zone: Please set according to your time zone, default is GMT + 08. -
Page 30: Power
6.2.4 Power Fig.6.6 Power Auto Reboot: ON/OFF. The default is OFF. If set ON, the device will reboot at the Reboot Time. If the device will be running 24 hours a day, recommend to set it ON, then set a Reboot time. Power Mode:... -
Page 31: Sleep Configuration
6.2.5 Sleep Configuration It supports device wake-up by Timing mode, I/O or G-sensor. It will turn on and run for some minutes so that you can set, upload GPS or start recording. Fig.6.7 Timing mode Fig.6.8 G-sensor mode Time Mode & Timed Interval: The device will wake up by the set interval. (Fig.6.7) I/O mode: The device will wake up by the trigger of I/O, select I/O channel. -
Page 32: Disk
6.2.6 Disk Encrypt Key: For safety concern, we can set a password (Key) for the dedicated channels. When played by Howen video player, user will be asked to input the password. Encryption Channel: Select the channel to encrypt. Once memory card is installed, Disk Name will be shown, click to enter. -
Page 33: Audio
For Dash camera, AI video/picture will be saved in the Standard part of TF card, so need to set a proper space for it. The default setting is 4GB. (Tips: For 128GB storage, spare 4~8GB as Standard,then click format). Fig.6.11 Block size Fig.6.12 Audio... -
Page 34: Parameter
6.2.9 Parameter Mileage: You could set an initial value or restore it to the original set-up. (Fig.6.14) Fig.6.14 Mileage Fig.6.15 Parameter import/export 1. Parameters Export: Export all the configuration of the current device to a USB drive. 2. Parameters import: Import configuration saved in the USB drive to the current device. Tips: Once finished parameters set-up on one device, you could export it, then import the set parameters to other devices via this feature. -
Page 35: General
6.3.1 General TV System: PAL / NTSC, default is PAL. If it is not the local format, the image will turn black and white. Select PAL/NTSC according to your local video format. Device will automatically reboot after changing it. Record Mode: Auto / time recording / alarm recording, default is Auto. Auto: it will record all the time. -
Page 36: Sub-Stream
Fig.6.19 Main stream set Fig.6.20 Sub-stream 6.3.3 Sub-stream Sub-stream is used for live streaming. Higher the resolution, the frame rate, better the video quality, video will be clearer, but will consume more cellular data. Notice: QUA, 1 refers to the best video quality. -
Page 37: Alarm
Fig.6.21 Storage SD1 refers to TF memory card, USB means USB drive after you connect it. Alarm Previous Rec: Set the previous recording time before the alarm happens. 0 to 60 seconds for selection. Alarm delay: Set the delay recording time after the alarm happened. 0 to 3600 seconds for selection. Alarm file to server: Alarm file upload to FTP or HFTP. -
Page 38: I/O
Level: High. High means it will trigger sensor alarm when the sensor voltage input is changed from 0 to a high voltage [DC 4V - 12V]. Attention: To set it as Low, need to connect external resistors, please contact Howen first if you need. Delay: The alarm duration time after triggering source is deactivated. -
Page 39: External Alarm
6.4.2 External alarm This function is for Geofence, if you have issued Geofence to the device from VSS platform, please enable it. Fig.6.24 Geofence 6.4.3 Speed It contains Parking (parking time setting), L-Warn (low-speed warning), L-ALM (low-speed alarm), H-Warn (high-speed warning), H-ALM (high-speed alarm), Spd Up (speed up), Spd Down (speed down), spd Idle (idle status). -
Page 40: G-Sensor
Fig.6.25 Speed 6.4.4 G-sensor The acceleration alarm contains X, Y, Z, impact, tilt, HC (Hard Cornering), HA (Harsh Acceleration), HB (Harsh Brake). Enable:Select ON/OFF. Limit: Set a limit value. Wait: The delayed response for false triggering could be set to prevent false alarm. Delay: Linkage’s duration time. - Page 41 Fig.6.26 G-sensor Fig.6.27 X and HB...
-
Page 42: Voltage
6.4.5 Voltage When the operation voltage is low, alarm will be triggered. Device’s operational voltage is 8-36V (Lower the voltage, higher the current will be drawn), 12V/24V input is recommended. You could set a Limit value first. Enable:On/Off. Limit: Set a threshold of voltage. Delay: The alarm duration time after triggering source is deactivated, it is used for setting linkage’s duration time. -
Page 43: Adas
Pre-Recording: Recording time (Unit: Second) before alert, could set it as 1 to 5 seconds. TriggerHold: The threshold time to trigger this alert. Interval: The trigger interval (Unit: Second) for the following same alert. Alarm Linkage items Record: Record video for this alert. Buzzer: Turn on /off alert announcement of speaker. -
Page 44: Face Setting
Speed: The alert triggering speed (km/H or MPH, switch in Speed menu), which you can configure it. Pre-Recording: Recording time (Unit: Second) before alert, could set it as 1 to 5 seconds. Interval: The trigger interval (Unit: Second) for the following same alert. Sensitivity: High, Middle (default), Low. -
Page 45: Other
Fig.6.31 Face setting 6.4.8 Other Face info: Which is used for searching the driver info which has been saved in the device. Speed test: For office testing (demo mode), need to input a speed value for it. The unit same as you set in 6.4.3 Speed menu. Input a demo speed which should be larger than ADAS&DMS threshold speed, then click Start. - Page 46 FCC Warning Statement Changes or modifications not expressly approved by the party responsible for compliance could void the user’s authority to operate the equipment. This equipment has been tested and found to comply with the limits for a Class B digital device, pursuant to Part 15 of the FCC Rules. These limits are designed to provide reasonable protection against harmful interference in a residential installation.
Need help?
Do you have a question about the Hero ME40-02V3 and is the answer not in the manual?
Questions and answers