
Related Manuals for LG GWL6026SC


Summary of Contents for LG GWL6026SC
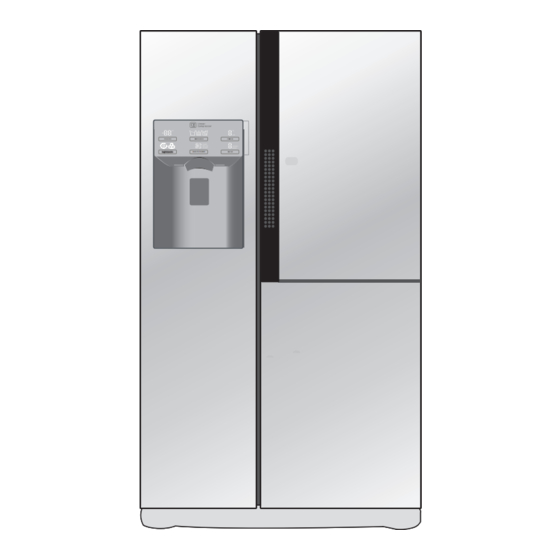
- Page 1 : p t b / / g l . REFRIGERAT O R SERVICE MANU AL CAUTI O N PLEASE READ CAREFULLY THE SAFETY PRECAUTIONS OF THIS BOO K BEFORE CHECKING OR OPERATING THE REFRIGERATO R . HEALTH GUARD MODEL:...
-
Page 2: Table Of Contents
CONTENTS WARNINGS AND PRECAUTIONS FOR SAFETY COMPRESSOR SPECIFICATION HEIGHT ADJUSTMENT TROUBLE DIAGNOSIS HOW TO INSTALL REFRIGERATOR Door removal How to intsall the handle How to intsall the display How to intsall the dispensor How to intsall the waterpipe Ice maker How to use the Pure N Fresh Homebar Refreshment center... -
Page 3: Warnings And Precautions For Safety
WARNINGS AND PRECAUTIONS FOR SAFETY Please observe the following safety precautions in order to 8. Do not fray, damage, machine, heavily bend, pull out, use safely and correctly the refrigerator and to prevent or twist the power cord. accident and danger during repair. 9. - Page 4 Figure 3 Figure 4 Figure 5 Figure 1 Figure 2...
- Page 5 Heavy Repair Method of Refrigerator by Application of Refrigerant Chapter 9 Heavy Repair Method of Refrigerator by Application of Refrigerant 1. Outline 1-1. Checkpoints before Heavy Repair Open the Cover ASM, Back-M/C of refrigerator and check the type of refrigerant indicated on a compressor before starting work.A yellow label is adhered to the compressor for the refrigerator using R600a as refrigerant.
- Page 6 Heavy Repair Method of Refrigerator by Application of Refrigerant 2. Heavy Repair SVC Method For the heaver repair of R600a type of refrigerator, perform work according to following SVC method. 2-1. Returnof Refrigerator Refrigerant Required equipment: Pinch pliers, refrigerant discharging hose, refrigerant returnbag Take power cords out and remove power between 6sec through 12sec after powering ON to open all both sides of 3way valve.
- Page 7 Heavy Repair Method of Refrigerator by Application of Refrigerant 2-2. Returnof Remained Refrigerant Required equipment: Pinch pliers, hose for refrigerant recovery, vacuum pump If refrigerant returntime of 7 minutes has passed, connect a vacuum pump at the ends of a ●...
- Page 8 Heavy Repair Method of Refrigerator by Application of Refrigerant 2-4. Charging Tube Connection Step Required equipment: Charging tube, simple welding machine ● Remove a charging pipe to recharge R600a refrigerant after completing work, and then connect a charging tube with welding 2-5.
- Page 9 Heavy Repair Method of Refrigerator by Application of Refrigerant 2-6. Refrigerant Charging Required equipment: Bombe, R600a refrigerant (80g) ● Firstly remove fire appliances and heating source for performing work when charging scaled refrigerant. (Do not spray refrigerant indoor.) Measure the accurate quantity (80g) of refrigerant to charge it into a Bombe. ●...
- Page 10 Heavy Repair Method of Refrigerator by Application of Refrigerant 2-8. Failure Checking Procedures...
-
Page 11: Compressor
SPECIFICATION 1. MODEL: GS9 ITEMS SPECIFICATIONS ITEMS SPECIFICATIONS DIMENSIONS (mm) LUBRICATING OIL HTS55MT (190cc) 912(W)*712(D)*1790(H) NET WEIGHT (kg) ID 0.7/ID 0.9 CAPPILARY TUBE DRIER MOLECULAR SIEVE XH-9 COOLING SYSTEM Fan Cooling 4~6 Hours FIRST DEFROST TEMPERATURE CONTROL Micom Control 13-15 Hours Full Automatic DEFROST CYCLE DEFROSTING SYSTE... - Page 12 SPECIFICATION 1. MODEL: GS9 Cover PWB HEALTH GUARD Extra Lamp Dairy corner Automatic Filter (Optional) Icemaker Lamp Drawer cover/Shelf Refreshment center (Optional) (Optional) Shelf Lamp Pure N Fresh (Optional) Egg Box(Optional) Shelf Refreshment center Drawer/Shelf (Optional) (Optional) Shelf Drawer/Shelf (Optional) V Fresh box (Optional) Door rack...
- Page 13 HOW TO INSTALL REFRIGERATOR 1. How to Adjust Door Height of Refrigerator.
- Page 14 HOW TO INSTALL REFRIGERATOR Removing the hinge cover Upper hinge cover Removing the hinge cover,and Main PCB cover by loosening the screws.Separate all connection wires except for the earth Main PCB cover line after. Removing the hinge cover,and Main PCB Upper hinge cover cover by loosening the screws.Separate all connection wires except for the earth...
- Page 17 Doors of freezing / cold storage room Closing Opening Closing Opening Closing or home bar 3 Times 3 Times 3 Times 3 Times BUZZER Within A minute a minute seconds seconds seconds...
- Page 19 MICOM ERROR CODE Error Code Summary When you check the Resistance values, be sure to turn o˜ the power. And wait for the voltage discharge su°ciently. (Optional) Type-1 Type-2 POWER REPLACE HOLD 5SECS HEALTH GUARD PURE N FRESH Type 1 PURE N FRESH EU/Australia Type 1...
- Page 20 MICOM failure mode diagnosis Sensor Layout: (RT) (RH) (R1) Name Usage (Position) (Ice make sensor) Freezer temperature sensing Freezer Sensor (upside) Refrigerator temperature Refrigerator sensing (C/Box) sensor 1 Refrigerator Refrigerator temperature sensor 2 sensing (right center) Defrosting activiation/deacti- Defroster sensor vation temperature sensing (R2) Temperature...
-
Page 34: Trouble Diagnosis
TROUBLE DIAGNOSIS SVC Manual 1-3. Other troubleshooting Crush Mode doesn’t work CON3 Auger Motor Main PCB Lever S/W CON7 Wiring diagram Is the connection loose ?(CON3) In Crush Mode, Replace Is the voltage between MAIN PCB pin2 and pin7 Reconnect of CON3 like as below, while pushing the lever switch? - Page 46 2.1 introduce...
- Page 48 Confirm the amount of water(Recommend: the water should not be over this maximum level line). Ice maker Test Switch...
-
Page 49: How To Install Refrigerator
HOW TO INSTALL REFRIGERATOR HOW TO INSTALL THE DISPLAY To replace the display, you should ake down the Decor Drain and Funnel first. Press the red part in the picture, hold the funnel with the other hand, wobble it and put it downwards. The red parts show the position of hook of Cover Dispenser 1. - Page 50 HOW TO INSTALL THE REFRIGERATOR How to exchange the water purifier filter (Only applies to internal type filter model.) How to disassemble the filter Because the filter is assembled on the top right side of the refrigerator lamp case and it removes the residual chlorine or odor, exchange a filter once every 6 months.
-
Page 51: How To Intsall The Dispensor
HOW TO INSTALL REFRIGERATOR HOW TO INSTALL THE DISPENSER 4) Duct cap Assembly is disconnected if hold lever 1 Remove the cover of the water collector (as shown connecting screw is loosened with a phillips screwdrive at the below figure).Pull out the water collector (pull out approx. - Page 52 HOW TO INSTALL REFRIGERATOR Dispenser Related Parts COVER ASSEMBLY, DISPLAY DECO COVER, DISPLAY COVER, DISPLAY PCB ASSEMBLY, DISPLAY FUNNEL, ASSEMBLY FRAME, FUNNEL LEVER, DISPENSER BUTTON, LEVER SWITCH, MICRO 10 SPRING CAP ASSEMBLY, DUCT 12 CAP, DUCT 13 LEVER, DISPENSER 14 RUBBER, CAP 15 GASKET,FOAM 16 DECO, DRAIN <...
- Page 53 HOW TO INSTALL REFRIGERATOR How to Install Water Pipe 2-1. When connecting directly to the water tap. Please confirm the following installation parts. Before Installation 1. The icemaker requires the water pressure of 1.5 - 8.5kgf/cm . (It is acceptable if city water fills a cup of 180cc with water for 3 seconds) 2.
- Page 54 HOW TO INSTALL REFRIGERATOR 1. Connection of Pipe Connector A and B. Feed pipe should be connected to cold water line. If it is connected to hot water line, trouble 1) Turn off main valve of water pipe. may occur. 2) Disconnect water tap from piping by loosening nuts.
- Page 55 HOW TO INSTALL REFRIGERATOR 3. When customer uses bottled water. *If customer wants to use bottled water, extra pump should be installed as shown below. 1. The pump system should not be on the floor (it may cause noise and vibration). Securely fasten the inlet and outlet nuts of pump.
-
Page 56: Ice Maker
HOW TO INSTALL REFRIGERATOR Ice maker Refershment center Press and hold the center left of the crisper until you Press and hold until you hear a hear a clicking sound. clicking sound With more storage space you can store more food. -
Page 57: How To Use The Pure N Fresh
HOW TO INSTALL REFRIGERATOR How to use the Pure N Fresh Pure N Fresh Pure N Fresh is already installed on the refrigerator wall, Pure N Fresh so installation is not needed. PURE N FRESH Please use containers with tight lids to place spicy food. Otherwise the odor will be absorbed by other food. -
Page 58: Exploded View
EXPLODED VIEW FREEZER DOOR PARTS 600A 200A 601A 601B 202A 606C 601C 601D 602B 602C 602A 602D 201A 204A 602G 203A 210A 503A 207A 279G 279A 213A... - Page 59 EXPLODED VIEW REFRIGERATOR PARTS 240A 243A 230A 232A 243A 239A 628B 628C 628A 242A 231A 233A 244A 234A...
- Page 60 EXPLODED VIEW FREEZER ROOM 270A 270C 270B 137C 101B 152A 137B 271B 271C 137A 405F 403A 405C 136B 136A 409D 130B 135A 302A 120A 128C 128D 316B 128E 128F 122A 272A 138A 125A 283E 106A 302B 121B 262E 121A 135B 121C 121D 312A...
- Page 61 EXPLODED VIEW REFRIGERATOR ROOM 140A 101B 140A 271A 271C 140A 116A 115A 166A 152B 151A 409D 162A 151C 130B 151B 162B 168A 272B 283F 106A 117A 262E 409B 117D 168A 161A 160A...
- Page 62 EXPLODED VIEW MACHINE COMPARTMENT 621A 621D 621C 621B 411A 619D 502A 621E 407B 304A 410G 500A 502B 303C 313A 303D 318A 300A 317A 301A 307A 306A 308C 104A 403B 305A 305B 305C 308A 308B 305C 305B 105C 105D...
- Page 63 EXPLODED VIEW DISPENSER PART 278H 611C 278A 603A...
Need help?
Do you have a question about the GWL6026SC and is the answer not in the manual?
Questions and answers