Advertisement
Global Knee™
Warnings and Instructions: Review carefully, proper applicat ion is required
This device will not prevent or eliminate risk of injury. Do Not Overtighten. If swelling, pain, skin
YWarning:
irritation, or an unusual reaction occurs, discontinue use immediately and consult your medical professional.
Care: Hand wash using mild soap. Rinse thoroughly. Air dry only. Do not tumble dry.
1.
1. Loosen all straps including the inside flap, and slide brace
on leg. Apply optional gel buttress to inside of buttress flap
only if recommended by your health care practitioner. See
buttress application instructions included with buttress.
4.
4. Pull and fasten inside buttress flap tabs as needed or instructed by
your care provider.
See Instructions on How to Adjust the Hinges Range of Motion on Back
Scan for video
2.
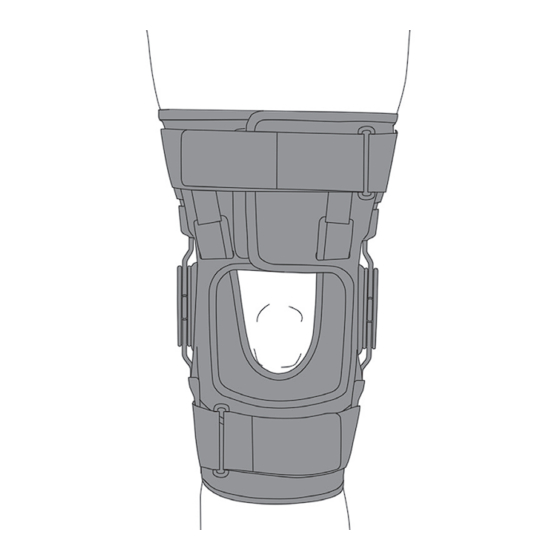
2. With leg fully extended center brace on knee.
Pull and fasten upper flap.
Inside buttress flap should be located just below the patella.
5.
5. Pull upper strap through loop lock and fasten.
1185 E Main St., Santa Paula, California 93060
California: 800-221-5465, National: 800-654-3241
International: 805-525-4244, fax: 805-933-2348
© 2017 Weber Orthopedics Inc.
U.S. fax: 800-559-5975, www.hely-weber.com
DBA Hely & Weber all rights reserved
3.
3. Pull lower strap through loop lock and fasten.
6.
6. Completed application.
7640
Rev F
3/21
Advertisement
Table of Contents

Related Manuals for Hely&Weber Globak Knee


Summary of Contents for Hely&Weber Globak Knee
- Page 1 7640 Global Knee™ Warnings and Instructions: Review carefully, proper applicat ion is required This device will not prevent or eliminate risk of injury. Do Not Overtighten. If swelling, pain, skin YWarning: irritation, or an unusual reaction occurs, discontinue use immediately and consult your medical professional. Care: Hand wash using mild soap.
- Page 2 Adjusting the Range of Motion Hinges 1. To remove the hinge cover cap, 2. Remove the E10 stops that come 3. Choose the hinge stops with the 4. Install the extension stop (E) on 5. Apply the front edge of the cap to insert the provided tool into the space pre-installed.
Need help?
Do you have a question about the Globak Knee and is the answer not in the manual?
Questions and answers