Table of Contents
Advertisement
Available languages
Available languages
Quick Links
Thank you for purchasing the Korg D1 digital piano.
Owner's Manual
To help you get the most out of your new instrument, please read this
manual carefully.
Merci d'avoir choisi la piano numérique D1 de Korg.
Manuel d'utilisation
Afin de pouvoir exploiter au mieux toutes les possibilités offertes par
l'instrument, veuillez lire attentivement ce manuel.
Vielen Dank, dass Sie sich für einen D1 digtal-Klavier
Bedienungsanleitung
von Korg entschieden haben.
Bitte lesen Sie sich diese Anleitung vollstädig durch, um bei der
Bedienung alles richtig zu machen.
Gracias por comprar el Piano digital D1 de Korg.
Manual del usuario
Por favor, lea este manual atentamente y guárdelo para futuras
consultas.
EFGS 3
Advertisement
Chapters
Table of Contents

Subscribe to Our Youtube Channel
Related Manuals for Korg D1WH


Summary of Contents for Korg D1WH
- Page 1 Thank you for purchasing the Korg D1 digital piano. Owner’s Manual To help you get the most out of your new instrument, please read this manual carefully. Merci d’avoir choisi la piano numérique D1 de Korg. Manuel d’utilisation Afin de pouvoir exploiter au mieux toutes les possibilités offertes par l’instrument, veuillez lire attentivement ce manuel.
- Page 2 AC adapter from the wall out- let. Then contact your nearest Korg dealer or the store where the equipment was purchased. * All product names and company names are the trademarks or registered trademarks of their respective owners.
-
Page 3: Table Of Contents
Table of Contents Introduction Introduction ---------------------------------------3 Main features Main features ------------------------------------------3 Thirty high-quality sounds Parts and their functions ---------------------4 The D1 provides 30 built-in expressive high-quality sounds, including a stereo concert grand piano. You can Preparation and demo performances ----5 use Layer mode to simultaneously play two sounds at once. -
Page 4: Parts And Their Functions
Parts and their functions Control panel Rear panel 12. S ound buttons: 1. Headphones jack: This button is used to select from 30 sounds (10 × 3 A stereo mini plug for headphones can be inserted banks). Two buttons can be pressed to play two sounds here. -
Page 5: Preparation And Demo Performances
Preparation and demo performances Before you begin playing About the stand This instrument does not include a stand. Refer to page 17 if you wish to use the ST-SV1 optional keyboard stand (sold separately) with the D1. Connecting the included AC adapter Fig. - Page 6 Turning the instrument on Press the power button to turn on the D1. (Fig. 2) When the instrument is turned on, the buttons on the control panel will light up (the power button will not light up). Fig. 2 To turn the instrument off, press the power button again. When the instrument is turned off, all functions and parameters, except Louder Softer...
-
Page 7: Listening To Demo Performances
Naoki Nishi Gymnopédie No.1 E.Satie E.PIANO1 Jam Session Naoki Nishi Etude Op.10-3 F.Chopin E.PIANO2 In Memory Michael Geisel Old Feather Blues KORG original HARPSI/ La fille aux cheveux de lin C.Debussy La Joyeuse J.P.Rameau CLAV The Entertainer S.Joplin VIBES/ Jazz in Spain... -
Page 8: Playing The D1
Playing the D1 Playing a single sound (Single mode) mains the same, even if a different sound button is pressed. You can select a sound from the thirty sounds supplied with the instrument (10 sounds x 3 banks). Sound button Bank Sound name PIANO1 Concert Piano... -
Page 9: Using A Damper Pedal
Using a damper pedal You can use the pedal to make your playing more expres- sive and realistic. Pressing this pedal will sustain the sound, producing a The setting appears in the display with 3 producing a deep richly resonant decay. You can also add the damper reso- chorus effect and 1 producing a light chorus effect. - Page 10 Setting Default Setting Range (Button) setting Time Signature 02 (2/4), 03 (3/4), 04 (4/4), 06 (6/4) (PIANO1) Volume 01–13 (PIANO2) oFF (no accent sound), Accent Sound on1 (emphasized sound for the accent beat), (E.PIANO1) on2 (bell sound for the accent beat) Tempo 40–240 (same as tempo setting) (E.PIANO2)
-
Page 11: Other Functions
Other functions Touch control settings The keyboard sensitivity, or touch, can be programmed. To change the setting, hold down the TOUCH button and press the + or – button beside the display. Loud C7 F7 Effect F ♯ 6–B6 6–1 semitones below Standard pitch Quiet Playing... - Page 12 List of functions Additional Functions and Descriptions Button Function Setting Display *1: Temperament Description [default setting] Temperament types PIANO1 Pitch 27.5...52.5 Display Temperament 427.5...440.0...452.5Hz [40.0 : 440.0Hz] Equal temperament (default setting): Spacing all semitones at equal pitch intervals, this In order to adapt the D1 pitch to that of an- temperament is the most widely used.
- Page 13 *3: Specifying the auto power-off function When 4 hours have passed without a key pressed on the keyboard or without an automatic performance played, the instrument is automatically turned off. To disable this function, turn off (oFF) this function. The default setting is this function turned on.
-
Page 14: Midi
MIDI What is MIDI? MIDI function mode MIDI, is the abbreviation of Musical Instrument Digital When the D1 is turned on, the MIDI parameters are set to Interface. It is an international standard that was created transmission channel 1, all reception channels (1–16), Local to connect and transfer data between electronic musical On and Omni Off. - Page 15 List of MIDI functions *2: Table of sounds and corresponding program change numbers. Button Function Setting Display CC0: Bank Select (MSB) for all sounds is set to 121. Description [default setting] Sound Button Bank CC32 Sound PIANO1 MIDI Channnel *1 C01...C16 PIANO1 Concert Piano 1...16 [C01]...
-
Page 16: Appendix
Appendix Troubleshooting Specifications If during use any of the following problems should occur, Keyboard RH3 (Real weighted hammer action 3) carefully examine the instrument to see if you can find out keyboard: 88 note (A0–C8) what the problem is, and try resolving it by following the suggestions below. -
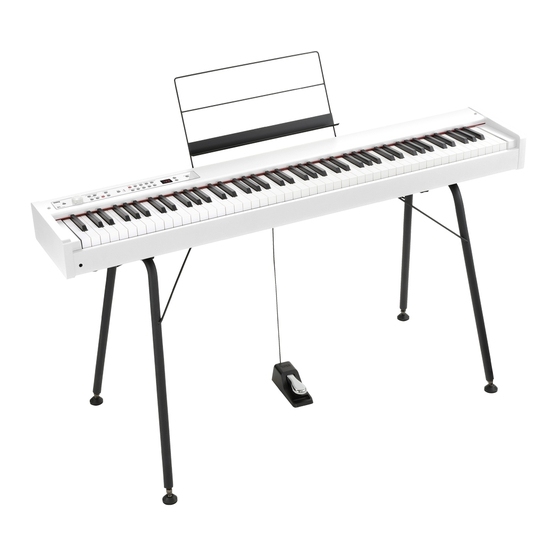
Page 17: When Using The St-Sv1 Optional Keyboard Stand (Sold Separately)
When using the ST-SV1 optional keyboard stand (sold separately) The D1 can be used with an ST-SV1 keyboard stand (the the ST-SV1. ST-SV1 BK model, sold separately). For the D1, use the Be very careful not to pinch your fingers during lifting instructions shown below instead for step 8 when assem- and attaching the D1 to the ST-SV1. - Page 18 (trombones, par ex.). Si cela se produit, débranchez l’alimentation de la prise de courant et contactez votre revendeur korg le plus proche ou la surface où vous avez acheté l’instrument. * Tous les noms de produits et de sociétés sont des marques commerciales ou déposées de leur déten-...
-
Page 19: Introduction
Table des matières Introduction Introduction ------------------------------------- 19 Principales caractéristiques Principales caractéristiques --------------------- 19 Trente timbres de qualité superbe Parties et leurs fonctions ------------------ 20 Le D1 offre 30 sons (ou “timbres”) pleins d’expression et de qualité époustouflante, dont un son stéréo de piano à Préparatifs et écoute des morceaux de queue de concert. -
Page 20: Parties Et Leurs Fonctions
Parties et leurs fonctions Panneau avant Panneau arrière 1. Prise pour casque: 11. B outon et témoin BANK: Cette prise permet de brancher un casque à fiche mini- Ce bouton permet de choisir la banque de timbres vou- jack stéréo. lue. Le témoin de la banque active s’allume. 2. -
Page 21: Préparatifs Et Écoute Des Morceaux De Démonstration
Préparatifs et écoute des morceaux de démonstration Avant de commencer à jouer Au sujet du pied Cet instrument est fourni sans pied. Si vous souhaitez utiliser le D1 avec le pied ST-SV1 pour clavier disponible en option, voyaz page 33. Illus. - Page 22 Mise sous tension de l’instrument Appuyez sur l’interrupteur d’alimentation pour mettre le D1 sous tension. (Illus. 2) Quand vous mettez l’instrument sous tension, les boutons de son panneau de Illus. 2 commande s’allument (l’interrupteur d’alimentation ne s’allume pas). Moins Plus Pour mettre l’instrument hors tension, appuyez à...
-
Page 23: Écoute Des Morceaux De Démonstration
Naoki Nishi Gymnopédie No.1 E.Satie E.PIANO1 Jam Session Naoki Nishi Etude Op.10-3 F.Chopin E.PIANO2 In Memory Michael Geisel Old Feather Blues KORG original HARPSI/ La Joyeuse J.P.Rameau CLAV La fille aux cheveux de lin C.Debussy VIBES/ Jazz in Spain KORG original The Entertainer S.Joplin... -
Page 24: Utilisation Du D1 Pour La Lecture
Utilisation du D1 pour la lecture Jouer un timbre (mode Single) timbres reste en vigueur, même si un autre bouton de timbres est enfoncé. Sélectionner l’un des trente timbres à disposition (10 x 3 sons banques). Bouton Banque Sonorit PIANO1 Piano de concert Chaque fois que vous mettez le D1 sous tension, le Piano à... -
Page 25: Utilisation D'une Pédale Forte
Utilisation d’une pédale forte ton s’allume) et coupe (le bouton s’éteint) tour à tour l’effet de Chorus. L’emploi d’une pédale permet d’obtenir un jeu plus expres- sif et réaliste. Pour changer le niveau de l’effet, maintenez enfoncé le Appuyer sur cette pédale permet de soutenir le son et de bouton CHORUS et appuyez sur le bouton + ou – à côté produire une chute du son pleine de résonance. - Page 26 Réglage Réglage Description (Bouton) par éfaut Type de mesure 02 (2/4), 03 (3/4), 04 (4/4), 06 (6/4) (PIANO1) Volume 01–13 (PIANO2) oFF (pas de son d’accent), on1 (son spécial pour le battement Son d’accent d’accent), (E.PIANO1) on2 (son de clochette pour le batte- ment d’accent) Tempo 40–240...
-
Page 27: Autres Fonctions
Autres fonctions Réglage du toucher Vous pouvez régler la sensibilité du clavier ou réponse au toucher. Pour changer la sensibilité du clavier, maintenez enfoncé le bouton TOUCH et appuyez sur le bouton + ou – à côté de l’écran. Fa 6 Do7 Fa7 Fort Touche... - Page 28 Liste des fonctions Description des fonctions supplémentaires Bouton Fonction Réglage à *1: Temperament l’écran Types de tempéraments Description [réglage par défaut] Affichage Tempérament PIANO1 Hauteur 27.5...52.5 Gamme tempérée (réglage par défaut): Cette 427.5...440.0...452.5Hz [40.0 : 440.0Hz] gamme produit un intervalle égal entre tous les demi-tons; c’est le tempérament le plus courant. Permet de changer la hauteur du clavier Tempérament pur [majeur]: Les accords ma- du D1 par pas de 0,5 Hz pour l’adapter à...
- Page 29 *3: Régler la fonction de mise hors tension automatique L’instrument est automatiquement mis hors tension quand 4 heures se sont écoulées sans aucune manipulation du clavier de l’instrument ni utilisation de la fonction de jeu automatique. Vous pouvez désactiver cette fonction en choisissant le réglage “oFF”.
-
Page 30: Midi
MIDI Le MIDI, qu’est-ce que c’est ? Mode de fonctions MIDI MIDI est l’abréviation de Musical Instrument Digital Inter- À la mise sous tension du D1, ses paramètres MIDI sont face (interface numérique pour instruments musicaux). réglés comme suit: transmission via le canal 1, réception C’est un standard international conçu pour connecter et sur tous les canaux (1 ~ 16), fonction Local On et fonction transférer des données entre instruments musicaux élec-... - Page 31 Liste des fonctions MIDI sur le canal suivant. Voici un exemple: si vous choisissez le canal MIDI C07 Bouton Fonction Réglage pour le son de la couche 1, le canal MIDI C08 est automati- à l’écran quement assigné au son de la couche 2. Si vous choisissez le canal MIDI C16 pour le son de la couche 1, le canal C01 Description [réglage par défaut] est assigné...
-
Page 32: Appendice
Appendice Problèmes et solutions Spécifications Si lors de l’utilisation vous détectez les problèmes décrits, Clavier RH3 (“Real Weighted Hammer 3”) examinez l’instrument pour comprendre le problème et es- Clavier: 88 notes (La0 ~ Do8) sayez de le résoudre en recourant aux conseils proposés. Si l’instrument continue à... -
Page 33: Quand Vous Utilisez Le Pied Pour Clavier St-Sv1 En Option (Vendue Séparément)
Quand vous utilisez le pied pour clavier ST-SV1 en option (vendue séparément) Vous pouvez utiliser le D1 avec un pied pour clavier ST- Veillez à ne pas vous pincer les doigts quand vous SV1 (modèle ST-SV1 BK disponible en option). Dans le cas levez et fixez le D1 sur le ST-SV1. - Page 34 Beachten Sie, daß keinerlei Fremdkörper in das Ge- rät gelangen. Sollte ein Fremdkörper in das Gerät gelangt sein, so trennen Sie es sofort vom Netz. Wen- den Sie sich dann an Ihren KORG-Fachhändler. * Alle Produkt- und Firmennamen sind Warenzei- chen oder eingetragene Warenzeichen der betref-...
-
Page 35: Einführung
Inhalt Einführung Einführung --------------------------------------- 35 Hauptfunktionen Hauptfunktionen ------------------------------------35 Dreißig Spitzensounds Teile und Funktionen ------------------------- 36 Das D1 bietet 30 interne ausdrucksstarke Spitzensounds, darunter auch einen Stereo-Konzertflügel. Dank dem Lay- Vorbereitung sowie Demos und Sound- er-Modus können Sie zwei Sounds gleichzeitig spielen. beispiele ------------------------------------------ 37 Effekte Das D1 bietet 3 interne digitale Effekte: Brilliance dient der... -
Page 36: Teile Und Funktionen
Teile und Funktionen Oberseite Rückseite 1. Kopfhörer-Buchse: 12. Sound-Tasten: Stereo-Miniklinkenbuchse zum Anschluss von Kopf- Zur Auswahl der 30 Sounds (10 x 3 Bänke). Sie können hörern. zwei Tasten drücken, um zwei Sounds gleichzeitig zu spielen (Layer-Modus). 2. Einschalttaste: Zum Ein- und Ausschalten des D1. 13. -
Page 37: Vorbereitung Sowie Demos Und Soundbeispiele
Vorbereitung sowie Demos und Soundbeispiele Bevor Sie mit dem Spielen beginnen Infos zum Ständer Dieses Instrument wird ohne Ständer ausgeliefert Auf Seite 49 erfahren Sie, wie Sie das D1 mit dem (getrennt erhältlich) Keyboardständer ST-SV1 verwenden können. Abbildung. 1 Anschluss des beiliegenden Netzteils Verbinden Sie den DC-Stecker des Netzteils mit der DC 9V-Buchse an der Rück- Netzteilbuchse seite und stecken Sie den Stecker des Netzteils in eine Steckdose. - Page 38 Instrument einschalten Drücken Sie die Einschalttaste, um das D1 einzuschalten. (Abb. 2) Wenn das Instrument eingeschaltet wird, leuchten die Tasten im Bedienfeld auf (Die Einschalttaste leuchtet nicht.). Abbildung. 2 Zum Ausschalten des Instruments drücken Sie erneut die Einschalttaste. Wenn das Instrument ausgeschaltet wird, kehren alle Funktionen mit Lauter Leiser Ausnahme der Energiesparfunktion zur Standardeinstellung zurück.
-
Page 39: Demo-Vorführungen Abspielen
Gymnopédie No.1 E.Satie PIANO2 Wind and Tide Naoki Nishi Etude Op.10-3 F.Chopin E.PIANO1 Jam Session Naoki Nishi Old Feather Blues KORG original E.PIANO2 In Memory Michael Geisel La fille aux cheveux de lin C.Debussy HARPSI/ La Joyeuse J.P.Rameau CLAV The Entertainer S.Joplin... -
Page 40: Spielen Des D1
Spielen des D1 Mit nur einem Klang spielen LED rechts neben der BANK-Taste leuchtet. Die für die jeweilige Sound-Taste gewählte Bank bleibt (Single-Modus) bestehen, auch wenn Sie eine andere Sound-Taste drü- Sie können einen der dreißig im Instrument enthaltenen cken. Klänge auswählen (10 x 3 Sounds Banken). -
Page 41: Dämpfer-/Haltepedal Verwenden
Dämpfer-/Haltepedal verwenden Durch Drücken der CHORUS-Taste schalten Sie den Choruseffekt ein (Taste leuchtet auf) bzw. aus (Taste er- Mit einem solchen Pedal können Sie Ihr Spiel ausdrucks- lischt). stärker und realistischer gestalten. Zum Ändern der Einstellungen halten Sie die CHORUS- Durch Drücken dieses Pedals wird der Klang gehalten Taste gedrückt und drücken Sie gleichzeitig die + oder und klingt mit einem satten Nachhall aus. Sie können die –-Taste neben dem Display. - Page 42 Rahmen Standar- Beschreibung (Taste) deinstellung Taktart 02 (2/4), 03 (3/4), 04 (4/4), 06 (6/4) (PIANO1) Lautstärke 01–13 (PIANO2) oFF (kein akzentuierter Klang), Akzentuierter on1 (Akzentuierter Beat ist lauter), Klang on2 (akzentuierter Beat erklingt als (E.PIANO1) Glocke) Tempo 40–240 (E.PIANO2) (entspricht der Tempoeinstellung) Klang 1 (akustisch), (HARPSI/CLAV)
-
Page 43: Weitere Funktionen
Weitere Funktionen Einstellung des Anschlagsteuerung Die Anschlagempfindlichkeit der Tastatur kann verändert werden. Zum Ändern der Einstelllungen halten Sie die TOUCH- Taste gedrückt und drücken Sie gleichzeitig die + oder –-Taste neben dem Display. C7 F7 Laut Note Effekt F ♯ 6–B6 6–1 Halbtöne nach unten Standardstimmung C ♯... - Page 44 Liste der Funktionen Zusätzliche Funktionen und Beschreibungen *1: Stimmung Taster Funktionen Anzeige im Display Stimmungsarten Beschreibung [Standardeinstellung] Display Stimmung PIANO1 Referenzton 27.5...52.5 Wohltemperierte Stimmung (Standardeinstel- 427.5...440.0...452.5Hz [40.0 : 440.0Hz] lung): Meistübliche Stimmung, bei der alle Halb- Um den Referenzton des C1/C1 Air an den ei- töne in gleiche Tonhöhenintervalle aufgeteilt sind.
- Page 45 *3: Energiesparfunktion deaktivieren und aktivieren Falls 4 Stunden lang keine Taste gedrückt wird oder falls solange keine automatische Wiedergabe erfolgt, schaltet sich das Instrument automatisch aus. Sie können diese Funktion deaktivieren (oFF). Werksseitig ist diese Funkti- on aktiviert. Falls Sie diese Einstellung ändern, wird die neue Einstellung gespeichert und bleibt auch nach dem Ausschalten des D1 gültig.
-
Page 46: Midi
MIDI Was ist MIDI? MIDI-Funktionsmodus MIDI ist die Abkürzung für Musical Instrument Digital Beim Einschalten des D1 sind die MIDI-Parameter auf Sen- Interface. Dies ist ein internationaler Standard für die Ver- dekanal 1, sämtliche Empfangskanäle (1–16), Local On und bindung und die Datenübertragung zwischen elektroni- Omni Off eingestellt. - Page 47 Liste der MIDI-Funktionen *2: Tabelle der Sounds und der entsprechenden Pro- gram-Change-Nummern Taster Funktionen Anzeige im CC0: Bank Select (MSB) für alle Sounds ist eingestellt auf 121. Display Taster Bank CC32 Klang Beschreibung [Standardeinstellung] PIANO1 Konzertflügel PIANO1 MIDI-Kanäle *1 C01...C16 Flügel 1...16 [C01] Pop-Piano...
-
Page 48: Anhang
Anhang Fehlerbeseitigung Technische Daten Sollte während des Gebrauchs des Instruments eines der Tastatur RH3 (gewichtete Hammertastatur 3) nachfolgend beschriebenen Probleme auftreten, kont- Tastatur: 88 Tastatur (A0–C8) rollieren Sie es sorgfältig und versuchen Sie, die Störung anhand der Vorschläge und Tipps zu beseitigen. Wenn Anschlagsteuerung Fünf das Instrument weiterhin nicht einwandfrei funktionieren sollte, wenden Sie sich bitte an Ihren Händler. -
Page 49: Bei Verwendung Des Als Zubehör Erhältlichen Keyboardständers St-Sv1 (Getrennt Erhältlich)
Bei Verwendung des als Zubehör erhältlichen Keyboardständers ST-SV1 (getrennt erhältlich) Das D1 kann mit einem ST-SV1 Keyboardständer verwen- Schrauben (o) des ST-SV1 zur Deckung. det werden (im Fachhandel erhältliche Modelle ST-SV1 Entfernen Sie vor Befestigen des ST-SV1 das beiliegen- BK). Um den Ständer mit dem D1 zu verwenden, montie- de Netzteil. - Page 50 Precauciones Ubicación Nota respecto a residuos y deshechos El uso de la unidad en las siguientes ubicaciones (solo UE) puede dar como resultado un mal funcionamiento: Cuando aparezca el símbolo del cubo de basura • Expuesto a la luz directa del sol tachado sobre un producto, su manual del usua- •...
-
Page 51: Introducción
Tabla de contenidos Introducción Introducción ------------------------------------ 51 Características principales Características principales ----------------------- 51 Treinta sonidos de alta calidad Partes y sus funciones ---------------------- 52 El D1 dispone de 30 sonidos expresivos de alta calidad incorporados, incluyendo un piano de cola de concierto Preparativos e interpretaciones de de- estéreo. -
Page 52: Partes Y Sus Funciones
Partes y sus funciones Panel de control Panel posterior 1. Toma para auriculares: 11. B otón/LEDs BANK: Aquí puede insertar el minijack estéreo de unos auri- Este botón se utiliza para seleccionar el banco de soni- culares. do deseado. El LED para el banco seleccionado actual- mente se iluminará. -
Page 53: Preparativos E Interpretaciones De Demostración
Preparativos e interpretaciones de demostración Antes de comenzar a tocar Acerca del soporte Este instrumento no incluye soporte. Consulte la página 65 si desea utilizar el soporte de teclado opcional ST-SV1 (se vende por separado) con el D1. Conexión del adaptador de corriente alterna (CA) incluido Fig. - Page 54 Encendido del instrumento Pulse el botón de alimentación para encender el D1. (Fig. 2) Cuando encienda el instrumento, los botones del panel de control se ilumina- rán (el botón de alimentación no se iluminará). Fig. 2 Para apagar el instrumento, vuelva a pulsar el botón de alimentación. Más Más Cuando apague el instrumento, todas las funciones y parámetros, excep-...
-
Page 55: Escucha De Interpretaciones De Demostración
Gymnopédie No.1 E.Satie PIANO2 Wind and Tide Naoki Nishi Etude Op.10-3 F.Chopin E.PIANO1 Jam Session Naoki Nishi Old Feather Blues KORG original E.PIANO2 In Memory Michael Geisel La fille aux cheveux de lin C.Debussy HARPSI/ The Entertainer S.Joplin La Joyeuse J.P.Rameau... -
Page 56: Toque Del D1
Toque del D1 do permanecerá igual, incluso aunque pulse un botón Toque de un solo sonido (Modo Simple) de sonido diferente. Puede seleccionar un sonido entre los treinta sonidos su- ministrados con el instrumento (10 sonidos x 3 bancos). Botón de sonido Banco Sonido PIANO1 Piano de concierto Cada vez que encienda el D1, el sonido del banco 1 se... -
Page 57: Utilización De Un Pedal De Resonancia
Utilización de un pedal de resonancia en fábrica, el ajuste de activación/desactivación para este efecto así como el ajuste de este efecto se guardan con cada Puede utilizar un pedal de resonancia para hacer sus inter- sonido. pretaciones más expresivas y realistas. Cada vez que pulse el botón CHORUS, el efecto de coro Al pisar este pedal el sonido se sostendrá, produciendo un se activará (el botón se iluminará) y desactivará (el botón... - Page 58 Ajuste Configuración Descripción (Botón) predeterminada Signatura de tiempo 02 (2/4), 03 (3/4), 04 (4/4), 06 (6/4) (PIANO1) Volumen 01–13 (PIANO2) oFF (sin sonido de acento), Sonido on1 (sonido enfatizado en el tiem- de acento po de compás con acento), (E.PIANO1) on2 (sonido de campana en el tiempo de compás con acento) Tempo...
-
Page 59: Otras Funciones
Otras funciones Ajustes de control de toque pulsado el botón TRANSPOSE y pulse la tecla C7. El botón TRANSPOSE se apagará, y la transposición se cancelará. La sensibilidad, o toque, del teclado puede programarse. Para cambiar el ajuste, mantenga pulsado el botón TOUCH y pulse el botón + o –... - Page 60 Lista de funciones Funciones y descripciones adicionales *1: Temperamento Botón Función Visualización de ajustes Tipos de temperamentos Descripción Visuali- Temperamento [Configuración predeterminada] PIANO1 Afinación 27.5...52.5 Temperamento igual (ajuste predeterminado): Espaciando todos los semitonos a intervalos de 427.5...440.0...452.5Hz [40.0 : 440.0Hz] tonalidad iguales, este temperamento es el más Para adaptar la tonalidad de afinación del ampliamente utilizado.
- Page 61 *3: Especificación de la función de apagado automático Cuando hayan transcurrido 4 horas sin que se toque una tecla del teclado o sin que se reproduzca una interpreta- ción automática, el instrumento se apagará automática- mente. Para inhabilitar esta función, desactive (oFF) esta función.
-
Page 62: Midi
MIDI ¿Qué es MIDI? Modo de función MIDI MIDI, son las siglas de Musical Instrument Digital In- Cuando encienda el D1, los parámetros MIDI se establece- terface (Interfaz Digital de Instrumentos Musicales). Es rán a canal de transmisión 1, todos los canales de recep- una norma internacional que fue creada para conectar y ción (1–16), Local On y Omni Off. - Page 63 Lista de funciones MIDI especificará para el sonido de la capa 2. *2: Tabla de sonidos y números de cambio de progra- Botón Función Visualización ma correspondientes de ajustes CC0: Bank Select (Selección de banco) (MSB) para todos los Descripción [Configuración predeterminada] sonidos está...
-
Page 64: Apéndice
Apéndice Solución de problemas Especificaciones Si durante el uso se produce alguno de los problemas si- Teclado RH3 “Real Weighted Hammer 3” guientes, examine cuidadosamente el instrumento para Teclado: 88 notas (A0–C8) ver si puede averiguar cuál es el problema y tratar de resolverlo siguiendo las sugerencias indicadas a continua- Control de toque Cinco disponibles... -
Page 65: Cuando Se Utiliza El Soporte De Teclado Opcional St-Sv1 (Se Vende Por Separado)
Cuando se utiliza el soporte de teclado opcional ST-SV1 (se vende por separado) El D1 se puede utilizar con un soporte de teclado ST-SV1 Quite el adaptador de corriente alterna (CA) antes del (modelo ST-SV1 BK, se vende por separado). Para el D1, montar el ST-SV1. -
Page 66: Midi Implementation Chart
Though GM Mode On is recognized, not all GM sounds are supported. Mode 1: Omni On, Poly Mode 2: Omni On, Mono O: Yes X: No Mode 3: Omni Off, Poly Mode 4: Omni Off, Mono Consult your local Korg distributor for more information on MIDI implementation. - Page 68 Published 01/2022 Printed in China...
Need help?
Do you have a question about the D1WH and is the answer not in the manual?
Questions and answers