Advertisement
INTRODUCTION
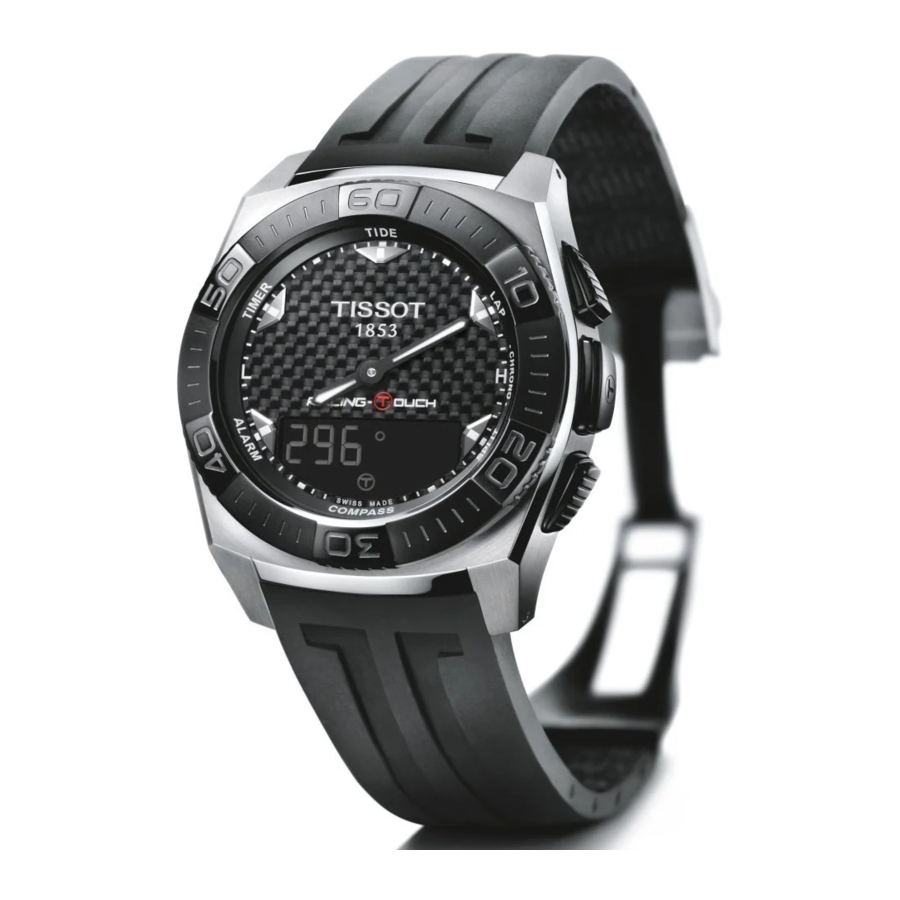
Your multi-sports tactile watch has the most recent technical innovations. It gives you a constant analogue time display and a variety of digital displays. In addition, the following functions can be accessed simply by touching the glass: Alarm, Compass, Lap time, Split time, Timer and Tide.
FUNCTIONS


Water resistance: 10 bar (100 m / 330 ft)
Battery type: button type lithium-manganese dioxide primary battery cell.

 Activate touch-sensitive glass / Activate light
 | CENTRE – Time 1 | 4 |  | LAP – Lap chronograph | 9 |
 | CENTRE – Time 2 | 4 |  | SPLIT – Split chronograph | 10 |
 | CENTRE – Date | 4 |  | COMPASS – Compass | 11 |
 | CENTRE – Options | 5 |  | ALARM – Alarm | 12 |
 | TIDE – Tide schedule | 8 |  | TIMER – Timer/countdown | 13 |
GENERAL USER INFORMATION
Activating the touch-sensitive glass

When the glass is activated, the «T» symbol will flash on the digital display. If the glass is not touched, it will automatically deactivate after 15 seconds.
Exception: in compass mode, the glass will deactivate after 30 seconds.
Activating the light

Activating the light - The display light will stay on for 10 seconds.
Select a function

Touch one of the 7 touch-sensitive areas of the glass to activate the corresponding function.
Setting mode

![]() : move display and/or hand position forward
: move display and/or hand position forward
![]() : move the display and/or hand position backward
: move the display and/or hand position backward
If no manipulation for 10 seconds, the setting mode is deactivated.
Display mode
Activate the glass

SETTING
TIME T1 & T2
Pressing and holding the 2 o'clock (+) or 4 o'clock (-) pushers will move the hands forward or backward. After a full revolution, the minute hand will stop and the hour hand advances/reverses in steps of one hour. Time T2 is set in steps of 15 minutes.

Activate the glass

Time T1 or T2 display (example: T1)

Setting mode

 : forward 1 min.
 : back 1 min. (hands and display)

Validate setting
- The seconds restart at zero
- The seconds continue
DATE
The calendar is perpetual, i.e. the number of days per month is predefined allowing the watch to correctly indicate the date until 2099. In continuous setting, the days scroll past slowly at first, and then quicker. After a full month, the calendar scrolls in months, and then likewise in years.

Activate the glass

Date display

Setting mode

: forward one day
: back one day

Validate setting
OPTIONS
Use the options menu to access the main settings of the watch.

Activate glass

Options display

Switch to sub-menu: Units display

Beep display

Swap timezones T1 with T2

Automatic switch to standby mode after 10 seconds. Beeps every second

Back to units display

At any time: exit sub-menu - back to date display
UNITS

Units display

Setting mode

Select mode 12/24 hours - in 12 hour mode, AM appears in the display below the time.

Validate setting. Selecting 12 hour mode displays the date in the format MM.DD. YY (month, day, year) and 24 hour mode in the format DD.MM.YY (day, month, year).
BEEP

Beep display

Setting mode

Activated = on
Deactivated = off

Validate setting
Deactivating the sound silences adjustment beeps but not the alarms.
SWAP
Swap mode allows the exchange of time T1 with time T2. Example: Before travelling, one can set the local time zone of the destination under T2 and upon arrival use the swap setting to have local time displayed as T1. When returning simply swap the two time zones back again.

Swap display

Setting mode

«Swap N» = No
«Swap Y» = Yes

Validate setting
SLEEP
Sleep (or standby) mode is a battery economy mode. All the functions are deactivated except the time and date which are continuously being updated in the background. This mode economises the battery when the watch is not being worn.

Automatic switch to standby mode after 10 seconds. Beep every second.
- The watch is on standby

Back to time & date mode


![]() /
/![]() : stop the count, the watch does not switch to standby mode
: stop the count, the watch does not switch to standby mode

Back to time & date mode
![]()


SYNCHRONISATION

The watch needs to be synchronised if the watch hands do not display the same time as the digital display, or if they are not correctly superimposed when accessing the functions. The watch is desynchronised when its electric motor's mechanism is disturbed due to heavy impacts for example.
N.B.: The glass must be active to access the synchronisation mode.

Units display

Press and hold the middle pusher to enter into synchronisation setting mode If the watch is synchronised, the hands should be perfectly superimposed in the 12 o'clock position.

Position the hours hand at 12 o'clock

Validate setting

Position the minute hand at 12 o'clock

Validate setting Return to Time T1 mode
TIDE
The minute hand indicates the actual state of a tide at a chosen location and the hour hand shows the tendency to low or high tide.

Activate glass

Tide display

Hour hand indicates the tendency to low or high tide Minute hand indicates the actual state of the tide (amplitude)

The display indicates the time of next high and low tides
CALIBRATING THE TIDE FUNCTION
For your tactile watch to indicate correct tidal information, you need to enter the exact time of the next high tide at your location. Please visit one of the websites for information about tidal times.

High tide display

Setting mode

: time forward
: time backward

Validate setting
GLOSSARY
Tides
Tides are the rise and fall of sea levels caused by the combined effects of the rotation of the Earth and the gravitational forces exerted by the Moon and the Sun. The interval between two high tides is of approximately 12 hours and 25 minutes.
During high tide, the sea level rises because the side of the Earth facing the Moon (nearest it) is attracted by the gravitational force of the Moon. Combined with the centrifugal force caused by the rotation of the Earth, oceans stretch into an ellipse with the Earth in the center. The ellipse has two peaks; one nearest the Moon and one farthest from it (at the antipodal point). As the Earth spins on its axis once a day and the Moon needs about 30 days to rotate around the Earth, the ellipse stays aligned with the Moon meaning that there are two high and two low tides in one day.

Description of function
Upon activation of the Tide function, the hands of your tactile watch indicate tidal information.
Minute hand
The minute hand moves back and forth in a half circle between 9 o'clock and 3 o'clock and indicates the actual state (amplitude) of the current tide. As there are four tides a day, the minute hand will need 6 hours to go from 9 to 3 o'clock and thus indicating how high, how low or how average is the current sea level for a chosen location.
Hour hand
In Tide function, the hour hand only has two positions. It points either towards 9 o'clock ("L") or towards 3 o'clock ("H"). If it points to "L", it means that the tidal tendency (next tide) is to low tide and if it points to "H" it is to high tide. When the Tide function is calibrated for a chosen location, the LCD display indicates at which time the next high and low tides will occur.
Example: The next tide will be a low tide (hour hand points to «L»), the sea level is still high as the last tide was a high one but it is now descending (minute hand is always trying to catch up the hour hand). It will be full low tide in approximately 4 hours, at exactly 5:54 pm.

Note
For best accuracy of the tide function, set tidal times as frequently as possible. For your safety, always carefully plan boat trips with accurate information and tools that meet your needs.
Useful links
www.tides.info
www.tide-forecast.info
LAP
The lap function is a chronograph dedicated to measuring lap times of 1 runner / racer, etc.

Activate glass

Lap display

Start lap chronograph with pusher First lap time is running

Use the pusher to mark the end of each lap Last marked lap time is blinking for 10 seconds while next lap time is already running in background

Last lap time must be stopped with the pusher

Reset lap chronograph with the pusher Lap times are saved as long as the chronograph is not started again
SAVED DATA
Every lap time measured with the lap function are saved and can be displayed on the watch as well as total race time, fastest, slowest and average lap times statistics.

Activate glass

Touch twice to access saved lap times

Scroll through lap times with the and pushers

Touch again to access statistics

Scroll through statistics with the and pushers
SPLIT
The split function is a chronograph dedicated to measuring total racing time of up to 99 racers competing in the same timed event. Example: measure the arrival time of several runners in a 100 meter race.

Activate glass

Split display

Start split chronograph with the pusher

Use the pusher to mark the arrival of up to 99 racers Last marked arrival time is blinking for 10 seconds while the total elapsed time is still running in background

Last arrival time must be stopped with the pusher

Reset split chronograph with the pusher Arrival times are saved as long as the split chronograph is not started again
SAVED DATA
Every split time measured with the split function is saved and can be displayed on the watch.

Activate glass

Touch twice to access saved split times

Scroll through split times with the and pushers
TOT: last arrival time and total race time
COMPASS
The minute hand points to magnetic North. By setting the magnetic declination the minute hand will indicate True Noth. In compass mode, the LCD displays the azimuth (angle between Heading (12 o'clock) and the North (minutes hand)).

Activate glass

Minutes hand points to North LCD display indicates the azimuth

Calibration of the compass

Back to regular compass display
MAGNETIC DECLINATION
The compass of your tactile watch can be adjusted to indicate True North if the magnetic declination for a chosen location is known.

Compass Display

Setting mode and magnetic declination display

Insert the magnetic declination
: +/- degree East
: +/- degree West

Validate setting
Minute hand now points to True North
COMPASS CALIBRATION
In case you feel that your tactile watch is no longer pointing to North (due to a shock or a strong exposure to a magnetic field), you can recalibrate it.

Compass calibration display

Activate calibration mode - glass deactivated during calibration

Turn the watch on itself for more than a complete revolution on a horizontal surface (e.g. a table) in an environment free from magnetic interference, at a rotation speed of around 30° per second. Total time: 20 seconds maximum
- Calibration successful - data stored
![]()
- Calibration failed - repeat calibration
![]()


Back to compass display
GLOSSARY
Compass
In compass mode, your tactile watch indicates the magnetic North. By setting the magnetic declination in the watch, it will indicate True North.

Compass explanations
The vertical lines (meridians) on the Earth converge at the True North Pole (Ng), indicating its direction. The hand of a conventional compass indicates the direction of the Magnetic North Pole (Nm). The angle between these two directions Ng and Nm is known as magnetic declination. The magnetic declination value depends on your location on Earth. Furthermore, the Magnetic North Pole is constantly moving. So the magnetic declination value also depends on the date. If the correct magnetic declination value (for the location and date) is set (see the setting procedure on page 11), the minutes hand of your tactile watch will point to True North (Ng). If the magnetic declination is set to 0, your tactile watch will point to Magnetic North (Nm). The magnetic declination values and dates are indicated on topographic charts, or can be found on the internet.

Website example: http://www.ngdc.noaa.gov/geomagmodels/Declination.jsp
Azimuth
In compass mode, the LCD display of your tactile watch indicates the azimuth (heading or direction) that the watch (6-12 o'clock axis) is facing.
Azimuth explanations
An azimuth is the horizontal angle between the direction of an object (heading) and North and is measured in degrees from 0° to 359° (e.g.: East = 90°). In compass mode, 12 o'clock represents the heading given by the azimuth relative to North. Example: Imagine you want to follow a given azimuth of 315° East using your tactile watch. Activate the compass function and hold the watch horizontally in front of you. Rotate on yourself until you read the azimuth you are looking for (here 315°) in the LCD: the direction that both yourself and the watch are facing at that moment is the azimuth (here 315°) to follow.

Note 1
For a correct indication of North, it is very important to hold the watch as level as possible.
Note 2
The compass function, like any other compass, should not be used near a metal or magnetic mass. In case of doubt, you can recalibrate your compass.

Characteristic of the function
Accuracy: ± 8°
Resolution: 2°
ALARM

The 2 alarms are associated with time T1. An alarm rings during 30 seconds, without repeating. A ringing alarm can be stopped by pressing one of the push-buttons.

Activate glass

Alarm 1 display

Alarm 2 display

Alarm rings

Stop alarm
SETTING

Alarm 1 or 2 display

Activate or deactivate alarm

Setting mode

&: adjust alarm

Validate setting
TIMER
Your tactile watch features 2 individual timers that can be set manually. Use the pushers to set a time in the timer function.

Activate glass

First timer display
Touch twice to access the second timer

Setting mode

: add time
: remove time

Validate setting

Start or stop the timer

Timer rings when it reaches zero

Stop the ringing with any pusher

Reload the last time set on the timer

Documents / Resources
References
Download manual
Here you can download full pdf version of manual, it may contain additional safety instructions, warranty information, FCC rules, etc.
Advertisement


Need help?
Do you have a question about the MULTI-SPORTS and is the answer not in the manual?
Questions and answers