Advertisement
Quick Links
WARNING
!
To avoid unpredictable system behavior that can cause personal injury
and property damage:
• Disconnect electrical supply (when necessary) before installation,
servicing, or conversion.
• Disconnect air supply and depressurize all air lines connected to
this product before installation, servicing, or conversion.
• Operate within the manufacturer's specified pressure, temperature,
and other conditions listed in these instructions.
• Medium must be moisture-free if ambient temperature is below
freezing.
• Service according to procedures listed in these instructions.
• Installation, service, and conversion of these products must be
performed by knowledgeable personnel who understand how
pneumatic products are to be applied.
• After installation, servicing, or conversion, air and electrical
supplies (when necessary) should be connected and the product
tested for proper function and leakage. If audible leakage is present,
or the product does not operate properly, do not put into use.
• Warnings and specifications on the product should not be covered
by paint, etc. If masking is not possible, contact your local
representative for replacement labels.
Introduction
Follow these instructions when installing, operating, or servicing
the product.
ANSI
Cautions
!
The MPS-2 Pressure Sensor is designed to monitor pressure
and is not a safety measure to prevent accidents.
The compatibility of the sensor is the responsibility of the
designer of the system and specifications.
Operating Environment
•
Parker / Convum Sensors have not been investigated for
explosion- proof construction in hazardous environments.
•
Do not use with flammable gases, liquids, or in hazardous
environments.
•
Avoid installing the sensor in locations where excessive
voltage surges could damage or affect the performance of
the sensor.
Operations
•
Dedicate a power supply of 10.8 to 30VDC to the sensor
and set the ripple to Vp-p10% or less. Avoid excessive
voltage. Avoid voltage surges.
•
A small amount of internal voltage drop is possible. Ensure
the power supply minus any internal voltage drop exceeds
the operating load.
•
Verify the operating media is compatible with the specified
sensor. Check the chemical make-up, operating
temperatures, and maximum pressure ranges of the system
before installing.
Pneumatic Division
Richland, Michigan 49083
Installation & Service Instructions
CVM-102P
MPS-2 Series Sensor
ISSUED: June, 2003
Supersedes: July, 2002
Doc.# CVM-102P, ECN030385, Rev. 2
•
Installation of air dryer system is recommended to remove
moisture.
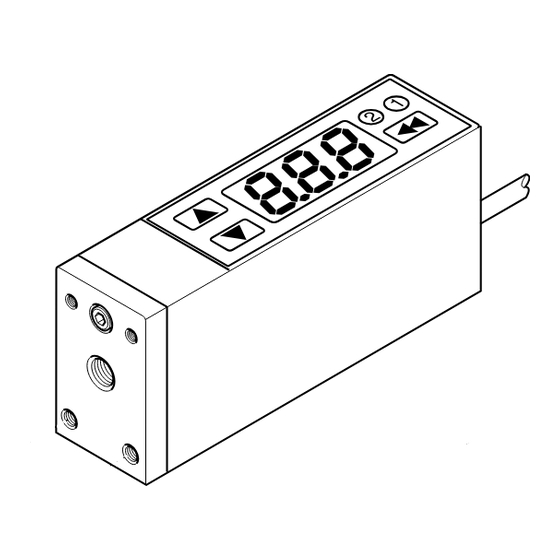
Installation
•
Never insert an object into the pressure port other than an
appropriate fluid connector.
•
Avoid short-circuiting the sensor. Connect the brown lead
to V+ and blue lead to 0V.
•
Do not connect the output lead wires (black / white) to the
power supply.
•
Outputs not being used should be trimmed and insulated.
•
Install as shown using the metal mounting base.
For 1/8 Inch Male Series Installation
•
To achieve IP65 rating, connect the o-ring and barb to a
normal environment with a 2mm I. D. tube as shown below.
IP65 Kit (Included Parts)
1 Venting Nipple M3
1 Washer M3
DIN Rail Mounting Kit (Accessory Kit)
1 DIN Rail
2 Washer M3
2 Screws M3
WARNING
!
FAILURE OR IMPROPER SELECTION OR IMPROPER USE OF
THE PRODUCTS AND/OR SYSTEMS DESCRIBED HEREIN OR
RELATED ITEMS CAN CAUSE DEATH, PERSONAL INJURY AND
PROPERTY DAMAGE.
This document and other information from Parker Hannifin Corporation,
its subsidiaries and authorized distributors provide product and/or
system options for further investigation by users having technical
expertise. It is important that you analyze all aspects of your application,
including consequences of any failure and review the information
concerning the product or systems in the current product catalog. Due
to the variety of operating conditions and applications for these products
or systems, the user, through its own analysis and testing, is solely
responsible for making the final selection of the products and systems
and assuring that all performance, safety and warning requirements
of the application are met.
The products described herein, including without limitation, product
features, specifications, designs, availability and pricing, are subject
to change by Parker Hannifin Corporation and its subsidiaries at any
time without notice.
EXTRA COPIES OF THESE INSTRUCTIONS ARE AVAILABLE FOR
INCLUSION IN EQUIPMENT / MAINTENANCE MANUALS THAT UTILIZE
THESE PRODUCTS. CONTACT YOUR LOCAL REPRESENTATIVE.
2
1
Ambient Air
Inlet Port
2
1
Barb
O-Ring
Coupling
Advertisement

Related Manuals for Parker Pneumatic MPS-2 Series


Summary of Contents for Parker Pneumatic MPS-2 Series
- Page 1 Installation & Service Instructions CVM-102P Pneumatic Division MPS-2 Series Sensor Richland, Michigan 49083 ISSUED: June, 2003 Supersedes: July, 2002 Doc.# CVM-102P, ECN030385, Rev. 2 • Installation of air dryer system is recommended to remove WARNING moisture. Installation To avoid unpredictable system behavior that can cause personal injury •...
- Page 2 4 Black: NPN / PNP Open Collector Output Switch Output Output Modes The MPS-2 Series Sensor has two independent NPN or PNP open collector output signals. The Switch Output Mode has a switch point programmed by the user at a specified pressure.
- Page 3 MPS-2 Series Sensor CVM-102P Programming Hold Press Press Press Output Mode 1 Output Mode 2 Output Set Open Hysteresis or Hysteresis or or Closed Selecting Window Window Units of Measure Comparator Comparator Easy Mode Activation Press Press Press Output 1 Setting...
- Page 4 MPS-2 Series Sensor CVM-102P Error Messages Display Description Solutions Zero Reset Error Reset Zero Below 3% of F.S. System Error (Internal) Contact Factory Auto Teach Mode Error Restart Function Over current of Output 1 Load current exceeds Over current of Output 2 maximum 125mA.
Need help?
Do you have a question about the MPS-2 Series and is the answer not in the manual?
Questions and answers