Table of Contents
Advertisement
Quick Links
Advertisement
Table of Contents

Related Manuals for MATSUYAN Vesta K

Summary of Contents for MATSUYAN Vesta K
- Page 1 Model: M793...
-
Page 3: Table Of Contents
TABLE OF CONTENTS SAFETY INSTRUCTIONS ------------------------------------------------------ 1 — SAFETY INSTRUCTIONS — WARNING — BATTERY AND RECHARGING INSTRUCTIONS SPECIAL FEATURES ------------------------------------------------------------ 5 MAJOR COMPONENTS AND ATTACHMENTS -------------------------- 5 M793 OVERVIEW --------------------------------------------------------------- 6 INSTALLATION GUIDE ------------------------------------------------------ 7 — Installing and Removing Side Brush —... -
Page 4: Safety Instructions
The appliance can be used by children aged 8 and above, persons of reduced physical, sensory, or mental capabilities, or people with limited experience or knowledge of the product provided they are under supervision and have been given explicit instructions regarding the operation of the appliance. Matsuyan... - Page 5 The plug must always be removed from the socket or outlet before cleaning or performing maintenance on the unit. Make sure that the appliance can move freely around the room, with zero or limited obstructions. Make sure there is nothing the appliance can overturn or break during its operation.
-
Page 6: Battery And Recharging Instructions
RF Exposure Warning: This Wireless LAN ( local area network) device has been evaluated under FCC Bulletin OET 65 and found compliant to the requirements as set forth in CFR 47 Sections 2.1091, 2.1093, and 15.247 (b) (4) addressing RF exposure from radio frequency devices. - Page 7 Do not recharge the battery if the cable or plug of the battery is damaged. Never touch the charger, plug or cable with damp hands. If M793 requires cleaning, unplug the adaptor, switch off the unit and take out the battery. The battery must be removed from the appliance before it is scrapped.
-
Page 8: Special Features
You talk to it through the <Vesta K> app, where it can let you decide where your M793 can and can’t go, as well as give it a schedule and even tell it to clean a room twice! Leave it to your M793. -
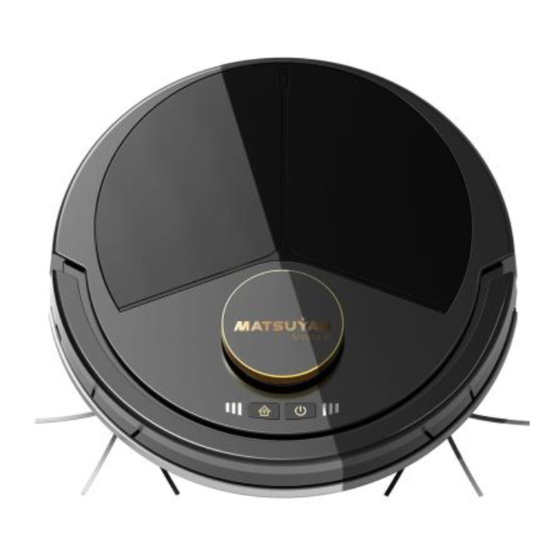
Page 9: M793 Overview
M793 OVERVIEW Top Cover (dust bin and power switch inside) Lidar Control Panel Power Indicator Bumper Contact Plates Front Small Wheel Contact Plates Battery Side Brush Side Brush Anti-Cliff Anti-Cliff Sensor Sensor Intake Valve & Brush Roll Wheel Cover Left & Right Speaker Wheels Heat Vent... -
Page 10: Installation Guide
INSTALLATION GUIDE Installing and Removing Side Brush: To install: Install the side brush by pushing it firmly onto the holder. (Fig. 1) To remove: Take it out by pulling two opposite sides of the brush (Fig. 2) then evenly pull both sides upward. PULL UP! Side brush PRESS... -
Page 11: Battery Installation And Removal
Battery Installation and Removal: Turn off the power switch before installing the battery. The method of replacing the battery: Unscrew the screws from the bottom case and remove the battery. Install the new battery inside the compartment with correct connection and screw it back to the bottom housing. -
Page 12: Recharging Battery
Recharging the Battery: Before recharging please check if the battery is properly mounted and turn on the power switch. Power switch to There are two ways to charge the battery: A. Manual charging Push the unit onto its docking station, making sure the contact points at the bottom of the unit are aligned with the docking station’s contact plate. -
Page 13: General Operation
GENERAL OPERATION Preparation for operation: Make sure the side brushes are securely installed on the unit. Turn on the power switch under the top cover of the unit and charge the battery for 4-6 hours prior to the first operation. Power switch to Make sure that the floor is free of big obstacles or clutter like clothes, papers, and cables, and that the drapes and curtains are... -
Page 14: Control Panel
Control Panel: Wifi indicator Power/Warning indicator Button Function with Vocal Message Power Button Push to turn on/off or start/pause /stop the cleaning Docking Button Push to start/pause docking Power + Docking Press for 3 seconds to Compound key enter WiFi setting mode LED Indication LED Indicator Description... -
Page 15: Start
Start: Make sure your unit is fully charged and the Before turning it on: docking station is plugged in. Press the power button “ ” on the panel for 3 seconds and wait 20 seconds for your unit to warm up. Clean: While in standby mode, press the power button “... -
Page 16: App Download And Install
Supports: — Android 7.0 and newer versions — iOS 11 and newer versions. Please download Vesta K APP from Google Play or APP store. Android 1. Open the APP ,then follow up the guidance to register your app account as below. - Page 17 2. Add New Robot And Set Up The Robot Connection. Open the top lid to find the power switch and switch to on. Power switch to Press the power button “ ” on top of the robot for 3 seconds to power on the robot.
- Page 18 Login to the APP with your email address and APP password. Then follow up the guidance as below.
-
Page 19: Cleaning And Maintenance
CLEANING & MAINTENANCE Maintenance Method: Maintaining your M793 unit is simple and fast. All you have to do is to clean out the dustbin and filter after every use. Cleaning Dust Bin: Push the cover from “A” position to open the top cover of the cleaner. - Page 20 Open the upper cover of the dust bin by pressing the side buckle. Side Buckle Lift up and take out the filter. Throw away the dust and dirt from the dustbin. ATTENTION: Do not throw the mylar.
- Page 21 Rinse the dustbin with tap water, rinsing and draining completely. It’s not necessary to wash every time. Every few weeks, clean up the filter with a soft bristle brush. Once dry, reinstall the filter and close the dust bin lid. Side buckle (Make sure the cover is closed firmly)
-
Page 22: Cleaning Side Brushes
Place the dustbin and top cover back onto the unit. ATTENTION! Before starting the unit, please be sure the dust bin filter is installed correctly! Cleaning Side Brushes: The side brushes need to be replaced after a period of time to keep the unit working properly. -
Page 23: Cleaning Intake
Cleaning Intake: Dust and dirt collects around the intake of the unit, which can block suction and reduce the effectiveness of the unit. Make sure to clear out the intake valve with a soft brush periodically to keep it working its best. Intake Valve Life made simple... -
Page 24: Cleaning Brush Roll & Inlet
Cleaning Brush Roll & Inlet: Hold the inlet on its four corners, push down the two lower buttons with your thumbs, and slide the inlet out. Carefully remove the brush roll. Clean dirt and other litter off with a soft bristle brush. Put the brush roll and inlet back in after cleaning. -
Page 25: Intake Valve Installation (Optional)
INTAKE VALVE INSTALLATION (Optional) Follow the illustration 1~6 to install the intake valve. Removable VAC SWEPT Life made simple... -
Page 26: Uv-C Sterilizer Installation (Optional)
UV-C STERILIZER INSTALLATION (Optional) Power off (press key 3 seconds) first prior to install the sterilizer. Then Remove side brushes and empty the dustbin & clean the filter. A. Follow the illustration 1~6 to install the sterilizer. Removable VAC-SWEPT Removable VAC-SWEPT B. -
Page 27: Trouble Shooting
TROUBLE SHOOTING Problem Probable Cause Solution The battery is either very Check if the battery is Power switch is on, low or not installed installed properly, or but no LED indicator. correctly. charge the unit for a few hours. The dustbin may be full Clean the dustbin out, or Vacuum is on but or the filter may not be... -
Page 28: Specifications
SPECIFICATIONS M793 Rating Voltage 10.95VDC / 10.8VDC Power Battery Type Li-ion rechargeable battery Battery Capacity 5200mAh / 5700mAh Charging Time 4~6 hours Working Time (normal mode) 120 +-/10 min Operating Temperature 5°C~45°C Operating Humidity ≤80% RH Noise ≤65dB 3.5kg Weight and Dimensions Ø: 360*93m Accessories Adaptor... - Page 29 4.6 dBiz Single - ≤20dBm Transmitting Matsuyan declares that this robotic vacuum cleaner is in compli- ance with the essential requirements and other relevant provi- sions of RE Directive 2014/53/EU. The declaration of conformity may be consulted in this link: http://www.matsuyan.com...
Need help?
Do you have a question about the Vesta K and is the answer not in the manual?
Questions and answers