Table of Contents
Advertisement
Quick Links
Advertisement
Table of Contents

Related Manuals for BOSS Grill IQBQ6BCHTB

Summary of Contents for BOSS Grill IQBQ6BCHTB
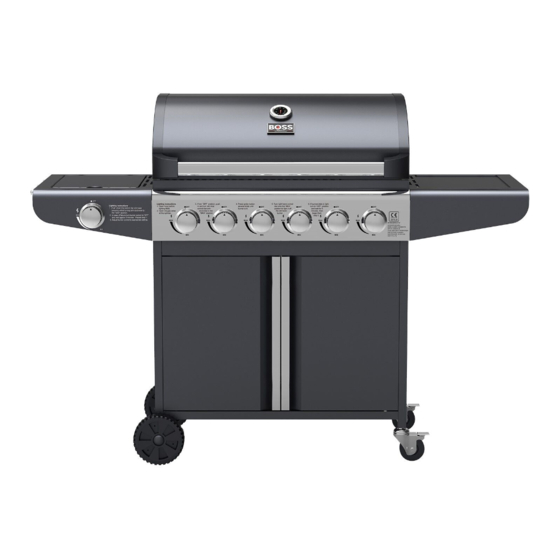
- Page 1 OWNER’S MANUAL PREMIUM 6 BURNER BBQ WITH SIDE BURNER IQBQ6BCHTB...
-
Page 2: Table Of Contents
Thank you for purchasing a BOSS GRILL BBQ Forged from iron, steel and solid, British values, our BBQ’s deliver a finger-licking feast. We design high-quality grills, so you can serve up a sizzling experience for your family and friends. Tongs at the ready? Then step up to the plate, Boss. -
Page 3: Important Safety Information
IMPORTANT SAFETY INFORMATION Please read this user manual before using this BBQ and keep it safe for future reference . Read the following instructions carefully and Your BBQ can be used with gas cylinders ⚫ ⚫ be sure your BBQ is properly installed, between 11 kg and 15 kg. -
Page 4: Exploded Diagram
EXPLODED DIAGRAM... -
Page 5: Parts List
PARTS LIST CARTON 1 OF 2 Part Part Description Diagram Description Diagram Side Burner Warming Rack Panel Flame Tamer Ignition Wire Body Side Burner Assembly Shelf Side Shelf Side Burner Side Shelf Side Burner Panel Rack Side Burner Door Bracket Valve, Pipe and Regulator Cart Bracket... -
Page 6: Tools Required
CARTON 2 OF 2 Part description diagram Cooking Tray Back Right Leg Front Right Back Panel PLEASE NOTE: BEFORE STARTING ASSEMBLY, CHECK THE CONTENTS OF Trolley Side THE BOXES TO ENSURE THAT ALL PARTS ARE PRESENT Panel AND UNDAMAGED. Door Bottom Tray Front Left Leg Back Left Leg... -
Page 7: Assembly Instructions
Assembly INSTRUCTIONS STEP 1. Attach the Front Left Leg (20) and Back Left Leg (21) to the Cart Bracket (08) and Trolley Side Panel (12) using 8 Bolts (A). Repeat for the Right side using the Back Right Leg (09) and Front Right Leg (10). Right Leg (09) and Front Right Leg (10) FITTINGS REQUIRED DESCRIPTION... - Page 8 STEP 3. Attach the Door Bracket (07) to both Front Legs using two Bolts (A) at each side. Then attach the Back Panel (11) to the Back Legs using two Bolts (A) at each side. Attach the Magnet (17) using 2 Bolts (C) and 2 Nuts (D).
- Page 9 STEP 5. Attach the Doors (15) to the frame by Sliding the Door Axle (14) through it, before locating the Axle into the locating hole in the door bracket. Once the top is located, push the door into position and slide the bottom of the Door Axle into the corresponding hole in the Bottom Tray.
- Page 10 STEP 7. Fix the Body Assembly (04) into position on the frame using 4 Bolts (A). Once all four bolts are in position, they can be fully tightened. Screw the Side Burner Valve, Pipe and Regulator Assembly (29) onto the side of the control panel, tightening with an Adjustable Spanner.
- Page 11 STEP 9. Attach the Shelves assembled in step 8 to the BBQ using six Bolts (A) for each Shelf. Once the Shelves are attached, all the bolts fitted in steps 8 and 9 can be fully tightened. FITTINGS REQUIRED DESCRIPTION M6 x 10mm BOLT STEP 10.
- Page 12 STEP 11. Slide the Side Burner (27) into position and secure with two Bolts (E). This can be fully tightened. FITTINGS REQUIRED DESCRIPTION Note: The connection between the Side Burner and the Side Burner Valve is designed to be loose. This allows air to be drawn into the gas supply, M4 x 10mm BOLT increasing the efficiency of the burner.
- Page 13 Place the Flame Tamers (03), Cooking Grids (30), Cooking Tray (02), Side Burner Rack (28) and STEP 13. Warming Rack (01) in position on the appliance. Screw the three Hooks (F) into the side of the Side Burner Shelf. FITTINGS REQUIRED DESCRIPTION Hook...
-
Page 14: Gas Supply Information
CONNECTING THE GAS CYLINDER GAS SUPPLY information This appliance is only suitable for use with low pressure Butane, Propane, or LPG mixtures, fitted with the appropriate low-pressure regulator via a flexible hose. The hose should be secured to the regulator and the appliance with hose clips. -
Page 15: Connecting The Gas Bottle To The Appliance
CONNECTING THE GAS BOTTLE TO THE APPLIANCE • Before connecting the gas supply, ensure that there is no debris caught in the head of the gas cylinder, regulator, burner or burner parts. Spiders and insects can nest within and clog the burner/ venturi tube at the orifice. -
Page 16: Lighting Instructions
LIGHTING INSTRUCTIONS If any burner fails to ignite after a number of attempts, turn the control dial to the off position (clockwise) and also turn the cylinder valve off. Wait for five minutes before attempting to light the BBQ again. MAIN BURNERS 1. -
Page 17: Safely Using Your Bbq
SAFELY USING YOUR BBQ FLARE-UP CONTROL Flare-ups can occur during barbequing, and is caused by fat and juices falling onto a hot surface. Avoid excessive flare-ups to prevent food from being burnt. The flame tamers are designed to help limit the amount of flare ups, but these must be kept in good condition and free of grease to be effective. -
Page 18: Cleaning And Care
CLEANING AND CARE All cleaning and maintenance should be carried out when the BBQ is cool and the fuel supply is turned OFF with the gas cylinder disconnected. OUTSIDE SURFACE • Use mild detergent or baking soda and hot water solution. Non-abrasive scouring powder can be used on stubborn stains, then rinse with water. -
Page 19: Technical Information
TECHNICAL INFORMATION IQBQ6BCHTB Buy It Direct Limited The Black Church, St Mary’s Place, Dublin 7 Unit J6, Lowfields Way, Elland, West Yorkshire, HX5 9DA Total Heat Input 18.2 kW (1325g/h) (All Gas Categories) Gas Category 3+(28-30/37) Types of Gas Gas Pressure...
Need help?
Do you have a question about the IQBQ6BCHTB and is the answer not in the manual?
Questions and answers
Hi do you know how I can purchase a new drip tray for my bbq thanks