Table of Contents
Advertisement
Available languages
Available languages
Quick Links
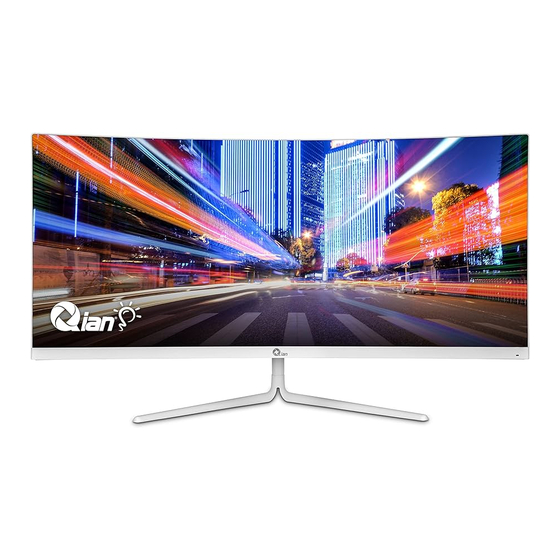
ULTRA WIDE 1080P CURVED MONITOR 29.5"
MONITOR CURVO ULTRA WIDE 1080P 29.5" (74.93CM)
MOD. QMC-VA30-01
Please read carefully before using your equipment
and save for future reference.
Por favor léalo cuidadosamente antes de usar su equipo
y guárdelo para uso de futuras consultas.
USER MANUAL / MANUAL DE USUARIO
Advertisement
Table of Contents

Related Manuals for iAN QMC-VA30-01

Summary of Contents for iAN QMC-VA30-01
- Page 1 ULTRA WIDE 1080P CURVED MONITOR 29.5” MONITOR CURVO ULTRA WIDE 1080P 29.5” (74.93CM) MOD. QMC-VA30-01 Please read carefully before using your equipment and save for future reference. Por favor léalo cuidadosamente antes de usar su equipo y guárdelo para uso de futuras consultas.
-
Page 2: Warranty And Product Information
WARRANTY AND PRODUCT INFORMATION These terms shall be governed and construed under laws of the jurisdiction in which the product was purchased, if any term here is held to be invalid or unenforceable, such term (in so far as it is invalid or unenforceable) shall be given no effect and deemed to be excluded without invalidating any of the remaining terms. - Page 3 Notices • Keep the monitor away from water sources or damp places, such as bathrooms, kitchens, basements and swimming pools. • Make sure the monitor is placed on a flat surface. lf the monitor falls down, it may cause injury or damage the device. •...
-
Page 4: Packing List
Packing list • Please check that the package of the monitor contains all parts. If any part is lost. • The color and shape of parts may vary with models. Figures in this User Manual are for reference only. • Cables supplied may vary with purchased products. Figures in this User Manual are for reference only. -
Page 5: Description Of Buttons
Description of buttons Power button: Turn the monitor on/off Exit/Left button: Exit or return and Input signal. Down button: Contextual Model Menu button: Enter sub-menus Up button: /crosshair shape Indicator Light Color Indicator Light Indicator light: Steady blue light indicates the power is on and the monitor is running normally. Red light indicates no horizontal or vertical synchronous signal detected or no video input signal, and that the monitor is in standby status. -
Page 6: Adjusting The Monitor
Adjusting the monitor Tilting angle -5.0°(±2.0°)- +20°(±2.0°) Stand installation 1.Open the cardboard box, take the foam out and lay it flat on the table top. Keep the foam underneath the monitor before attaching the stand. - Page 7 2. Take the support and rotating shaft out assembly and lock them using two screws. 3. Lock the bracket and base with a screw. 4. Stick the assembled stand into the corresponding slot of the back shell, gently press the bracket to lock it into the lock, then hold the middle of the bracket, gently lift the body twice, without loosening your grip, to make sure that it’s locked.
-
Page 8: Mount Installation
Mount Installation 1.Open the cardboard box, take the foam out and lay it flat on the table top. Keep the foam underneath the monitor before attaching the mount. 2. Take out the wall mount assembly and attach the wall mount assembly with four screws. -
Page 9: Cable Connection
Cable connection * The bottom interface configuration at the back of the monitor may vary depending on the product. * Note: If the power cable or signal cable is damaged, please replace them with special soft cables and components purchased from our Manufacture or Maintenance Departments. - Page 10 DC interface Please connect the power adapter to the power cable, connect the power adapter plug to the corresponding power port on your monitor, and then connect the power cable to a properly grounded power outlet. OSD menu Menu description •...
- Page 11 • Monitor settings may vary within different models, and the settings in this manual are for reference only. Standard Mode Off/On RTS/RPG Mode Off/On FPS Arena Mode Off/On MOBA Arena Mode Off/On Adaptive-Sync Off/On Shadow Balance 0-100 Response Time Off/Normal/Fast/Ultrafast Game Refresh Rate On/Position: Top Right / Top Left / Bottom...
- Page 12 Warm Off/On Natural Off/On Cool Off/On User1 Off/On: Red, Green, Blue Color settings User2 Off/On: Red, Green, Blue User3 Off/On: Red, Green, Blue Red/Green/Blue/Cyan/Magenta/Yellow: 0-100 Saturation PIP/PBP Mode Off/PIP Mode/PBP 2Win 1:1 Sub-Signal Source DP/HDMI1/HDMI2 Audio Source Auto/DP/HDMI1/HDMI2 PIP / PBP Top Right/Top Left/Bottom Right/Bottom PIP Position Left...
- Page 13 Input Signal Auto/DP/HDMI1/HDMI2 Volume 0-100 Mute Off/On Other Auto Power Off/On Settings Eyeshield Remind Off/On Reset Yes/No Information Input Source:/Resolution:/Mode:/SN:...
- Page 14 GARANTÍA E INFORMACIÓN DEL PRODUCTO Estos términos se regirán e interpretarán de acuerdo con las leyes de la jurisdicción en la que se compró el producto, si alguno de los términos en este documento se considera inválido o inaplicable, dicho término (en la medida en que sea inválido o inaplicable) no tendrá...
- Page 15 Aviso • Mantenga el monitor alejado de fuentes de agua o lugares húmedos, como baños, cocinas, sótanos y piscinas. • Asegúrese de que el monitor esté colocado sobre una superficie plana. Si el monitor se cae, puede causar lesiones personales o daños al dispositivo.
- Page 16 Lista de contenido • Compruebe que el paquete del monitor contenga todas las piezas. • El color y la forma de las piezas pueden variar según los modelos. Las figuras en este Manual del usuario son solo para referencia. • Los cables proporcionados pueden variar según los productos adquiridos.
-
Page 17: Descripción De Los Botones
Descripción de los botones Botón de encendido: enciende/apaga el monitor. Botón Salir/Izquierda: Salir o regresar y señal de entrada. Botón Abajo: Bajar en el menú. Modelo contextual Botón de menú: Entrar en submenús Botón Arriba: Sube en el menú/cambia el tipo de mira. Explicación de la luz indicadora Luz indicadora: La luz azul fija indica que está... -
Page 18: Ajuste Del Monitor
Ajuste del monitor Ángulo de inclinación -5.0°(±2.0°)- +20°(±2.0°) Instalación de la base 1. Abra el empaquete de cartón, saque la espuma y colóquela sobre la mesa. Mantenga la espuma debajo del monitor antes de colocar el soporte. 2. Saque el conjunto de soporte y eje giratorio y atorníllelo con dos tornillos. - Page 19 3. Atornille el soporte y la base con un tornillo. 4. Coloque la base ensamblada en la ranura correspondiente de la carcasa trasera, presione suavemente el soporte para fijarlo en la cerradura, luego sostenga el medio del soporte, levante suavemente el cuerpo.
- Page 20 Instalación de montura 1. Abra el empaque de cartón, saque la espuma y colóquela sobre la mesa. Mantenga la espuma debajo del monitor antes de colocar el soporte. 2. Saque el montaje de pared y atornille el montaje de pared con cuatro tornillos.
-
Page 21: Conexión De Cable
Conexión de cable * La configuración de la interfaz inferior en la parte posterior del monitor varía según los productos. * Nota: Si el cable de alimentación o el cable de señal están dañados, debe reemplazarlo con cables blandos especiales o componentes especiales adquiridos con nuestro departamento de fabricación o mantenimiento. - Page 22 Interfaz de CC Conecte el adaptador de alimentación al cable de alimentación, conecte el enchufe del adaptador de alimentación al puerto de alimentación correspondiente del monitor y luego conecte el cable de alimentación a una toma de corriente con conexión a tierra adecuada. Menu OSD Descripción del menú...
- Page 23 • Las funciones del monitor varían con los modelos, y las funciones en este manual son solo para referencia. Modo Estándar Cerrar/Activado Modo RTS/RPG Cerrar/Activado Modo Estadio FPS Cerrar/Activado Modo Estadio MOBA Cerrar/Activado Adaptive-Sync Cerrar/Activado Bal.sombras 0-100 Tpo.respuesta Cerrar/Normal/Rápido/Ultrarrápido Cerrar Frec.actualizac.
- Page 24 Cálida Cerrar/Activado Natural Cerrar/Activado Fría Cerrar/Activado Usuario1 Cerrar/Activado: rojo, verde, azul Ajustes color Usuario2 Cerrar/Activado: rojo, verde, azul Usuario3 Cerrar/Activado: rojo, verde, azul Matiz Rojo/Verde/Azul/Cian/Magenta/Amarillo: 0-100 Saturación Modo PIP/PBP Cerrar/Modo PIP/PBP 2Vent 1:1 Fuente de subseñal DP/HDMI1/HDMI2 Fuente audio Automático/DP/HDMI1/HDMI2 Arriba-Derecha PIP / PBP Arriba-Izda...
- Page 25 English//عربىPortugues do Brasilazil / Deutsch/Nederland/Suomi/Français/ Ελληνικά/Indonesia/Italiano/Malaysia/ Idioma Polskie/Português/Pусский/Español/ /Українська/Tiếng Việt/Türkçe/ Tpo espera OSD 0-100 Pos. hor. OSD 0-100 Pos. vert. OSD 0-100 Ajustes Transp. OSD 0-100 Conf. acceso1 Brillo/Contraste/Volumen/Silencio Bal. sombras/Pto mira juego/ Conf. acceso2 Frec. actualizac./Tiempo juego/ Modo contextual/ Conf.
Need help?
Do you have a question about the QMC-VA30-01 and is the answer not in the manual?
Questions and answers