
Related Manuals for Crestron QuickMedia QM-FBCC-1


Summary of Contents for Crestron QuickMedia QM-FBCC-1
- Page 1 Crestron QM-FBCC-1 & QM-WCC-1 ® QuickMedia Computer Centers Operations & Installation Guide...
- Page 2 This Class B digital apparatus complies with Canadian ICES-003. Cet appareil numérique de la classe B est conforme à la norme NMB-003 du Canada. All brand names, product names and trademarks are the property of their respective owners. ©2010 Crestron Electronics, Inc.
-
Page 3: Table Of Contents
Installation ......................... 16 Hardware Hookup ..................... 19 Programming Software ......................21 Earliest Version Software Requirements for the PC ............21 Programming with Crestron SystemBuilder .............. 21 Programming with SIMPL Windows ................ 21 Example Program ...................... 23 Uploading and Upgrading ......................24 Establishing Communication .................. -
Page 5: Quickmedia Computer Centers: Qm-Fbcc-1 & Qm-Wcc-1
® Crestron QM-FBCC/WCC-1 QuickMedia Computer Centers ® QuickMedia Computer Centers: QM-FBCC-1 & QM-WCC-1 Introduction ® Crestron MediaManager is a comprehensive family of affordable products fusing high performance AV signal distribution, device control and facility-wide system management. MediaManager simplifies the art of Pro AV system design and installation with complete hardware, software and low-cost wiring solutions. - Page 6 Crestron QM-FBCC/WCC-1 Features and Functions (Continued) QM-WCC-1: Wall mount QuickMedia computer interface Integrates with Crestron C2N-CBD and C2N-DB Series Keypads Installs alongside third-party LAN jacks and other devices Available in white or black ® The QM-FBCC-1 QuickMedia...
- Page 7 Connectivity for LAN and other signals can easily be added by ganging the QM-WCC-1 together with other third-party wall plate devices. A Crestron C2N-CDB or C2N-DB series keypad may also be installed for a truly complete interface and control solution. Wiring for the QM-WCC-1 is extremely simple, requiring just a single CresCAT-QM cable (sold separately).
-
Page 8: Applications
® QuickMedia Computer Centers Crestron QM-FBCC/WCC-1 capabilities of each device can be assessed and managed through the QM-FBCC/WCC-1, ensuring reliable operation by instructing sources to output only the resolutions and formats that can be handled by the displays and system wiring. -
Page 9: Specifications
Computer Centers For more information on this and other QM applications, refer to the latest revision of the Crestron MediaManager Applications Guide (Doc. 6244), which is available from the Crestron Web site (www.crestron.com/manuals). Specifications Specifications for the QM-FBCC/WCC-1 are listed in the following table. - Page 10 ® QuickMedia Computer Centers Crestron QM-FBCC/WCC-1 QM-FBCC/WCC-1 Specifications (Continued) SPECIFICATION DETAILS Enclosure QM-FBCC-1 Mountable on either side of a Hubbell SystemOne floor box or ® poke-through using Style Line Sub-plate (S1SP) and Universal Cover or any floor box with a standard wall plate screw spacing (3.81 inch, 97 mm), 2.1 inch (54...
- Page 11 QuickMedia Cable Cresnet Cresnet Control Cable 1. The latest software versions can be obtained from the Crestron Web site. Refer to the NOTE following these footnotes. 2. Crestron 2-Series control systems include the AV2 and PRO2. Consult the latest Crestron Product Catalog for a complete list of 2-Series control systems.
-
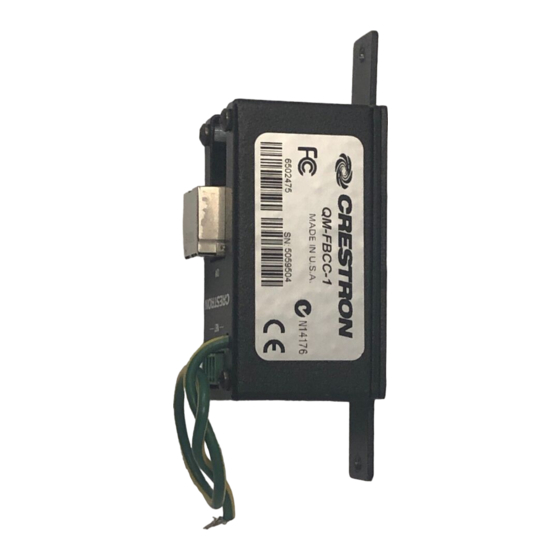
Page 12: Physical Description
® QuickMedia Computer Centers Crestron QM-FBCC/WCC-1 Physical Description This section provides information on the connections, controls and indicators available on your QM-FBCC/WCC-1. QM-FBCC-1 Physical View QM-WCC-1 Physical View 8 QuickMedia ® Operations & Installation Guide – DOC. 6716B : QM-FBCC/WCC-1... - Page 13 ® Crestron QM-FBCC/WCC-1 QuickMedia Computer Centers QM-FBCC-1 Overall Dimensions (Front and Rear Views) 4.14 in (105 mm) 1.30 in (33 mm) QM-FBCC-1 Overall Dimensions (Side and Bottom Views) 1.74 in (44mm) 1.55 in (39 mm) 0.13 in (3 mm) : QM-FBCC/WCC-1 9 Operations &...
- Page 14 ® QuickMedia Computer Centers Crestron QM-FBCC/WCC-1 QM-WCC-1 Overall Dimensions (Front and Rear Views) 4.12 in (105 mm) 1.72 in (44 mm) QM-WCC-1 Overall Dimensions (Side and Bottom Views) 1.74 in (44 mm) 1.50 in (38 mm) 0.19 in (5 mm) 10 ...
- Page 15 ® Crestron QM-FBCC/WCC-1 QuickMedia Computer Centers Connectors, Controls & Indicators CONNECTORS DESCRIPTION CONTROLS & INDICATORS PWR LED (1) Green LED, indicates 24 Volts DC power supplied from Cresnet network AUDIO (1) 3.5 mm TRS mini phone jack; Unbalanced stereo line level audio input;...
- Page 16 ® QuickMedia Computer Centers Crestron QM-FBCC/WCC-1 Connectors, Controls, & Indicators (Continued) CONNECTORS DESCRIPTION CONTROLS & INDICATORS 2, 3 (1) 8-wire RJ-45 female, QuickMedia output port; Connects to QM input port of any QuickMedia device via CresCAT-QM or CresCAT-IM cable Grounding Wire (1) Flying lead, grounding wire 1.
-
Page 17: Setup
Use Crestron power supplies for Crestron equipment. Provide sufficient power to the system. CAUTION: Insufficient power can lead to unpredictable results or damage to the equipment. Please use the Crestron Power Calculator to help calculate how much power is needed for the system (www.crestron.com/calculators). - Page 18 This phenomenon is due to the added resistance and capacitance of longer cable lengths and is not peculiar to either Crestron and/or QuickMedia systems. To ensure sufficient bandwidth, the maximum aggregate cable length should not exceed 450 feet.
-
Page 19: Identity Code
The Net ID of each unit must match an ID code specified in the SIMPL™ Windows program. Each network device must have a unique Net ID. For more details, refer to the Crestron Toolbox help file. : QM-FBCC/WCC-1 15 Operations & Installation Guide – DOC. 6716B ®... -
Page 20: Installation
® QuickMedia Computer Centers Crestron QM-FBCC/WCC-1 Installation The QM-FBCC/WCC-1 should be used in a well-ventilated area. The venting holes should not be obstructed under any circumstances. To prevent overheating, do not operate this product in an area that exceeds the environmental temperature range listed in the table of specifications. - Page 21 ® Crestron QM-FBCC/WCC-1 QuickMedia Computer Centers QM-FBCC-1 Installation (Two QM-FBCC-1s Shown) Insert, Black (4508384) Screws (2) #06-32 x 1" (2013235) ® ® Hubbell SystemOne Floor Box S1SP Plate (not supplied) QM-FBCC-1 : QM-FBCC/WCC-1 17 Operations & Installation Guide – DOC. 6716B ®...
- Page 22 ® QuickMedia Computer Centers Crestron QM-FBCC/WCC-1 QM-WCC-1 Installation 1-Gang Wall Box (not supplied) QM-WCC-1 Screws (2) #06-32 x 1" (2013235) Wall Plate with Hardware (not supplied) Insert, Black (4508384) Insert, White (4508383) 18 QuickMedia ® Operations & Installation Guide – DOC. 6716B...
-
Page 23: Hardware Hookup
Refer to “Network Wiring” on page 13 before attaching the 4-position terminal block connector. Apply power after all connections have been made. When making connections to the QM-FBCC/WCC-1, use Crestron power supplies for Crestron equipment. Hardware Connections for the QM-FBCC-1 (Front and Rear Views) - Page 24 NOTE: Ensure the unit is properly grounded by connecting the ground wire to an earth ground (building steel). NOTE: For optimum performance, Crestron strongly recommends using CresCAT-QM cable, available from Crestron. Other high-quality/low skew CAT5e/CAT6 wiring may also be used with varying performance.
-
Page 25: Programming Software
Have a question or comment about Crestron software? Answers to frequently asked questions (FAQs) can be viewed in the Online Help section of the Crestron Web site. To post a question or view questions you have submitted to Crestron’s True Blue Support, log in at http://support.crestron.com. - Page 26 Configuration Manager is the view where programmers “build” a Configuration Manager Crestron control system by selecting hardware from the Device Library. 1. To incorporate the QM-FBCC/WCC-1 into the system, drag the QM-WCC-1/QM-FBCC-1 from the Cresnet Control Modules | QM Series folder of the Device Library and drop it in the System Views.
-
Page 27: Example Program
“Device Settings: Crestron QM-WCC-1/QM-FBCC-1” Window NOTE: The ID code specified in the SIMPL Windows program must match the Net ID of each unit. Refer to “Identity Code” on page 15. Program Manager is the view where programmers “program” a Crestron Program Manager control system by assigning signals to symbols. -
Page 28: Uploading And Upgrading
2-Series Control Systems Reference Guide (Doc. 6256). 2. Use the Address Book in Crestron Toolbox to create an entry for the QM-FBCC/WCC-1 using the expected communication protocol (Indirect). Select the Cresnet ID of the QM-FBCC/WCC-1 and the address book entry of the control system that is connected to the QM-FBCC/WCC-1. -
Page 29: Programs And Firmware
Windows control system using SIMPL Windows or Crestron Toolbox. Firmware Check the Crestron Web site to find the latest firmware. (New users may be required to register to obtain access to certain areas of the site, including the FTP site.) Upgrade QM-FBCC/WCC-1 firmware via Crestron Toolbox. -
Page 30: Problem Solving
® QuickMedia Computer Centers Crestron QM-FBCC/WCC-1 Problem Solving Troubleshooting The following table provides corrective action for possible trouble situations. If further assistance is required, please contact a Crestron customer service representative. QM-FBCC/WCC-1 Troubleshooting TROUBLE POSSIBLE CORRECTIVE CAUSE(S) ACTION Device does not... -
Page 31: Check Network Wiring
Calculate CAUTION: Use only Crestron power supplies for Crestron equipment. Power Failure to do so could cause equipment damage or void the Crestron warranty. CAUTION: Provide sufficient power to the system. Insufficient power can lead to unpredictable results or damage to the equipment. Please use the Crestron Power Calculator to help calculate how much power is needed for the system (www.crestron.com/calculators). - Page 32 Cresnet power usage of the entire chain. If the unit is home-run from a Crestron system power supply network port, the Cresnet power usage of that unit is the Cresnet power usage of the entire run.
-
Page 33: Reference Documents
Crestron at 1-888-CRESTRON [1-888-273-7876]. You can also log onto the online help section of the Crestron Web site (www.crestron.com/onlinehelp) to ask questions about Crestron products. First-time users will need to establish a user account to fully benefit from all available features. -
Page 34: Return And Warranty Policies
Purchasers should inquire of the dealer regarding the nature and extent of the dealer's warranty, if any. CRESTRON shall not be liable to honor the terms of this warranty if the product has been used in any application other than that for which it was intended or if it has been subjected to misuse, accidental damage, modification or improper installation procedures. - Page 35 ® Crestron QM-FBCC/WCC-1 QuickMedia Computer Centers This page is intentionally left blank. : QM-FBCC/WCC-1 31 Operations & Installation Guide – DOC. 6716B ® QuickMedia...
- Page 36 Operations & Installation Guide – DOC. 6716B Crestron Electronics, Inc. 15 Volvo Drive Rockleigh, NJ 07647 (2021900) Tel: 888.CRESTRON 09.10 Fax: 201.767.7576 Specifications subject to www.crestron.com change without notice.
Need help?
Do you have a question about the QuickMedia QM-FBCC-1 and is the answer not in the manual?
Questions and answers