Table of Contents
Advertisement
Quick Links
Advertisement
Table of Contents

Related Manuals for Romy C5

Summary of Contents for Romy C5
- Page 1 User manual for your robotic vacuum cleaner...
-
Page 3: Table Of Contents
Content 1. What's inside ......................4 2. Get to know your robot ..................6 3. Product overview ....................8 Dust bin ....................... 10 Water tank ......................11 4. First steps ......................12 5. Connect the app ....................17 6. Use Alexa ......................19 7. -
Page 4: What's Inside
1. What's inside... - Page 5 Robot Docking station Water tank 2 mop cloths Docking tray Cleaning tool...
-
Page 6: Get To Know Your Robot
2. Get to know your robot HOME button Press briefly to dock and start charging. PLAY/PAUSE button Press briefly to start, pause or resume cleaning. Press and hold for 10 s to factory reset. Note: After a factory reset, you will need to set up your robot again via the app. All saved maps, cleaning schedules and the WiFi connection will be lost. - Page 7 Battery White: full Blinking: low or charging Wi-Fi status Blue: connected Blinking (fast): in pairing mode Blinking (slow): not connected Dust bin Red: full Error Blinking (red): error, the robot can't start cleaning...
-
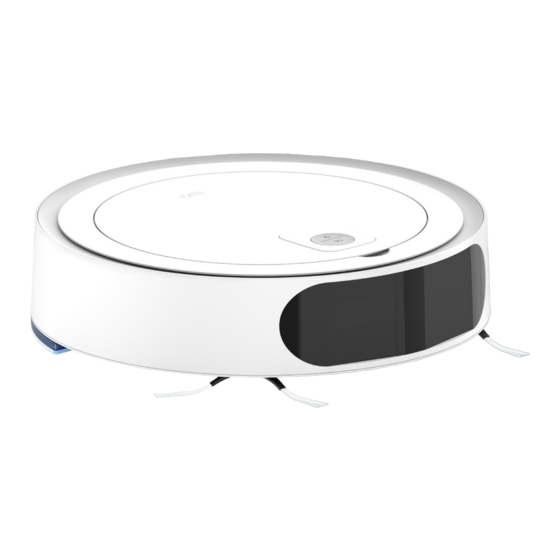
Page 8: Product Overview
3. Product Overview Vacuum cleaner lid Dust bin with filter ON/OFF switch LED status display HOME/PLAY/PAUSE button Lid opening Sensor cover Cleaning tool... - Page 9 Side brush, left Front wheel Main brush Main brush cover Drop sensor Water tank slots Drive wheel Side brush, right...
-
Page 10: Dust Bin
Dust bin Dust bin lid Dust filter Dust filter frame... -
Page 11: Water Tank
Water tank Velcro Water tank droplets Water tank cover Mounting clip... -
Page 12: First Steps
4. First steps Remove all protective films Note: • Leaving films on the robot may lead to unexpected behavior and affect the robot's performance. Install the side brushes Flip the robot and clip the side brushes into place. - Page 13 Install the docking tray Place the docking tray on the floor and attach the docking station to the docking tray using the guiding grooves. 4. Set up the docking station Place the docking station against the wall on a hard floor in a place with good Wi-Fi coverage.
- Page 14 5. Turn on the robot Flip the power switch to turn on the robot. Wait until only the battery light is on. Note: If the robot doesn't turn on, the battery might be low. Place the robot on the docking station and try again.
- Page 16 Do you want to add a no-go area here to avoid it during cleaning? Add Areas No-go area Hotspot Spot clean Set up reminders Reminder It seems you haven't cleaned your kitchen for a while. Do you want Romy to clean it now?
-
Page 17: Connect The App
5. Connect the app App name: ROMY robot Google Play and the Google Play logo are trademarks of Google LLC. Apple and App Store are registered trademarks of Apple Inc. -
Page 19: Use Alexa
6. Use Alexa Maximize ROMY's autonomy by paring it with Alexa! ''Alexa, tell Romy Robot there is a mess in the kitchen'' ''Mess happens. I told Romy to clean the kitchen. It will take around 20 minutes' Skill name: ROMY robot Amazon, Alexa and all related logos are trademarks of Amazon.com, Inc. -
Page 20: Wet Cleaning
7. Wet cleaning Attach the mop cloth Note: Wet the mop cloth manually before each wet cleaning run. 2. Fill the water tank Open the water tank cover and carefully fill the tank. Close the water tank cover. - Page 21 Install the water tank Slot the water tank's mounting clips into the slots on the bottom of the robot and press firmly until you hear the water tank click into place. Note: For the best results, wash the mop cloth before and after each use. Start cleaning Simply press the PLAY/PAUSE but- ton on the robot or start cleaning...
-
Page 23: Maintenance
8. Maintenance Clean the dust bin, filter and brushes regularly to make sure your robot performs at its best. -
Page 24: Emptying The Dust Bin
Emptying the dust bin Remove the dust bin Open the lid and remove the dust bin by releasing the clips on the sides. Empty the dust bin Open the dust bin lid and empty the dust bin. -
Page 25: Cleaning The Filter
Cleaning the filter Clean the filter Open the filter cover and remove the filter by pulling at the latch. Tap the filter against your trash con- tainer to shake off debris. Reinstall the filter and close the cover. Note: You can also clean the filter with water. Make sure the filter is completely dry before rein- stalling it. -
Page 26: Cleaning The Main Brush
Cleaning the main brush Remove the main brush cover Flip the robot and press the two tabs of the main brush cover to re- lease it. Take out the main brush. Clean the main brush Remove and clean the bearings on either side of the main brush. -
Page 27: Cleaning The Side Brushes
Cleaning the side brushes Remove the side brushes Flip the robot and pull the side brushes off. Clean the side brushes Carefully remove any string or hair wrapped around the brushes. Rein- stall the side brushes. -
Page 28: Cleaning The Sensors
Cleaning the sensors Clean the front sensor Wipe the front sensor cover with a clean cloth to prevent scratches. Note: Clean all sensors regularly to ensure the best results. Clean the drop sensors Flip the robot and wipe all the sen- sors with a dry or slightly damp cloth. -
Page 30: Troubleshooting
9. Troubleshooting Error Blinking (red): error, the robot can't start cleaning Check the app to find out what the issue is and have a look at the list below to help the robot. Problem Description Solution Software problem Internal software error Reset to factory settings. - Page 31 Problem Description Solution Robot is not on The robot has been raised Place the robot on the the floor (lifted) off the ground floor correctly. Main brush The main brush is jammed Remove dirt, lint or hair or cannot rotate properly from the main brush.
- Page 32 www.romyrobot.eu...
Need help?
Do you have a question about the C5 and is the answer not in the manual?
Questions and answers