Table of Contents
Advertisement
Quick Links
Advertisement
Table of Contents

Related Manuals for Haier HSW59F18DIMM


Summary of Contents for Haier HSW59F18DIMM
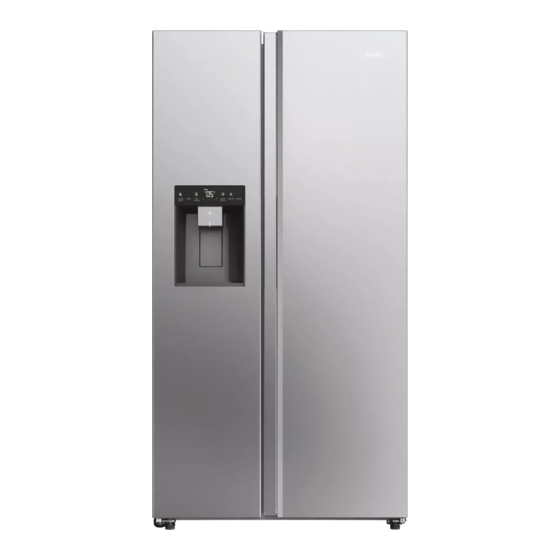
- Page 1 User Manual Refrigerator-Freezer HSW59F18DIMM HSW79F18DIPT...
-
Page 2: Table Of Contents
Contents Safety information ......................4 Intended use ........................9 Product description ......................10 Control panel ........................11 Use ............................12 Equipment .........................25 Care and cleaning......................27 Troubleshooting .......................32 Installation ..........................36 Technical data ........................41 Customer service ......................43... - Page 3 Thank you Thank you for purchasing a Haier Product. Please read these instructions carefully before using this appliance. The instructions contain important information which will help you get the best out of the appliance and ensure safe and proper installation, use and maintenance.
-
Page 4: Safety Information
Safety information WARNING – Important Safety information NOTICE-General information and tips Environmental information Disposal Help protect the environment and human health. Put the packaging in applicable containers to recycle it. Help to recycle waste of electrical and electronic appliances. Do not dispose appliances marked with this symbol with the house- hold waste. - Page 5 Safety information Before switching on the appliance for the first time read the following safety hints!: WARNING! Before first use ▶ Make sure there is no transport damage. ▶ Remove all packaging and keep out of children´s reach. ▶ Wait at least two hours before installing the appliance in order to ensure the re- frigerant circuit is fully efficient.
- Page 6 Safety information WARNING! ▶ Use a separate earthed socket for the power supply which is easy accessible. The appliance must be earthed. Only for UK: The appliance’s power cable is fitted with 3-cord (grounding) plug that fits a standard 3-cord (grounded) socket. Never cut off or dismount the third pin (grounding).
- Page 7 Safety information WARNING! ▶ Do not store or use inflammable, explosive or corrosive materials in the appli- ance or in the vicinity. ▶ Do not store medicines, bacteria or chemical agents in the appliance. This ap- pliance is a household appliance. It is not recommended to store materials that require strict temperatures.
- Page 8 Safety information WARNING! ▶ Hold the plug, not the cable, when unplugging the appliance. ▶ Do not clean the appliance with hard brushes, wire brushes, detergent powder, petrol, amyl acetate, acetone and similar organic solutions, acid or alkaline solu- tions. Please clean with special refrigerator detergent to avoid damage. ▶...
-
Page 9: Intended Use
Intended use Intended use This appliance is intended for cooling and freezing food. It has been designed exclusively for use in household and similar applications such as staff kitchen areas in shops, offices and other working environments; farm houses and by clients in hotels, motels and other residential type environments as well as in bed-and-bre- ackfast and catering business. -
Page 10: Product Description
Product description A: Freezer compartment B: Refrigerator compartment 1 Ceiling lamp 7 Ceiling lamp 2 Ice maker with ice container 8 Wine rack 3 Water and ice dispenser 9 Bottle holder 4 Glass shelves 10 Day Light(HSW79F18DIPT) 5 Bottle holder 11 Glass shelves 6 Drawers 12 Water filter... -
Page 11: Control Panel
Control panel Control panel d e2 e1 c c3 B C D1 D2 E F Keys: Indicators: A Auto Set function /3Sec.Wi-Fi a1 Auto Set mode B Holiday function a2 Wi-Fi function C Zone selection/3Sec.Filter Reset b Holiday mode D1 Temperature adjustment c Zone indicator button “-”... -
Page 12: Use
Before first use ▶ Remove all packaging materials, keep them out of children`s reach and dispose them in an environmentally friendly manner. ▶ Clean the inside and outside of the appliance with water and a mild detergent before putting any food in it. ▶... - Page 13 Lock/unlock panel 1. Automatic lock: When the fridge door, freezer door are closed and there is no key operation within 30 seconds, the display screen will be automatically extinguished and locked Unlock Hold for 3s Indicator on Display locked 2. Manual lock: When the display screen is unlocked, press the button “G” (Panel lock selector) and hold for 3 seconds, the buzzer rings once, the indicator “g”...
- Page 14 Adjust the temperature for fridge 3. Press the button “D2” (Temperature adjustment button “+”) every time, the buzzer rings once, the set temperature of the fridge will be increased by 1. The fridge temperature will display in the sequence of “1 °C > 2°C > 3°C > 4°C > 5°C > 6°C >...
- Page 15 Auto Set mode 1. When the display screen is unlocked, press the button “A” (Auto Set mode selector), the buzzer rings once, the indicator “a1” (Auto Set mode) illuminates, and then the Auto Set function will be turned on. 2. When the indicator “a1” (Auto Set mode) illuminates, press the button “A” (Auto Set mode selector), the buzzer rings once, the indicator “a1”...
- Page 16 Notice Under Holiday state, the fridge temperature cannot be adjusted. If either button “D1” (Temperature adjustment button “-”) or button “D2” (Temperature adjust- ment button “+”) is pressed to adjust the temperature of fridge, the indicator “b” (Holiday indicator) will flash with a prompt sound to indicate that this operation cannot be carried out.
- Page 17 Super-Freeze function (Super-Frz) 1. When the display screen is unlocked, press the button “E” (Super-Frz. selector), the buzzer rings once, the indicator “e1” (Super-Freeze function) illuminates, and then the Super-Freeze function will be turned on. 2. When the indicator “e1” (Super-Freeze function) illuminates, press the button “E”...
- Page 18 Ice maker mode 1. Under unlocked state, press the button “E” (Ice maker mode selector) and hold for 3 seconds, the buzzer rings once, the indicator “e2” (Ice maker mode) illumi- nates, and then the ice maker mode will be turned on. 2.
- Page 19 Cubed ice function Under any state (locked or unlocked), press the button “H2” (Cubed ice function selector), the buzzer rings once, the indicator “h2” (Cubed ice function) illuminates, and then the Cubed ice function will be turned on. Press 1 time Indicator on Cubed ice function on Notice...
- Page 20 Notice When the indicator “h3” (Crushed ice function) illuminates, the indicator “h1” (Water intake function) and the indicator “h2” (Cubed ice function) go off. After the mi- cro-switch of distributor is pressed, crushed ice will flow out of the intake port. Press the micro-switch of dispenser, the light of it turns on with the cover of it open.
- Page 21 TIPS ON STORING FRESH FOOD Storing into the fridge compartment 1. Keep your fridge temperature below 5°C. 2. Hot food must be cooled to room temperature before storing in the appliance . Foods stored in the fridge should be washed and dried before storing . 4.
- Page 22 TIPS ON STORING FRESH FOOD Storage into the freezer compartment 1. Keep the freezer temperature at -18°C. 2. 12 hours before freezing additional items switch on the Super - Freeze function; for small quantities of food 4-6 hours are sufficient . 3.
- Page 23 NOTICE : STORAGE 1. Please keep a distance of more than 10 mm between the food and the sensor to ensure the cooling effect . 2. Please leave the lowest drawer in the appliance when it is working in order to ensure the cooling effect .
- Page 24 Energy saving tips ▶ Make sure the appliance is properly ventilated (see INSTALLATION). ▶ Do not install the appliance in direct sunlight or in the near of heat sources (e.g. stoves, heaters). ▶ Avoid unnecessarily low temperature in the appliance. The energy consump- tion increases the lower the temperature in the appliance is set.
-
Page 25: Equipment
Equipment Adjustable shelves 1. The height of the shelves can be adjusted to fit your storage needs. 2. To relocate a shelf, remove it first by uplifting its hind edge ① and pulling it out ②. 3. To reinstall it, put it on the lugs on both sides and push it to the most rearward position until the rear of the shelf is fixed inside the slots in the sides... - Page 26 Equipment Removing the ice container 1. Grip both side hangles. 2. Lift the container up. 3. Pull the container out. Fig.1 Reinstalling the ice container Fig.2 To reinstall the ice container , the U - shaped bracket behind the ice container(1 in Fig.2) must be aligned with the corresponding metal structure .
-
Page 27: Care And Cleaning
4. In case some small part or component gets stuck inside of the fridge (between shelves or drawers), use small soft brush to release it. If you could not reach the part, please contact Haier service ▶ Rinse and dry with soft cloth. - Page 28 This product contains a light source of energy efficiency class G. Compartment Voltage Energy efficiency class Model Refrigerator HSW59F18DIMM HSW79F18DIPT Freezer Day Light HSW79F18DIPT Cleaning the ice container Clean the ice container periodically with warm water , especially if ice cubes get older and stale .
- Page 29 Care and cleaning Moving the appliance 1. Remove all food and unplug the appliance. 2. Secure shelves and other moveable parts in the fridge and the freezer with adhesive tape. 3. Do not tilt the refrigerator more than 45° to avoid damaging the refrigerating system.
- Page 30 6. Dispense water for approximately 5 minutes to remove trapped air and conta- minants. CAUTION! ▶ Failure to replace filters when required or using non Haier authorised water fil- ters can cause the filter cartridge to leak and result in property damage. Water Filter Model: Haier HRXWF ▶...
- Page 31 Care and cleaning It is essential that the manufacturer’s recommended installation, maintenance and filter replacement requirements be carried out for the product to perform as adver- tised. See Installation Manual for Warranty information. Notice While the testing was performed under standard laboratory conditions, actual performance may vary.
-
Page 32: Troubleshooting
Troubleshooting Many occuring problems could be solved by yourself without specific expertise. In case of a problem please check all shown possibilities and follow below instructions before you contact an after sales service. See CUSTOMER SERVICE. WARNING! ▶ Before maintenance, deactivate the appliance and disconnect the mains plug from the mains socket. - Page 33 Troubleshooting Problem Possible Cause Possible Solution It is not cold enough • The temperature is set too high. • Reset the temperature. inside the appliance. • Too warm goods has been • Always cool down goods stored. before storing them. •...
- Page 34 Troubleshooting Problem Possible Cause Possible Solution The sides of the • - • This is normal. cabinet and door strip get warm. The appliance makes • The appliance is not located on • Adjust the feet to level the abnormal sounds. level ground.
- Page 35 Troubleshooting To contact the technical assistance, visit our website: https://corporate.haier-eu- rope.com/en/ Under the section “website”, choose the brand of your product and your country. You will be redirected to the specific website where you can find the telephone number and form to contact the technical assistance.
-
Page 36: Installation
Installation Unpacking WARNING! ▶ The appliance is heavy. Always handle with at least two persons. ▶ Keep all packaging materials out of children´s reach and dispose them in an en- vironmentally friendly manner. ▶ Take the appliance out of the packaging. ▶... - Page 37 Installation Connecting water to the appliance Remove the rubber plug (1) from the water inlet valve. ① 2. Firmly push the water tube onto the water inlet valve and tighten up the collar nut. This water pipe needs to be cut from the middle and used, and the other section is used as a spare part.
- Page 38 Installation WARNING! ▶ Ensure that the connections are always firm , dry and leak free . ▶ Make sure the hose is never crushed , kinked , or twisted . Aligning the appliance The appliance should be placed on a flat and solid surface .
- Page 39 Installation WARNING! Do not adjust the hinge lifting shaft excessively to a height which might cause the shaft to leave its original locked position .( Adjustable height range :3 mm ) Waiting time To the maintenance-free lubrication oil is located in the capsule of the compressor. This oil can get through the closed pipe system during slanting transport.
- Page 40 Installation 1.Release the left side of two water couplers on the front left corner at the bottom of appliance : press and hold in the collar as shown and remove the water pipe .( Fig .11). Fig.11 2.Undo the hinge cover screw and Fig.12 remove the cover ( Fig .12).
-
Page 41: Technical Data
Technical data Product fiche according to regulation EU No. 2019/2016 Brand Haier HSW59F18DIMM Model name / identifier HSW79F18DIPT Refrigerator-freezer Category of the model Energy efficiency class Annual energy consumption(kWh/year) (1) Total volume(L) Volume refrigerator(L) Volume freezer(L) Volume Ice Storage bin(2-Star)(L) Star rating Temperature of other compartments>14°C... - Page 42 Technical data Explanations: • Yes, featured (1) Based on the results of the standards conformance test over 24 hours. The actual consumption depends on the use and the location of the appliance. (2) Climate rating SN: This appliance is intended for use in an ambient temperature of between + 10°C and +32°C Climate rating N: This appliance is intended for use in an ambient temperature of between + 16°C and +32°C...
-
Page 43: Customer Service
▶ your local dealer or ▶ our European Call Service-Center (see listed phone numbers below) or ▶ the Service & Support area at www.haier.com where you can activate the service ▶ claim and also find FAQs. To contact our Service, ensure that you have the following data available. - Page 44 Customer service * For other countries please refer to www.haier.com Haier Europe Trading S.r.l Branch UK Westgate House, Westgate, Ealing London, W5 1YY *Duration of the guarantee of the refrigerating appliance: Minimum guarantee is: 2 years for EU Countries, 3 years for Turkey, 1 year for UK, 1 year for Russia, 3 years for Sweden, 2 years for Serbia, 5 years for Norway, 1 year for Morocco, 6 months for Algeria, Tunisia no legal warranty required.
- Page 45 2023 Version A 0060535982...
Need help?
Do you have a question about the HSW59F18DIMM and is the answer not in the manual?
Questions and answers