Table of Contents
Advertisement
Quick Links
Advertisement
Table of Contents

Related Manuals for Fysic F15


Summary of Contents for Fysic F15
- Page 1 User Manual F15 Flip mobile phone with panic button...
- Page 2 Introduction Thank you on purchasing the Fysic F15 telephone. This easy to use mobile phone for seniors is compatible and suitable for 4G mobile network. It offers many functions such as a SOS alarm button which sends SMS with SOS message to emergency numbers or calls emergency numbers in handsfree mode.
- Page 3 Description phone...
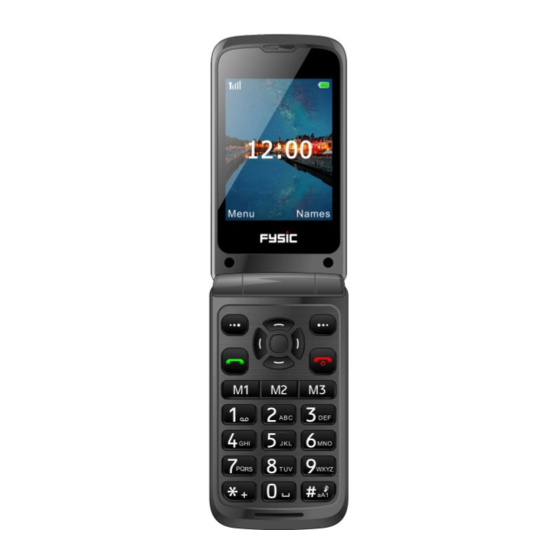
- Page 4 Instructions buttons and telephone appearance 1. Earpiece 2. Arrow buttons 3. Left-selection button 4. Call button 5. Speed dial button: M1 6. Speed dial button: M2 7. Voice mail 8. Right-section button/Back button 9. + Volume button/Torch button 10. End call button/Power on/Power off 11.
-
Page 5: Table Of Contents
Contents Installation ........................7 Installing the SD card ...................... 7 Installing the SIM card ....................8 Installing the battery ......................8 Menu ..........................9 Phonebook ........................9 Add new contact ......................10 Photo contact ........................11 Delete multiple ....................... 12 Import/Export ......................... - Page 6 Broadcast message ......................15 Voice mail server ......................16 Settings ........................... 16 Message capacity ......................16 Call logs ......................... 16 Alarm ..........................17 Camera .......................... 17 Magnifier ........................18 Recorder ........................19 Organizer ........................19 Calendar ......................... 19 Calculator ........................20 Alarm ..........................
- Page 7 Display ........................... 26 Profiles ........................... 26 Security settings ......................27 Connections ........................27 Bluetooth ........................27 Speed dial ........................28 Dial Num Voice ......................29 Specifications ........................ 29 EU declaration of conformity ..................31...
-
Page 8: Installation
Installation IMPORTANT Turn off the phone and disconnect the charger before removing the battery cover. Installing the SD card Insert the memory card into the slot under the SIM card holder, make sure the card faces downwards. Do not scratch or bend the card. The SD card is used as a phone storage. When connect to a computer by a USB cable you can copy data such as music, contacts, pictures,…... -
Page 9: Installing The Sim Card
Installing the SIM card 1. Insert the SIM card into the SIM card slot upon the memory card holder. (Make sure the card is facing inwards.) 2. First, turn off the phone before taking out the SIM card. Installing the battery When you use the phone for the first time, charge the battery for 4 hours to achieve the best state of the battery. -
Page 10: Menu
Menu “ When in standby mode, you can choose by the Left-selection button Menu” different options by scrolling the buttons and you can choose the options “Phonebook”, “Message”, “Call logs”, “Alarm”, “Camera”, “Magnifier”, “Recorder”, “Organiser”, “Multimedia”, “Settings”. The chapters below explain each section in detail. -
Page 11: Add New Contact
Add new contact: You can add a new contact to the SIM card or Phone. 1. Go to Phonebook ---> Add contacts ---> Select Phone or SIM to add you contact ---> New and press the center of the navigator buttons 2. -
Page 12: Photo Contact
Photo Contact: You can also create a Contact with a picture associated with it. This is particularly useful when you receive an incoming call as the picture will be displayed on the inside screen. Therefor you can see who is calling by simply looking at the photograph of the contact. Go to Phonebook --->... -
Page 13: Delete Multiple
Delete multiple: You can multi-select the contacts and delete them. Import/Export: You can import or export contacts. Others: Indicates the memory status of your contacts. Message In standby mode you press Menu and scroll to Message. You can choose the following options: “Write message”, “Inbox”, “Outbox”, “Drafts”, “Sentbox”, “Security inbox”, “Templates”, “Broadcast message”, “Voice mail ”, “Settings”, “Message capacity”. -
Page 14: Write Message
Write message: 1. Menu ---> Message ---> Write message 2. Enter the number or select a number from the phonebook list by using the center of the navigator buttons and scroll to choose your contact number. 3. Use the button to go to the next rule to type your text message. -
Page 15: Outbox
Others options as below: Reply by SMS: Input your message and send to the sender. Forward: Choose another contact to forward the same message. Delete: Press select to delete the message. Delete all: Press to delete all messages. Call: Press “call” to make a phone call. Move: Press “move”... -
Page 16: Sentbox
1. Menu ---> Message ---> Drafts. 2. Scroll to the message you wish to review. 3. Press the central navigator button to view. 4. Press OPTIONS to see all the options available that can be performed on this selected text message. Sentbox: Here you can check all messages you sent out. -
Page 17: Voice Mail Server
Voice mail server: Here you can save the voice mail number. Settings: Here you can check SMS validity, Status report, Reply path, Save sent messages, Preferred storages (in SIM card or Phone), Export SMS. Message capacity: Here you can check the SMS memory on SIM card or Phone (max: 200). Note: You can delete messages in the Inbox, Outbox, Draftbox or Sent Message. -
Page 18: Alarm
Alarm 1. To edit an alarm press “Menu” or the center of the navigator buttons scroll to “Alarm” to edit an Alarm 1, 2 and/or 3. Select with the center navigator button an alarm and edit Message (name of the alarm), Time, Ringtone and Repeat mode. 2. -
Page 19: Magnifier
all and see the “Details” of your picture. 4. Choose Options, set More options to choose “camera mode” or “video mode”. Thereafter you can use the right and left arrow buttons to set your pictures of movie settings. 5. Choose Options, Settings to set some settings of the camera, images you want. Warning! If the memory card is insufficient, delete some documents or expand the storage with another card with more memory. -
Page 20: Recorder
Recorder In standby mode, press “Menu” to scroll to Recorder, press OK and start recording to press the center button on the navigator buttons to record the voice, press pause the recording, press to get on with recording. When choose “Stop”, the record will be automatically saved. -
Page 21: Calculator
Today's day and date is shown on the display. 2. Press Options to do the following settings: Add new schedule: for some important reminder Input subject for the event . • • Enter a start date and time for the event . Activate Ringtone and repeat mode for the event. -
Page 22: Alarm
to use decimal. + - * ÷ b) Use to select ( c) Enter the second number and press the left button OK. The result is shown on the screen. Alarm: 1. Press Menu enter into Oraniser, press OK to select Alarm. 2. - Page 23 Image: View all saved photos under this menu. Camera: See details in chapter “Camera” to use the camera. DV: You can record a video which you can send or save. Audio: All audio files can be shown in this menu. With the scroll button you can adjust the volume.
-
Page 24: Settings
View Timing record and Predefined time & frequency if you like Select Record file list to view record list. Select Storage to choose the storage path on Phone or MemoryCard. Press the arrow buttons button to change the current channel. Press the volume button to adjust the volume. -
Page 25: Sos Setting
SOS settting: Scroll to Menu --> Settings --> SOS setting, select Status “On”. SOS number list: There are 5 contact numbers as options to add. Send SOS SMS: If you would like to send SOS notification message when SOS button activated, please select Status “On”. SOS message settings: The default message is “Please help me! I am in an emergency”. -
Page 26: Call Settings
Select Set format to set the format of Time (12 or 24) and Date. Select Date format to set the format of Date (Year-Mon-Day or Mon- Day-Year or Day-Mon-Year). Select World clock to add city, delete city or set daylight saving system. Select Update time settings 1) Enable or disable Auto update time. -
Page 27: Display
(some advanced settings like Reply SMS after reject, Flight mode and Auto record voice call, etc.) Display: 1. Set Wallpaper form the phone or memory card. 2. Set LCD Brightness by pressing buttons. 3. Set LCD backlight Time. 4. Set buttons backlight time. Profiles: 1. -
Page 28: Security Settings
Security: 1. SIM security: Under this menu, you can turn on or turn off PIN lock and change the PIN code. 2. Phone locked: Under this menu, you can turn on or turn off Phone lock and modify the phone password. The default phone password is “1234”. 3. -
Page 29: Speed Dial
2. Scroll to Bluetooth and Press OK for the below settings: Activate: Select left button Activate/Close to enable or disable bluetooth. Visibility: Select left button Activate/Close to make the phone visible or invisible to other devices. Pair device: Allow you to search new available devices and pair new devices. Device name: Bluetooth name for current device. -
Page 30: Dial Num Voice
Dial Num voice: Here you can enable or disable button pad voice by pressing Activate or Off. Specifications Network: GSM900 class 4 / 880.2-959.8 MHz / < 33 dBm DCS1800 class 1/ 1710.2-1879 MHz / < 30 dBm WCDMA class 3 band I / 1922.4-2167.6 MHz / < 24 dBm WCDMA class 3 band VIII / 882.4-957.6 MHz / <... - Page 31 SAR/DAS: Head: 0.116W/kg - Body: 1.163W/kg - Limb: 2,109W/kg Information power adapter: Manufacturers name and address : Shenzhen YingQin Electronic Co., Ltd, Floor 5, Building 8, Zhengzhong Industrial Plant, Xintian Communinity, Fuhai Street, Baoan District, Shenzhen, China Model Identifier: EE-0501000DPE Input voltage: 100-240VAC Input AC frequency : 50/60 Hz Output voltage: 5.0V DC...
-
Page 32: Eu Declaration Of Conformity
EU declaration of conformity Hereby, Commaxx declares that the radio equipment type F15 is in compliance with Directive 2014/53/EU. The full text of the EU declaration of conformity is available at the following internet address: http://DOC.hesdo.com/F15_DOC.pdf...
Need help?
Do you have a question about the F15 and is the answer not in the manual?
Questions and answers