
Related Manuals for AccuTherm US-5461P-ACCU1

Summary of Contents for AccuTherm US-5461P-ACCU1
- Page 1 Temperature and Humidity Controller US-5461P-ACCU1 Instruction Manual This is the instruction manual for this controller unit,please store it properly. Please read manual before operation. 応用電子 工業株式会社...
-
Page 2: Table Of Contents
Contents 1. Introduction 2. System Configuration 3. Operation Menu 4.「Monitor」Display Screen 4-1. Control Mode (Program control) 4-2. Control Mode (Fix control) 5.「Mode Set」Display Screen 5-1. Operation Mode(Fix/Program)option 5-2. Operation Startup(Instant/Pre-set 01/01 00:00)option 5-3. Key Lock(Enable/Disable)option 5-4. Power down(Stop/Cold start/Warm start)option 6.「Graph」Display Screen 6-1. -
Page 3: Introduction
1.Introduction Thank you for purchasing our US-5461P-ACCU1Temperature and humidity controller. To ensure accurate and proper usage of this equipment, please read and understand this instruction manual before operation. Please observe the following warnings/ cautions before the operation of this device. To ensure safety in handling the instrument, please be sure to observe the following warnings/cautions as well as the precautions in this manual. -
Page 4: System Configuration
2.System Configuration HMI Interface Display I/O BOARD MAIN BOARD (P-791) (US-5461) -
Page 5: Operation Menu
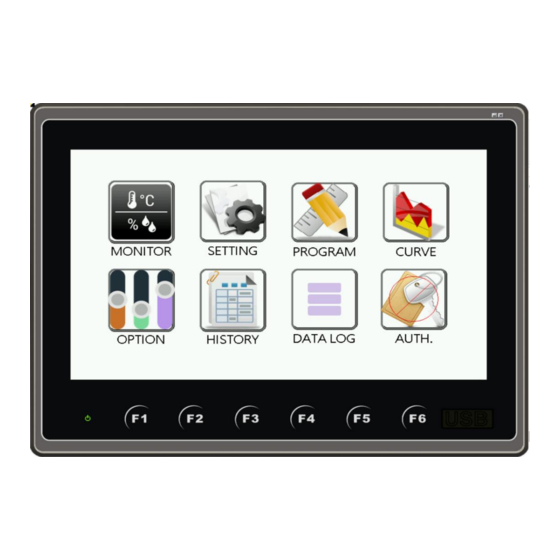
3. Operation Menu This device works on a touch-screen panel for operation and control. All function can be selected from 「Menu Selection」 Operation Menu 1. Set Present Value, Control mode and Operate status 2. For RUN, PAUSE, HOLD, ADVANCE, STOP function Monitor 3. -
Page 6: Control Mode (Program Control)
4.「monitor」operation instruction 4.1 Control Mode=「Program control」 : Message display Program-process Operation Program-Stop Program-Data Detail □ 4-1-1. Top Right hand corner a shows the status of controller(RUN/STOP) □ 4-1-2. Top Left hand corner b to return to the menu selection page □... -
Page 7: Control Mode (Fix Control)
4-2. Control Mode=「Fix mode」 : Fix-In:Stop Fix-In:Progress Output : Fix Control □ 4-2-1. Top Right hand corner a shows the status of controller(RUN/STOP) □ 4-2-2. Top Left hand corner b to return to the menu selection page □ 4-2-3. Bottom Left hand corner c 「CURVE」... - Page 8 4-2-4. Bottom corner “NEXT”to check and view current humidty bulb value, input/ output, current status, and to stop, hold, jump and continue operation. 4-2-5. you could press “JUMP” jump to next step. (you need to press twice when you set up “WAIT” fuction) 4-2-6.
- Page 9 5-2. END mode( STOP/ NORMAL ℃)options To set up the temperature after program stop. STOP – controller stop immediately when program end NORMAL ℃ - Controller will stop after reach the setting temperature(0~50℃). 5-3. KEY LOCK( YES / NO)options The ICON LOCK for RUN and STOP. 5-4.
-
Page 10: Graph」Display Screen
Real time curve shows the operation curve whithin 3 hour. And the curve will be disappear when controller stop 6-2. Curve setting and historical records Program setting curve History cureve Top Left corner「menu selection」to return to the main selection page;Top Right corner「MONITOR display」to return to “MONITOR”... - Page 11 according in this program individually. Enter as below: Setting Procedure 1 : make sure the program number and start setting the program. Set the temperature value, humidity value, time period, temperature waiting time, humidity waiting time and time signal (4 units) ※...
- Page 12 Seting Procedure 4:Set the time period of segment ※ Setting range : 00H00M ~ 99H59M ※ The Slop control will be actived if the setting time period is not zero. Seting Procedure 5: Waiting mode is active or not. ※ Set the temperature and humidity waiting mode is active or not ※...
- Page 13 Seting Procedure 7: Set the time signal type. ※ There are 10 time siganl type could be set ※ time signal type could be set in “time signal setting” screen Seting Procedure 8: Cycle setting You could set total, part and link cycle in cycle setting screen if you need Cycle pattern Cycle Times range :1~9999 Link pattern setting range 1~9...
- Page 14 7.2 Program edit Edit the program which is set before 7.3 Time signal setting There are ten terms (0-9) in “Time signal time set” screen. NO.0 represent OFF;and NO.1 represent ON, NO.0 and NO.1 cannot be altered;NO.2-NO.9 can be set according to requirement. Explaination as below: ON DELAY:time signal act after segment counting started and(ON DELAY TIME)period passed。...
- Page 15 8. Option Setting The option setting screen is shown below 8.1 Waiting mode setting Set the temperatire and humidity waiting parameter. 8.2 Time setting Set the time of controller 8.3 Language 3 kinds of language could be changed (traditional Chinese, simple chanese, English) 8.4 LCD setting Set the backlight valume(0~15) and screen saver time(0~99 minutes) 8.5 Version...
- Page 16 9. Event Record History 9.1 Alarm history This screen list down all the alarm records. A total of 50 events can be stored...
- Page 17 9.2 Operation history This screen list down all the operation records. A total of 100 events can be stored 10. DATA LOG 10.1 Link of logger data Could choose C: for internal memory, D: for external memorry(SD card), E: for external memorry(USB disk) 10.2 record interval 5 sec, 30 sec, 1 min, 5 min, 10 min interval could be choosed 10.3 File save config...
- Page 18 11. Authority setting 11.1. User:input account ID of operator. 11.2. Password:input password of operarator. 11.3. Authorisation:Administrator and User account can be set: Administrator has the full operation authorisation User are only authorize to view and operate program accordingly...
Need help?
Do you have a question about the US-5461P-ACCU1 and is the answer not in the manual?
Questions and answers