Table of Contents
Advertisement
Advertisement
Table of Contents

Subscribe to Our Youtube Channel
Summary of Contents for Sitecom LN-505
- Page 1 LN-505/506/507/508/509 LN-515/516/517/518 Homeplug User Manual Version 1.0...
-
Page 2: Table Of Contents
8.2 Add an extra Homeplug................20 Appendix A: Add an extra Homeplug to an existing network ........ 21 Install the Hardware ................21 2. Add a Slave Homeplug to a secured network ..........22 3. Configure your secured network..............24 Full manual Sitecom LN-505/515/506/516/507/517/508/518/509 Homeplug... -
Page 3: Safety Instructions
Homeplug adapter has been exposed to rain or water. the Homeplug adapter does not work, even though the operating instructions have been followed properly. the Homeplug adapter’s case is damaged. Full manual Sitecom LN-505/515/506/516/507/517/508/518/509 Homeplug... -
Page 4: Ce Conformity
(R&TTE) and 2006/95/EC (LVD), and it is designed for use in the EU and Switzerland. The product is class II equipment. This equipment may cause interference with radio waves in home use; if this occurs the operator may be required to take cor- rective action. Full manual Sitecom LN-505/515/506/516/507/517/508/518/509 Homeplug... -
Page 5: Introduction
Two CAT 5e Ethernet cables (1.5 meter) 3.3 About this manual The images in this manual are based on the LN-515 Homeplug, but are also applicable to the other models. In case it is not applicable this will be clearly noticed. Full manual Sitecom LN-505/515/506/516/507/517/508/518/509 Homeplug... -
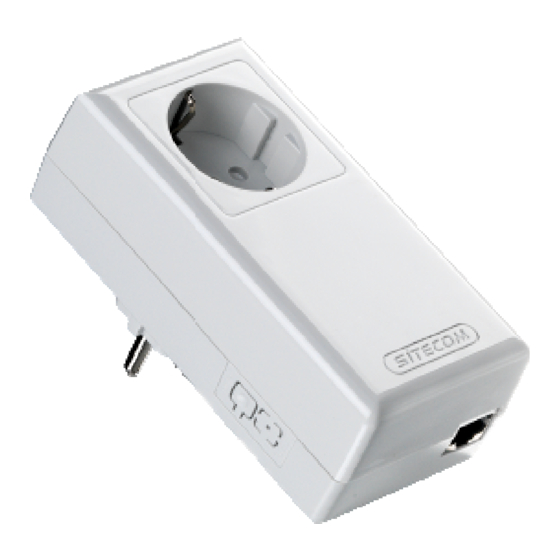
Page 6: Introduction Of The Hardware
Indicates an active connection and data transfer between Homeplugs Indicates an active connection and data transfer between the Homeplug and connected device Reset button. Press and hold for 3-5 seconds to reset to factory defaults NMK button. See chapter 8. Full manual Sitecom LN-505/515/506/516/507/517/508/518/509 Homeplug... -
Page 7: Ln-507/Ln-517
Indicates an active connection and data transfer between Homeplugs Indicates an active connection and data transfer between the Homeplug and connected device Reset button. Press and hold for 3-5 seconds to reset to factory defaults NMK button. See chapter 8. Full manual Sitecom LN-505/515/506/516/507/517/508/518/509 Homeplug... -
Page 8: Ln-509
Indicates an active connection and data transfer between Homeplugs Indicates an active connection and data transfer between the Homeplug and connected device Reset button. Press and hold for 3-5 seconds to reset to factory defaults NMK button. See chapter 8. Full manual Sitecom LN-505/515/506/516/507/517/508/518/509 Homeplug... -
Page 9: Install The Hardware
Start with the Homeplug which is labeled as ‘Master’. You’ll see this on the backside of the Homeplug. Plug the Ethernet cable in the Ethernet port on the master Homeplug. Connect the master Homeplug to your computer and plug it into the socket. Full manual Sitecom LN-505/515/506/516/507/517/508/518/509 Homeplug... -
Page 10: Install The Slave Homeplug
Take the Homeplug which is labeled as ‘Slave’. You’ll see this on the backside of the Homeplug. Plug the Ethernet cable in the Ethernet port on the slave Homeplug. Connect the slave Homeplug to your Internet router and plug it into the socket. Full manual Sitecom LN-505/515/506/516/507/517/508/518/509 Homeplug... - Page 11 With the LN-509 you have the possibility to connect 3 devices simultaneously. Your network is now fully functional. Follow the next steps to secure your network. Full manual Sitecom LN-505/515/506/516/507/517/508/518/509 Homeplug...
-
Page 12: Install The Software
Install the software only on the PC which is connected to the Master Homeplug. Insert the CD in the computer. Windows 7/Vista will prompt you to run CDMenu4.exe. The CD menu will start choose ‘Install utility’. Full manual Sitecom LN-505/515/506/516/507/517/508/518/509 Homeplug... - Page 13 Windows Vista/7 will ask permission to start the installation which looks similar to this image. Choose your language for installation. The WinPcap Installer will start, click Next. Click Next. Full manual Sitecom LN-505/515/506/516/507/517/508/518/509 Homeplug...
- Page 14 Click, I agree. Click Install. Click Finish. Full manual Sitecom LN-505/515/506/516/507/517/508/518/509 Homeplug...
- Page 15 The Homeplug Utility setup will start, click Next. Choose an installation folder or keep the default folder (recommended) and click Next. Click Next. Full manual Sitecom LN-505/515/506/516/507/517/508/518/509 Homeplug...
- Page 16 The software will be installed on your computer. Click Close to finish the installation. Full manual Sitecom LN-505/515/506/516/507/517/508/518/509 Homeplug...
-
Page 17: Configure The Network
6. Configure the network Start the software on the PC connected to the Master Homeplug by double clicking the Sitecom icon. Select the Homeplug in the ‘Powerline devices detected’ list and click ‘Enter Password’. Full manual Sitecom LN-505/515/506/516/507/517/508/518/509 Homeplug... - Page 18 ‘OK’. NOTE: the DAK code is case sensitive Select the ‘Privacy’ tab in the Homeplug utility. Fill in a chosen network name in the ‘Private Network Name’ field. Click ‘Set all devices’. Full manual Sitecom LN-505/515/506/516/507/517/508/518/509 Homeplug...
- Page 19 A popup appears to inform you the network name has been changed. Your network type now has changed to ‘private’. Click ‘Close’ Full manual Sitecom LN-505/515/506/516/507/517/508/518/509 Homeplug...
-
Page 20: Setting Security With The Push Button Method
3. Wait for the connection to complete. 8.2 Add an extra Homeplug If you have 2 Sitecom Homeplugs in an already secured network and you want a new device (“Slave”) to join the network, please following these steps below: 1. Press the pushbutton on the ‘Slave’ for 5~8 seconds. -
Page 21: Appendix A: Add An Extra Homeplug To An Existing Network
Plug the Ethernet cable in the Ethernet port. Plug the cable into the device you want to connect to your network. Your network is now fully functional. Follow the next steps to secure your network. Full manual Sitecom LN-505/515/506/516/507/517/508/518/509 Homeplug... -
Page 22: Add A Slave Homeplug To A Secured Network
2. Add a Slave Homeplug to a secured network Start the software on the PC connected to the Master Homeplug. Click ‘Add remote’ Full manual Sitecom LN-505/515/506/516/507/517/508/518/509 Homeplug... - Page 23 ‘OK’. NOTE: the DAK code is case sensitive Fill in the password from your existing network. If you do not remember this password you can find it under the privacy tab. Full manual Sitecom LN-505/515/506/516/507/517/508/518/509 Homeplug...
-
Page 24: Configure Your Secured Network
3. Configure your secured network Select the Homeplug you have added in the previous step from the ‘Powerline devices detected’ list and click ‘Enter Password’. Full manual Sitecom LN-505/515/506/516/507/517/508/518/509 Homeplug... - Page 25 ‘OK’. NOTE: the DAK code is case sensitive Select the ‘Privacy’ tab in the Homeplug utility. Fill in a chosen network name in the ‘Private Network Name’ field. Click ‘Set all devices’. Full manual Sitecom LN-505/515/506/516/507/517/508/518/509 Homeplug...
- Page 26 Note: All the information contained in this manual was correct at the time of publication. However, as our engineers are always updating and improving the product, your device may have a slightly different appearance or modified functionality than presented in this manual. Full manual Sitecom LN-505/515/506/516/507/517/508/518/509 Homeplug...
Need help?
Do you have a question about the LN-505 and is the answer not in the manual?
Questions and answers