Advertisement
Quick Links
38338
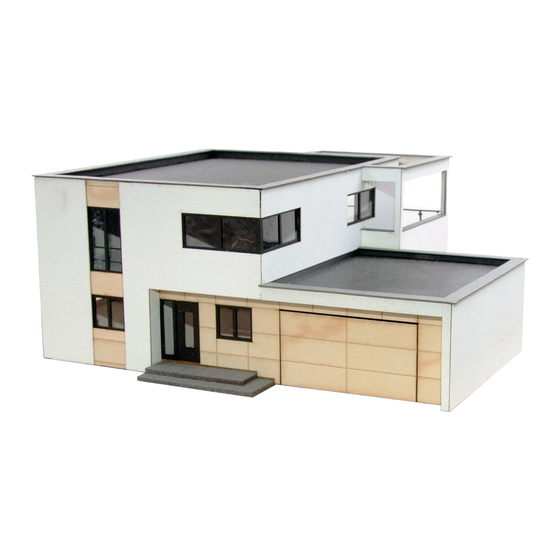
H0 Kubushaus Anna mit Balkon - Polyplate Bausatz
H0 Cube house Anna with balcony - Polyplate kit
DE
1. Inhalt .................................................1
4. Montage ............................................5
Bitte legen Sie die Einzelteile nach
Baugruppen
zusammen und beginnen Sie
dann
entsprechend der Zeichnungen
dem Zusammenbau.
Dieser Bausatz besteht aus nachhaltigem
Polyplate Verbundwerkstoff.
Für den Zusammenbau dieses hoch-
wertigen Polyplate-Bausatzes empfehlen
wir unseren kibri Polyplate Kleber,
Art. 39997.
Änderungen vorbehalten. Keine Haftung für
Druckfehler und Irrtümer.
Die aktuelle Version der Anleitung finden Sie auf
der Homepage unter der Artikelnummer.
Montageanleitung
Mounting instructions
EN
1. Contents .............................................1
4. Mounting .............................................5
Arrange the individual parts by assembly
groups, and then begin assembling in
mit
accordance with the drawings.
This kit consists of sustainable Polyplate
composite material.
For the assembly of this high-quality
Polyplate kit, we recommend our kibri
Polyplate glue, item 39997.
Subject to change without prior notice. No liability for
mistakes and printing errors.
You will find the latest version of the manual on the
website using the item number.
Schwierigkeitsgrad
Einsteiger
der Bausätze:
Learners
Level of difficulty:
Fortgeschrittene
Advanced learners
Profis
Professionals
Made in Europe
1. Inhalt / Contents
Baugruppe
Teile-Nr.
Assembly group
Part No.
A
1
2
3
4
5
6
6a
7
7a
8
9
10
11
12
12 C
12 B
12 D
13
14
15
16
17
18
19
20
21
22
23
24
B
1
1/2
1/3
2
2/2
3
3/2
4/1
4/2
4/3
5
5/2
6
7
80873
12
Stand 01/sw
04/2023
12/2
Ho/Kf
Stück
Baugruppe
Teile-Nr.
Pieces
Assembly group
Part No.
1
B
12/3
1
12/4
1
14
1
15
2
1
D
1
1
2
1
3
1
4
1
5
1
6
1
7
1
8
1
9
1
10
1
1
F
1
1
2
1
3
1
4
1
1
G
1
1
2
1
3
1
4
1
5
1
1
I
1
1
EL
1
1
2
1
3
1
1
Tormontagestift
1
Door mounting pin
1
1
1
1
1
14,6 cm
1
1
1
1
1
1
17,6 cm
Stück
Pieces
2
1
1
1
1
1
1
1
1
1
1
1
1
1
1
1
1
1
1
1
1
1
1
2
1
1
1
2
1
Advertisement

Related Manuals for Kibri 38338


Summary of Contents for Kibri 38338
- Page 1 This kit consists of sustainable Polyplate composite material. Dieser Bausatz besteht aus nachhaltigem Polyplate Verbundwerkstoff. For the assembly of this high-quality Polyplate kit, we recommend our kibri Für den Zusammenbau dieses hoch- Polyplate glue, item 39997. wertigen Polyplate-Bausatzes empfehlen wir unseren kibri Polyplate Kleber, Art.
- Page 2 Baugruppe A / Assembly group A A 6 & A 7a A7 a A 6a A 10 A 11 A 12 + A 13 A 12 C A 16 + A 17 A 18 A 12 B A 15 + A 14 A 12 D A 19 A 20...
- Page 3 Baugruppe B / Assembly group B B 12/2 B 12 B 14 B 2/2 B 12/3 B 4/1 B 4/3 B 1/3 B 12/4 B 4/2 B 15 B 3/2 B 5/2 B 1/2 Baugruppe D / Assembly group D KABEL / WIRE D8 - D10 D 10...
- Page 4 Baugruppe F / Assembly group F Baugruppe I / Assembly group I EL 1-3 2 x Tormontagestift Door mounting pin Baugruppe G / Assembly group G...
- Page 5 2. Montage / Mounting Zwischendecke A 15 A 16 False ceiling Bei Verwendung von Viessmann Art. 6002 werden die Durchlässe am Bauteil D 1 zum Einsetzen der LEDs herausgelöst. When using Viessmann item 6002, the openings on component D 1 for inserting the LEDs are removed.
- Page 6 Bei Verwendung von Viessmann Art. 6002 wird die Kopplung wird mit etwas Kleber zwischen die Bauteile EL 1 und EL 2 geklebt. Diese Bauteile sind Identisch. A 12 C When using Viessmann item 6002, the coupling is glued between some adhesive between the components EL 1 and EL 2.
- Page 7 A 10 B 4/3 B4/3 B 1/3 B 4/1 Die Bauteile A 9 & A 10 können mit B 1/2 B 4/2 leichter Drehung angeklebt werden. The components A 9 & A 10 can be attached with a slight twist. Die Fassadenteile B 4/1, B 4/2, B 1 und B 1/2 werden an den Rillen auf den Bauteilen A 1, A 4 an Unterkante und der Oberkante des Gebäudes positioniert.
- Page 8 Die Bauteile Das Bauteil G 5 wird in das B 12/3 (rechts und Links) Geländer A 8 eingelegt und B 12/2 (oben) und mit etwas nicht ätzendem B 5/2 B 12 (vorne) werden Klebstoff fixiert. zuerst als Rahmen Die Baugruppe wird in die angebracht und Zinkeindeckung vom Rahmen bilden die Einfassung...
- Page 9 Böden A 19 – A 21 werden in das Haus gelegt. Die Bodenbauteile A 18 und A 22 bilden das Erdgeschoss. Flooring panels A 19 – A 21 will be laid in the house. The floor components A 18 and A 22 form the ground floor. A 20 A 19 A 21...
- Page 10 Der Stecker muss gut mit Sekunden- kleber in den Bauteilen EL 3 und D 3 verklebt und eingepresst werden. Das montierte Dach wird vorsichtig in die Führungen gesetzt und Achtung! mit leichtem Druck in den Kern gesetzt. Der dünne Kontakt ist Das Dach benötigt keinen Kleber.
Need help?
Do you have a question about the 38338 and is the answer not in the manual?
Questions and answers