
Related Manuals for HOME8 PIR1301


Summary of Contents for HOME8 PIR1301
- Page 1 Infrared Motion Sensor PIR1301 User Manual home8alarm.com Infrared Motion Sensor User Manual V1.0 2017 1-844-800-6482 | support@home8alarm.com...
-
Page 2: Table Of Contents
Table of Contents Chapter 1. Introduction ................. 2 System Requirement ....................2 Chapter 2. Hardware Overview ..............3 Chapter 3. Sensor Installation & Add/Remove/Rename Sensor ....5 Sensor installation ....................5 Adding the Sensor to the System ................5 Positioning & Installing Sensor................. 9 Remove Sensor from System ................ -
Page 3: Chapter 1. Introduction
Operating Temperature : 5°F to 104°F (-15°C to 40°C) Battery: Panasonic CR123A non-rechargeable battery 1.1 System Requirement This section explains the system requirement. Network: Proprietary 433MHz RF protocol, must co-work with Home8 OPU2/OPU3 Shuttle Infrared Motion Sensor User Manual V1.0 2017... -
Page 4: Chapter 2. Hardware Overview
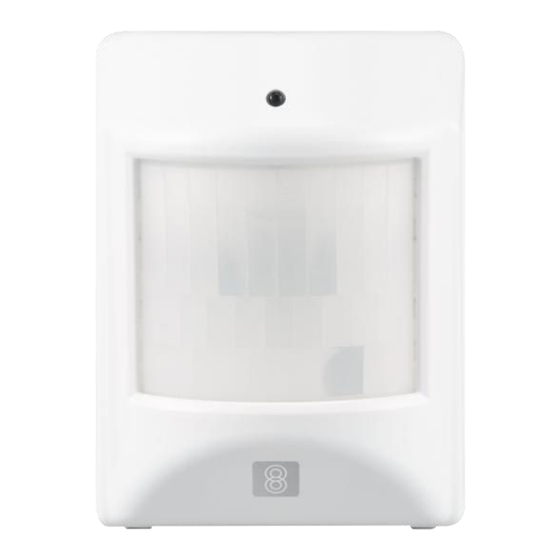
Chapter 2. Hardware Overview This section provides an overview of the PIR sensor. Infrared Motion Sensor User Manual V1.0 2017... - Page 5 Infrared Motion Sensor User Manual V1.0 2017...
-
Page 6: Chapter 3. Sensor Installation & Add/Remove/Rename Sensor
Chapter 3. Sensor Installation & Add/Remove/Rename Sensor 3.1 Sensor installation 1. Release cover tab to open the cover 2. Insert CR123A battery, and put the cover back (Please make sure the battery polarity before inserting.) 3. Sensor takes around 10 seconds to warm up, and LED will blink 7 times during sensor warm up 4. - Page 7 1. Tap the menu icon to show the sidebar menu. 2. Tap “Device Management”. If you have more than one Security Shuttle, you may need to swipe left more than once to find the one you wish the sensor to connect to. After selecting the Security Shuttle, tap the plus icon “+”...
- Page 8 3. Select “Sensor”. 4. Follow the on-screen instructions. When finished, press “Next”. Infrared Motion Sensor User Manual V1.0 2017...
- Page 9 5. After scanning the QR code located on the bottom of the sensor, the “sensor adding” process will begin. The process will take approximately 1 to 2 minutes. 6. When the activation is completed, the sensor will be added to the device management page. In the illustration shown below, the name of the Security Shuttle is “Location1”...
-
Page 10: Positioning & Installing Sensor
3.3 Positioning & Installing Sensor After the “sensor adding” process has been completed, you can place the device at the desired location. For the best performance we recommend to face the sensor towards an open area, and place the sensor at least 2 meters above the ground. -
Page 11: Remove Sensor From System
3.4 Remove Sensor from System If you want to remove the sensor from the system, complete the following steps. 1. Tap the menu icon to show the sidebar menu. 2. Tap “Device Management”. If you have more than one Security Shuttle, you may need to swipe left more than once to find the one you wish the sensor to connect to. -
Page 12: Rename Sensor From System
3. Tap “Remove Sensor”, the app will ask for confirmation if you really want to remove the sensor. Simply tap “Yes” to confirm & remove. 3.5 Rename Sensor from System If you want to the rename sensor from the system, complete the following steps. Infrared Motion Sensor User Manual V1.0 2017... - Page 13 1. Tap the menu icon to show the sidebar menu. 2. Tap “Device Management”. If you have more than one Security Shuttle, you may need to swipe left more than once to find the one you wish the sensor to connect to. After selecting the Security Shuttle, select the desired sensor you want to rename by tapping “>”.
- Page 14 3. Tap “>” to rename the sensor that will be shown on the app, and tap “V” to complete. Infrared Motion Sensor User Manual V1.0 2017...
-
Page 15: Chapter 4. Sensor Operation
Chapter 4. Sensor Operation 4.1 Sensor operation modes, and way to judge valid motion trigger The sensor has 2 different modes, which are “Test Mode” and “Normal Mode”. For a detailed description behavior about these 2 modes, please refer to the following table. Mode How to enter? Condition of valid... -
Page 16: When Valid Motion Alert Happens
Fig.3 Illustration when multiple motions are detected during 3-minute countdown window under “Normal Mode” 4.2 When valid motion alert happens When valid motion alert happens, the LED indicator on the sensor will blink one time, and your app will also pop out a notification to indicate there’s a motion alert as below. Infrared Motion Sensor User Manual V1.0 2017... -
Page 17: Low Battery Alert
4.3 Low battery alert This sensor can automatically detect current battery status, and report “low battery” when battery level is too low. When “low battery” happens, the LED indicator on the sensor will blink constantly, and the app will also show “low battery alert from sensor”... - Page 18 Infrared Motion Sensor User Manual V1.0 2017...
-
Page 19: Appendix - Glossary Of Terms
Appendix – Glossary of Terms Arm: The cameras and other security related sensors in the system are actively monitoring the surroundings. Any suspicious activity that has been detected by the camera or sensor will prompt the app to immediately send a notification.
Need help?
Do you have a question about the PIR1301 and is the answer not in the manual?
Questions and answers