Table of Contents
Advertisement
Advertisement
Chapters
Table of Contents

Related Manuals for Daikin FCW15ARV16


Summary of Contents for Daikin FCW15ARV16
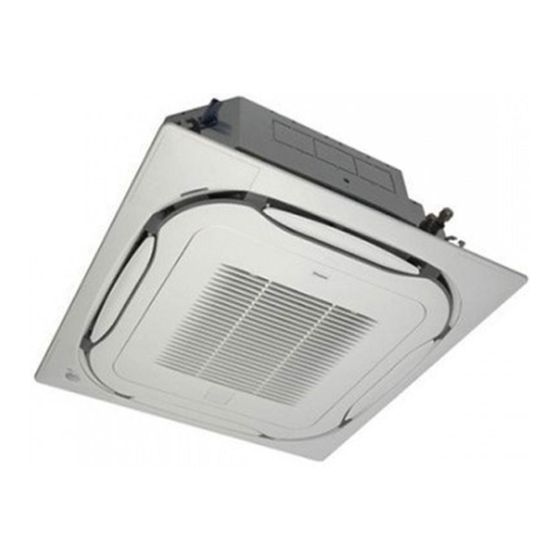
- Page 1 INSTALLATION MANUAL DAIKIN Air Conditioners CHILLED WATER CASSETTE FCW15ARV16 FCW18ARV16 FCW24ARV16 English FCW27ARV16 FCW30ARV16 FCW33ARV16 FCW36ARV16 FCW42ARV16 FCW46ARV16 FCW48ARV16 READ THESE INSTRUCTIONS CAREFULLY BEFORE INSTALLATION. KEEP THIS MANUAL IN A HANDY PLACE FOR FUTURE REFERENCE.
-
Page 2: Table Of Contents
DAIKIN FCW15ARV16 FCW33ARV16 Installation manual FCW18ARV16 FCW36ARV16 FCW24ARV16 FCW42ARV16 FCW27ARV16 FCW46ARV16 FCW30ARV16 FCW48ARV16 CONTENTS 1. SAFETY PRECAUTIONS ................... 2 2. BEFORE INSTALLATION ................... 4 3. SELECTING INSTALLATION SITE ................6 4. PREPARATIONS BEFORE INSTALLATION ..............8 5. INDOOR UNIT INSTALLATION ...................10 6. - Page 3 • Be sure to switch off the unit before touching any electrical parts. • Be sure to earth the air conditioner. • Do not earth the unit to a utility pipe, lightning conductor or telephone earth lead. Imperfect earthing may result in electric shocks or fire.
-
Page 4: Before Installation
2. BEFORE INSTALLATION Do not exert pressure on the resin parts when opening the unit or when moving it after opening. • When opening the unit or moving it after opening, be sure to lift it by holding on to the hanger bracket without exerting any pressure on other parts, especially, drain piping, and other resin parts. - Page 5 Table 1 Unit model Decoration Panel Wireless Remote Controller ARC91A156 FCW15, 18,24,27,30,33,3 6, BYCQ48EAF6 42, 46, 48 ARV16 Color : Fresh White Supplied with IOU FOR THE FOLLOWING ITEMS, TAKE SPECIAL CARE DURING CONSTRUCTION AND CHECK AFTER INSTALLATION IS FINISHED. 1.
-
Page 6: Selecting Installation Site
2. Items to be checked at time of delivery * Also review the "1. SAFETY PRECAUTIONS" Items to be checked Check Has the field setting done (as necessary)? Did you attach the control box lid, the air filter, and suction grille? Does the cold air blow properly during the cooling operation? Did you explain about operations while showing the instruction manual to your customer? Did you hand the instruction manual over to your customer? - Page 7 H (mm) Model BYCQ48EAF6 FCW15, 18, 24, 27, 30 ARV16 FCW33, 36, 42, 46, 48 ARV16 Indoor unit Indoor unit *At least I At least 1500mm 1500mm from a wall At least 2000mm (NOTE) At least 4000mm Fig. 2 NOTE-:Di •...
-
Page 8: Preparations Before Installation
4. PREPARATIONS BEFORE INSTALLATION 4-1.Relation of ceiling opening to unit and suspension bolt position. :::=- cii Q) c: ..c: :,..__-1--1---. v · - Water Piping C. c_:!::: c.. C: - O> Hanger ---------+--------- :.:::; uspens1on bracket ·a5 0 - C: .. - Page 9 ■ Installation is possible when ceiling opening dimensions is as follows. • When installing the unit within the frame for fixing false ceiling. (Opening dimension inside the flame for ceiling) Frame False ceiling � 1 . _ _ 3' 2 0 :?: 2 0 •...
-
Page 10: Indoor Unit Installation
5. INDOOR UNIT INSTALLATION Installing optional accessories (except for the decoration panel) before installing the indoor unit is easier. However, for existing ceilings, install fresh air inlet component kit and branch duct before installing the unit. As for the parts to be used for installation work, be sure to use the provided accessories and specified parts designated by our company. - Page 11 (1-4) Check the unit is horizontally level. (Refer to Fig.13) • The indoor unit is equipped with a built-in drain pump and float switch. Verify that it is level by using a level or a water-filled vinyl tube. - � CA U TION •...
-
Page 12: Water Pipingw Ork
Chiller 6. WATER PIPING WORK • Carry out insulation of both inlet and outlet water piping securely along with the purge valve. If not insulated, it may cause water leakage. For water outlet piping, use insulation material of which heat resistant °... - Page 13 • Use the attached drain hose (1) and Metal clamp (2). • Insert the drain hose into the drain socket up to the base, and tighten the metal clamp securely within the portion of a white tape of the hose-inserted tip. Tighten the metal clamp until the screw head is less than 4 mm from the hose.
- Page 14 (2) A fter piping work is finished, check if drainage flows smoothly. WHEN ELEC T RIC WIRING W O RK IS FINISHED • Add approximately 1 L of water slowly from the air outlet and check drainage flow. (Refer to Fig.23) •...
- Page 15 Drain sockets (Check the drainage now.) iii E � --+- ,..,, cu E Service drain outlet (with rubber plug) �o (Use this outlet to drain water from <( T""" the drain pan.) Plastic watering can (Tube should be about 100mm long.) <Adding water through air discharge outlet>...
-
Page 16: Electric Wiring Work
8. ELECTRIC WIRING WORK • Electric wiring work must be conducted by electrician authorized by power companies. (Only licensed electrician can conduct electric work and earth connections.) • All wiring must be performed by an authorized electrician. • A circuit breaker capable of shutting down power supply to the entire system must be installed. (T his installation of an earth leakage circuit breaker is mandatory for the prevention of electric shocks and fire disasters. - Page 17 Wiring Inter-unit wiring through-holes - - - - - - - - - - - - - - - ----..Clamping position Secure the earth wire Inter-unit and inter-unit wiring with wiring sheath both edges aligned. '--- ____ � Clamp (4) _ _ _ Control box lid Cut off any...
- Page 18 - � C AU T I O N ------------------------ • Shape the wires and attach the control box lid securely so that wires will not be caught. (Caught wires and risen lid may cause an electric shock or fire.) Precautions to be taken for power supply wiring Use a round crimp-style terminal for connection to the power supply terminal block.
-
Page 19: Wiring Example
9. WIRING EXAMPLE V AC, ,-- ------- - N 50Hz 1-- - ----1 FROM CUSTOMER � 230 VAC SUPPLY TO WATER VALVE, MAXIMUM CURRENT LOAD- - � C A UTI O N ------------------------ • Refer to "1. I tems to be checked at time of delivery" on page 4 upon completion of the test run and make sure that all the items are checked. - Page 20 OPERATION MANUAL DAIKIN Air Conditioners MODEL Chilled Water Cassette Models FCW15ARV16 English FCW18ARV16 FCW24ARV16 FCW27ARV16 FCW30ARV16 FCW33ARV16 FCW36ARV16 FCW42ARV16 FCW46ARV16 FCW48ARV16 READ THESE INSTRUCTION CAREFULLY BEFORE USE. KEEP THIS MANUAL IN A HANDY PLACE FOR FUTURE REFERENCE...
- Page 21 Thank you for purchasing this Daikin air conditioner. Carefully read this operation manual before using the air conditioner. It will tell you how to use the unit properly and help you if any trouble occurs. This manual explains about the indoor unit only. After reading the manual, file it away for future reference.
- Page 22 ■ DISPOSAL REQUIREMENTS Disposal requirements Your air conditioning product is marked with this symbol. This means that electrical and electronic products shall not be mixed with unsorted house hold waste. Do not try to dismantle the system yourself: the dismantling of the air conditioning system, treatment of the oil and of other parts must be done by a qualified installer in accordance with relevant local and national legislation.
-
Page 23: Safety Precautions
CONTENTS • Consult your local dealer about installation work. Doing the work yourself may result in water leakage, 1. SAFETY PRECAUTIONS ..........23 electric shocks or fire hazards. 2. WHAT TO DO BEFORE OPERATION ......25 • Consult your local dealer regarding modification, 3. - Page 24 • Do not place water containers (flower vases, etc.) • Do not block air inlets or outlets . Impaired air flow may result in insufficient performance on the unit, as this may result in electric shocks or fire. or trouble. •...
-
Page 25: What To Do Before Operation
7 Segment Display Infra Red Reciever IDU Coil Sensor Orange LED Timer Operation Green LED Operation Lamp Red LED ON/OFF Button... -
Page 26: Operation Range
System relocation 3. OPERATION RANGE • Consult your Daikin dealer about remodelling and If the temperature or the humidity is beyond the following relocation. conditions, safety devices may work and the air conditioner may Regarding drainage of drain pipe not operate, or sometimes, water may drop from the indoor unit. -
Page 27: Optimum Operation
Recommended airflow direction position AIRFLOW DIRECTION ADJUST --;. □ Airflow direction adjustment can be done by remote controller. Cooling For details about airflow direction adjustment, refer to operation manual attached to remote controller. We recommend using the fan in the position shown above when fixing the fan direction. -
Page 28: Maintenance (For Service Personnel)
1. Open the suction grille. 8. MAINTENANCE Pull it downward slowly while pressing the buttons pro (FOR SERVICE PERSONNEL) vided on two spots. (Do the same procedure for closing.) ONLY A QUALIFIED SERVICE PERSON IS Fig.1 ALLOWED TO PERFORM MAINTENANCE "... - Page 29 B) Washing with water HOW TO CLEAN THE SUCTION GRILLE When the air filter is very dirty, 1. Open the suction grille. use soft brush and neutral Push it downward slowly while pressing the buttons detergent. provided on two spots. (Follow the same procedure for closing.) Fig.
-
Page 30: Not Malfunction Of The Air Conditioner
6. Reattach the air filter. 9. NOT MALFUNCTION OF THE Refer to "HOW TO CLEAN THE AIR FILTER". AIR CONDITIONER (Refer to Fig. 2) 7. Reattach the suction grille. 1. THE AIR CONDITIONER DOES NOT OPERATE Refer to fig No. 3. 8. -
Page 31: Trouble Shooting
3. The air conditioner operates but it does not 6. DUST FROM THE INDOOR UNITS sufficiently cool. • Dust may blow out from the unit after starting • Check if the air inlet or outlet of indoor unit is blocked operation from long resting time. - Page 32 -&, WARNING-------------------------- When the air conditioner is malfunctioning ( giving off a burning odor, etc.) turn off power to the air conditioner and contact your local dealer. Continued operation under such circumstances may result in a failure, electric shocks or a fire. Contact your local dealer . •...
-
Page 33: Operation Manual Of Remote Controller
Operation Manual of Remote Controller (ARC91A156) �DAIKIN 1. Signal transmitter ll!JD @STD .& * ;� · � . IBBs Sends signals to the indoor unit. ij' a11 ml!!I c,-e 2. Display (LCD): .� 4'00�(;,tcl ilia� .-:-;�.; ,erg Displays the current settings. - Page 34 POWER CHILL operation cannot be used with ECONO and COANDA operation. Priority is given to the function of whichever button is pressed last. POWER CHILL operation can only be set when unit is running. Pressing ON/OFF button causes the settings to be cancelled. The temperature and airflow rate(fan) settings cannot be changed during POWER CHILL operation.
- Page 35 DAIKIN AIRCONDIT/ONING INDIA PVT. LTD. 12th floor, Building No. 9, Tower A, DLF Cyber City, DLF Phase-Ill Gurgaon 122002, Haryana (India) Tel: 0124-4555444 Fax: 0124-4555333 3P731020-1...
Need help?
Do you have a question about the FCW15ARV16 and is the answer not in the manual?
Questions and answers