Table of Contents
Advertisement
Quick Links
Advertisement
Table of Contents

Related Manuals for NetComm VELOCITY Series


Summary of Contents for NetComm VELOCITY Series
- Page 1 NETCOMM VELOCITY™ SERIES Wireless N Extender USER GUIDE...
-
Page 2: Table Of Contents
Setting Static IP ......................................23 Setting a static IP Address ......................................23 For Windows 2000/XP ........................................23 For Windows Vista-32/64 .......................................24 For Windows 7-32/64 ........................................26 For Mac OSX 10.6 .........................................27 Product Warranty ...........................................29 Technical Support ..........................................29 Wireless N Extender User Guide YML124 www.netcomm.com.au... - Page 3 About the NP124...
-
Page 4: About The Np124
The NP124 comes with 1 x 10/100M Auto MDI/MDIx Ethernet port that can be used to connect to an existing wired network to serve as a wireless access point or wireless bridge. It can also be used to upgrade the firmware or configure the device via its web-based configuration page when connected to a computer. Wireless N Extender User Guide YML124 www.netcomm.com.au... -
Page 5: Minimum System Requirements
• NP124 • Ethernet cable • Printed QSG If there are any items missing, please contact NetComm immediately. Safety Precautions • Do not open, service, or change any component. • Only qualified technical specialists are allowed to service the equipment. -
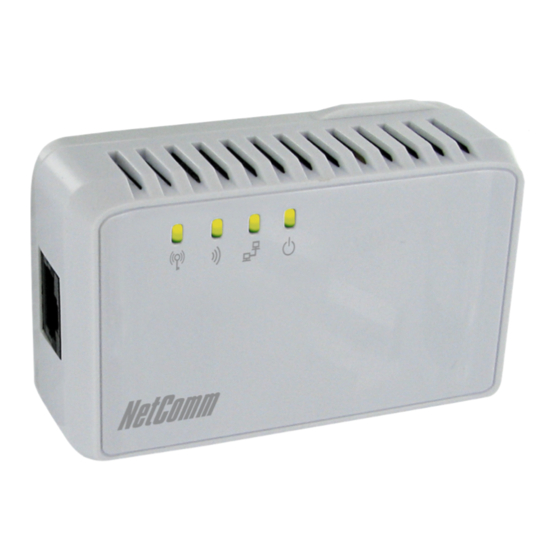
Page 6: Device Overview
WPS authentication is on going WPS disabled Bottom Panel FEATURE DESCRIPTION RESET Press the Reset button for 5 seconds to restore the NP124 to factory default settings ETHERNET PORT Connect to computers/Ethernet devices Wireless N Extender User Guide YML124 www.netcomm.com.au... - Page 7 How to configure WEP/WPA-PSK/WPA2-PSK Wireless Security Set up...
-
Page 8: Setting Up The Np124
5 seconds to restore the device to its factory default configuration. You will then need to refer to the sticker on the back of the NP124 for the default SSID and password in order to connect your wireless devices. Alternatively, you can manually configure the access point settings as required for your wireless network. Wireless N Extender User Guide YML124 www.netcomm.com.au... -
Page 9: Placement When Used As A Wireless Access Point
NetComm Velocity Series - Wireless N Extender Placement when used as a Wireless Access Point You will need to connect the NP124 directly to the modem that is supplying your Internet. For this reason, the placement of the NP124 will... -
Page 10: Configuring The Np124
Click the Connect button located on the right side of the Wireless network you want to connect to. • Enter the wireless network key / passphrase. • Click the Apply button to save the settings. Wireless N Extender User Guide YML124 www.netcomm.com.au... -
Page 11: Using The Np124 As A Wireless Repeater
NetComm Velocity Series - Wireless N Extender Using the NP124 as a Wireless Repeater Once the wireless connection from the NP124 to the wireless router / access point is established you can connect your wireless devices like laptops and smartphones to the wireless repeater. -
Page 12: Using The Np124 As A Wireless Bridge
Note however, that the NP124 will need to be in a position where it can receive a strong wireless signal from your current wireless router. Wireless N Extender User Guide YML124 www.netcomm.com.au... - Page 13 Wireless...
-
Page 14: Wireless
Once you have made any required configuration changes, click Apply to save the new settings. Please note: You will need to re-setup any wirelessly connected devices using the new wireless settings you have selected. Wireless N Extender User Guide YML124 www.netcomm.com.au... -
Page 15: Wps
NetComm Velocity Series - Wireless N Extender WPS (or Wifi Protected Setup) makes it easy for wireless clients to connect to the wireless access point. Press the WPS button on the NP124 and then press the WPS button on the wireless client within 2 minutes, and the wireless security authentication will be done automatically. - Page 16 Home Page...
-
Page 17: Home Page
NetComm Velocity Series - Wireless N Extender Home Page The NP124 Home Page The Home Page displays current network information about your NP124. To view the NP124 Home Page • Open your browser and type 192.168.20.1 (the factory default IP address) into the address bar at the top of page. - Page 18 System management...
-
Page 19: System Management
NetComm Velocity Series - Wireless N Extender System management The System Management menu is used for administering the device settings and firmware. • Open your browser and type 192.168.20.1 (the factory default IP address) into the address bar at the top of page. -
Page 20: Local
Upload a firmware upgrade file to the NP124. Please note: Make sure you connect to the NP124 via an Ethernet cable when upgrading the firmware to avoid corruption during the firmware upgrade procedure. Wireless N Extender User Guide YML124 www.netcomm.com.au... -
Page 21: Settings
NetComm Velocity Series - Wireless N Extender Settings The settings page enables you to backup, restore or reset the current configuration of the NP124. LABEL DESCRIPTION Backup Click the Backup button to save a copy of the current NP124 configuration to your hard drive. - Page 22 Setting Static IP...
-
Page 23: Setting Static Ip
NetComm Velocity Series - Wireless N Extender Setting Static IP Setting a static IP Address Setting a static IP address enables you to access the web based configuration pages for the NP124 after it has been successfully connected to another wireless router or access point. -
Page 24: For Windows Vista-32/64
In the Manage network connections, click on “Manage network connections” to continue. Single RIGHT click on “Local Area connection”, then click “Properties”. The screen will display the information “User Account Control”, click “Continue”. Double click on “Internet Protocol Version 4 (TCP/IPv4)”. Wireless N Extender User Guide YML124 www.netcomm.com.au... - Page 25 NetComm Velocity Series - Wireless N Extender Select “Use the following IP address” and enter the IP address of 192.168.20.2 and a subnet mask of 255.255.255.0. Please note: If you have changed the IP address of the NP124, you will need to enter an appropriate static IP address.
-
Page 26: For Windows 7-32/64
Select “Use the following IP address” and enter the IP address of 192.168.20.2 and a subnet mask of 255.255.255.0. Please note: If you have changed the IP address of the NP124, you will need to enter an appropriate static IP address. Wireless N Extender User Guide YML124 www.netcomm.com.au... -
Page 27: For Mac Osx 10.6
NetComm Velocity Series - Wireless N Extender Click on “OK” to complete the setup procedures. For Mac OSX 10.6 Click the Apple icon and choose System Preferences. Click on Network icon. Set Location to Automatic and click on Ethernet. Select “Manually” from the Configure IPv4 dropdown menu. - Page 28 This warranty is in addition to and not in replacement for such conditions and warranties. To the extent permitted by the Relevant Acts, in relation to your product and any other materials provided with the product (“the Goods”) the liability of NetComm under the Relevant Acts is limited at the option of NetComm to: •...
-
Page 29: Product Warranty
Note: NetComm Technical Support for this product only covers the basic installation and features outlined in the Quick Start Guide. For further information regarding the advanced features of this product, please refer to the configuring sections in the User Guide or contact a Network Specialist.
Need help?
Do you have a question about the VELOCITY Series and is the answer not in the manual?
Questions and answers