Advertisement
Advertisement
Table of Contents

Related Manuals for Acmeda PIUMA

Summary of Contents for Acmeda PIUMA
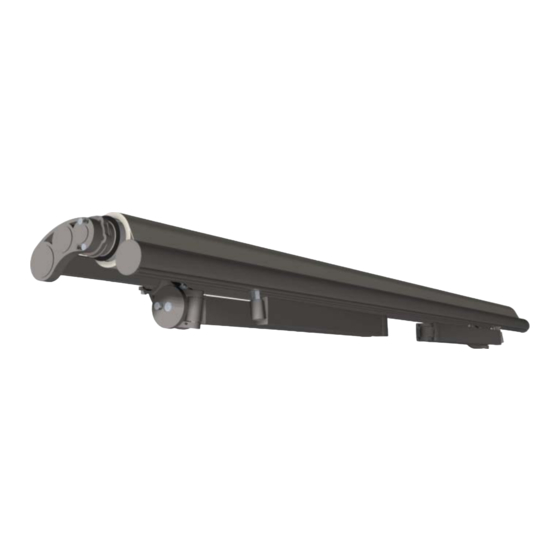
- Page 1 PIUMA INSTALLATION MANUAL December 2014 ...
- Page 2 CONTENTS December 2014 This manual is to be read in conjunction with the Product Specifications & Assembly manual SECTION NO. DESCRIPTION PAGE NO. SECTION 1 − ITEMS REQUIRED SECTION 2 − INSTALLATION SECTION 3 – REGULATING THE AWNING SECTION 4 – REMOVING THE AWNING DISCLAIMER INTRODUCTION This Installation manual has been produced by Acmeda to supply the necessary information for safe and correct installation of this system. INSTALLERS RESPONSIBILITY Before installing, please read & ensure you understand the safety information and installation instructions as defined in this installation manual. If you do not fully understand these instructions, contact Acmeda for clarification before installing. The Installer is responsible to ensure that all installation personnel have been adequately trained on the safe & correct installation and operation. The Installer is responsible to ensure that a Job Safety Analysis or Safe Work Method Statement is completed prior to installation to identify hazards, to determine appropriate risk control measures and to implement the control measures. The Installer is responsible to ensure that supporting structures are sound and can adequately support the load. The Installer is responsible to ensure that the devises used to anchor the product to the supporting structure are suitable for the application. SAFETY INFORMATION Ensure Job Safety Analysis/Safe Work Method Statement is completed and actions to reduce risks are implemented. Ensure that electrical works are done only by a LICENSED ELECTRICIAN. DO NOT modify any of the components of this system. ...
- Page 3 High Frequency Welder Screw Driver – Philips Head [detail if any alternate screw drivers are required] Jaw Pliers [detail if any alternate pliers are required] Scissors Stapler Punch tool / template Measuring Tape Pencil Etc ADDITIONAL ITEMS REQUIRED (NOT SUPPLIED) To assemble a piuma, the following non‐stocked items are required: Staples [specify size if applicable] Fabric Spline [Specify spline sizes and type] Screw [Specify screw type, head type, size, length and material] Rivet [Specify head type, size, grip range and material] Ballast [Specify sizes] Etc BLIND ITEMS REQUIRED ASSEMBLED AWNING BRACKETS ...
- Page 4 SECTION 2 − INSTALLATION STEP 1 – DEFINE BRACKET POSITION Define the distance of the wall/ceiling brackets and position them on the wall STEP 2 – ATTACH AWNING TO BRACKETS Insert the square bar (A) to the wall/ceiling brackets (B) positioned previously. Check distance required to install square bar to brackets (Fig 1.1 & 1.2) STEP 3 – TEST AWNING After having checked the tightness of the front terminal bar connecting screws, remove the safety bands and straps from the arms and open the awning. Fix the fabric to the terminal bar to prevent is from sliding. Use screws between the spline and the extrusion. Open and close the awning twice. IMPORTANT Ensure that there are no persons, animals or things in the vicinity while opening/closing the awning. piuma Installation Manual | December 2014 Page 2.1 © Copyright 2014 | All Rights Reserved Acmeda (International Group) ...
- Page 5 SECTION 3 – REGULATING THE AWNING Once the awning has been assembled, to check that all the components are correctly fitted you must: • Complete 2‐3 test cycles of opening/closing the awning. • Regulate any components that prevent the correct and unimpeded opening and closing movement of the awning. STEP 1 ‐ DESCRIPTION Ensure that there are no persons, animals or things in the vicinity while opening/closing the awning. Slacken the side screw (A)of the folding arm support using and allen key 10. To increase the inclination, slacken the socket head screw (B) using allen key 8. III. To decrease the inclination, tighten the socket‐head screw, raising the front terminal bar. After regulation, check that the front terminal bar is perfectly horizontal. DESCRIPTION After regulation, firmly tighten the side screw. With the awning almost closed, check that the arms are parallel. If they are not parallel, tighten or slacken the dowel in the lever using Allen key 3, accompanying the arm. piuma Installation Manual | December 2014 Page 3.1 © Copyright 2014 | All Rights Reserved Acmeda (International Group) ...
- Page 6 SECTION 4 – REMOVING THE AWNING • The awning must be taken down by qualified personnel. • The awning must be taken down when closed. Remove the screws from the brackets that lock the square bar in place and remove the awning from the brackets. piuma Installation Manual | December 2014 Page 4.1 © Copyright 2014 | All Rights Reserved Acmeda (International Group) ...
Need help?
Do you have a question about the PIUMA and is the answer not in the manual?
Questions and answers