
Related Manuals for Mighty Mule FM123

Summary of Contents for Mighty Mule FM123
- Page 1 User Manual of Product 2: 10 Watt Solar Panel Kit (FM123) for Mighty Mule Automatic Gate Openers,Black Cell...
- Page 2 Solar Powered Battery Charger Installation Manual Compatible with Mighty Mule DC Powered Gate Openers. GTO Limited One Year Warranty GTO Access Systems, LLC ("GTO") gate openers and accessories are covered under warranty by the manufacturer against defects in materials and manufacturer workmanship for a period of one (1) year from date of purchase, provided the recommended installation procedures have been followed.
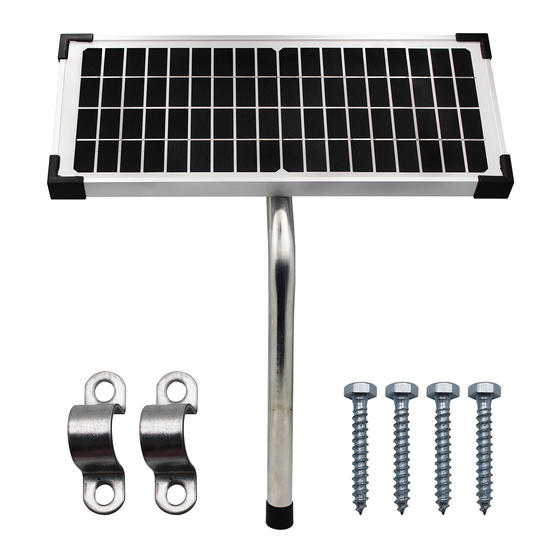
- Page 3 Parts Included: A. Solar Panel B. Lag Bolts (4) C. Pipe Clamps (4) D. Curved Pipe E. Nuts (4) F. Bolts (4) G. Wire Nuts (2) H. Wrench Tools Required : • Phillips head screwdriver STEP 1: Position the curved pipe (D) between the pre- drilled holes on the back side of the frame and place the two pipe clamps (C) over the curved pipe.
- Page 4 STEP 2: Determine the installation site for the solar panel. IMPORTANT: • Place the panel facing due south in the path of the sun. • The solar panel must be placed in an open area away from shade.* • The solar panel should receive at least 8 hours of direct sunlight for a full charge.
- Page 5 GTO. Any reprinting of GTO publications is by permission only. Copyright infringement is a violation of federal law. Mighty Mule, E-Z Gate, Linear PRO Access, GTO, are registered trademarks of GTO Access Systems, LLC. All rights are reserved by GTO, and these marks may not be used, in any for without the prior, written permission of GTO.
Need help?
Do you have a question about the FM123 and is the answer not in the manual?
Questions and answers
show where solar panel wires go for the control box