Advertisement

 Read these instructions carefully before using the appliance.
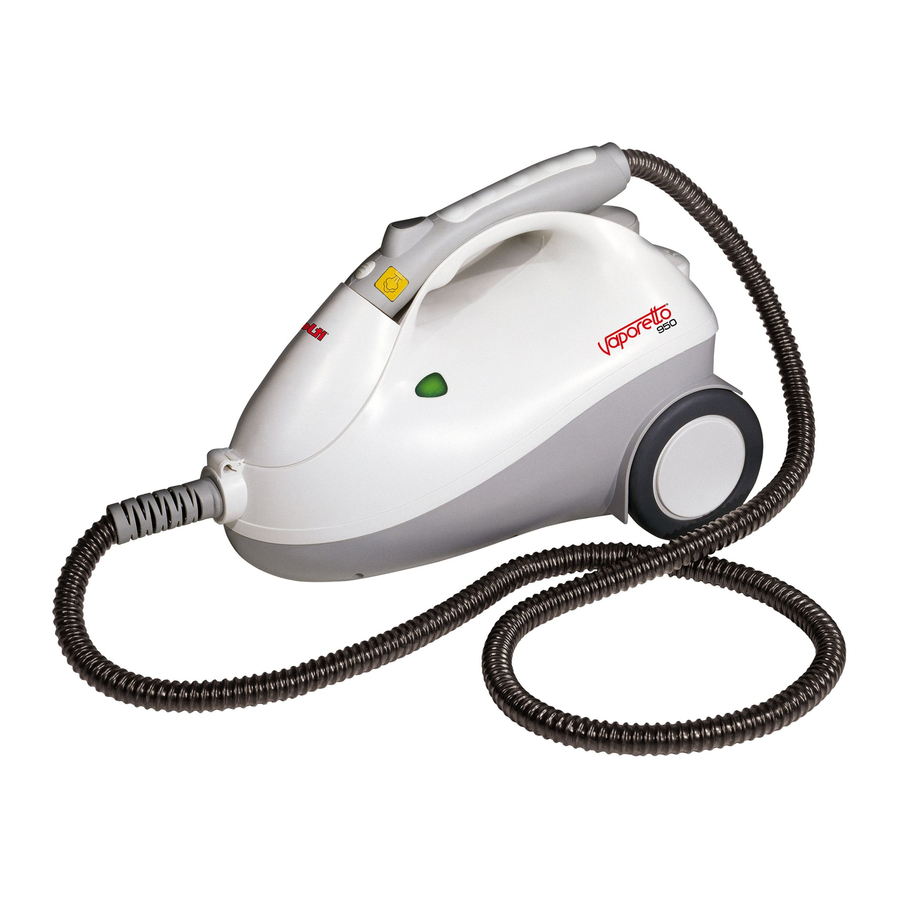
GENERATOR

- Safety cap
- ON/OFF switch
- Steam pressure indicator light
- Power cable
- Carry handle
ACCESSORIES
- Hose
- Steam pistol
- Safety lock
- Steam button
- Small tool reducer
- Lance
- Curved nozzle for lance
- Round nylon brush
- Round brass brush
- Extension tubes
- Large brush
- Lever attachments
- Cloth for large brush
- Bristle selector
- Brush attachment
- Funnel
- Jug
- Accessory lock button
- Small nozzle
- Cloth for small nozzle
- Squeegee attachment for small nozzle
This apparatus conforms with EC 89/336 directive modified by 93/68 (EMC) and 73/23 directive, modified by 93/68 ( low voltage)
POLTI S.p. A, reserves the right without prior notice to introduce technical and construction changes as it considers necessary.
PRECAUTIONS
KEEP THESE INSTRUCTIONS
- Read these instructions for use carefully before using the appliance.
- Any use which does not comply with these instructions will invalidate the warranty.
- The wiring system to which the appliance is connected must always comply with the laws in force.
- Before connecting the appliance, make sure that the mains voltage is the same as the voltage indicated on the data label of the appliance and that the power outlet is connected to earth.
- Always turn off the appliance at the on/off switch before unplugging it.
- If the appliance is left unused, always disconnect it from the mains. Never leave the appliance unattended with the cable plugged into the mains.
- Always make sure the appliance is unplugged before performing maintenance work of any kind.
- Do not pull the power cord out of the socket, but grasp the plug itself to avoid damage to the socket.
- Do not allow the power cord to be twisted, crushed, stretched, or come into contact with sharp or hot surfaces.
- Do not use the appliance if the power cable or other important parts are damaged.
- Do not use electric extension leads that are not authorized by the manufacturer, as they may cause damage or fire.
- If it is necessary to replace the power supply cable, please refer to the nearest Polti authorised service centre, since the use of a special tool is necessary.
- Never touch the appliance with wet hands or feet with the cable plug-ged into the mains.
- Do not use the appliance when barefoot.
- Do not use the appliance near a bathtub, shower or container full of water.
- Never immerse the appliance, the cable or the plugs in water or ano-ther liquid.
- Use of the appliance in places where there is a danger of explosions is prohibited.
- Do not use the product with toxic substances.
- Do not lay the hot appliance on surfaces sensitive to heat.
- Do not leave the appliance exposed to wind or rain.
- Do not place the appliance near a live element, an electric stove or any other source of heat.
- Do not expose the appliance to extreme temperatures.
- Never let children or people who are not familiar with how the appliance works use it.
- Do not press the buttons hard or with a pointed object such as a pen.
- Always rest the appliance on a stable surface.
- In case of accidental fall of the appliance it is necessary to have it checked by an authorized Service Centre as the internal safety features may have been affected.
- In case of breakdown or malfunction switch off the appliance and never attempt to disassemble it, but refer to an authorized Service Centre.
- In order to avoid prejudicing the safety of the appliance, use only original spare parts and accessories approved by the manufacturer.
- Do not wind the power cord around the appliance, especially when the appliance is still hot.
- During refilling with water, switch off and disconnect the appliance from the mains.
- Do not direct the steam jet on electrical and/or electronic appliances.
- Let the appliance cool down before cleaning it.
- Before storing the appliance make sure that it has completely cooled down.
- This appliance is equipped with safety devices which are to be replaced only by a suitably qualified technician.
- Do not direct the steam jet at people, animals or debris. Never place your hands inside the jet of steam.
![]()
ATTENTION: Danger of burns! - When refilling the boiler, use HOT rather than cold water, pour in gently at first and keep your face away. Otherwise the still hot boiler walls can spit drops of very hot water or steam spray.
- Do not put any detergent or chemical substance in the boiler.
- Make sure the patented safety cap is fully and correctly screwed on, otherwise you may experience very hot steam escaping from around the cap.
- Do not refill the boiler while it is still hot. Allow it to cool down for a few minutes before refilling.
- Do not empty the appliance when the water in the boiler is still hot.
- Do not try to unscrew the safety cap when the appliance is in use.
- Check the safety cap and that the related inner gasket is present, replace them with original spare parts if necessary.
- This appliance is not intended for use by persons (including children)with reduced physical, sensory or mental capabilities, or lack of experience and knowledge, unless they have been given supervision or instruction concerning use of the appliance by a person responsible for their safety.
- Children should be supervised to ensure that they do not play with the appliance.

CORRECT USE OF THE PRODUCT
This appliance is intended for home use as a steam generator as described and in accordance with the instructions provided in this manual. Please read these instructions carefully and keep them, as you may find them useful in future.
Polti declines liability for any damage or accident derived from any use of Vaporetto which is not in conformity with the instructions contained in this booklet.
ATTENTION
Directive 2002/96/EC (Waste Electrical and Electronic Equipment - WEEE): information for users
This product complies with EU Directive 2002/96/EC.

The crossed-out wastebasket symbol on the appliance means that at the end of its useful lifespan, the product must be disposed of separately from ordinary household wastes.
The user is responsible for delivering the appliance to an appropriate collection facility at the end of its useful lifespan.
Appropriate separate collection to permit recycling, treatment and environmentally compatible disposal helps prevent negative impact on the environment and human health and promotes recycling of the materials making up the product. For more information on available collection facilities, contact your local waste collection service or the shop where you bought this appliance.
IMPORTANT

Before leaving our factory all our products are rigorously tested. Your Vaporetto may contain some residual water in the boiler from the factory testing.
PREPARATION
- Unscrew the safety cap (A) (fig.1) and fill the boiler with 1,3 l of water using the jug (10) and the funnel (9) provided (fig.2).

- Carefully screw the safety cap all the way back on.
Make sure that the safety cap (A) is screwed on properly. If it is not, the appliance may leak steam. - Plug the power cord (D) into a suitable earthed outlet.

USE
- Press the ON/OFF (B) switch; it will light up.
- Wait until the pressure indicator light (C) comes on (about 10 minutes). Vaporetto is now ready to use.
- The steam pistol (2) has a safety lock (3) to prevent accidental production of steam by children or people unfamiliar with the appliance. To prevent accidental steam production, move the safety lock button (3) back. When you wish to resume steam production, move the safety lock button (3) in the opposite direction and press the steam button (4) (fig. 3).

The first time you use the appliance it may leak a few drops of water due to incomplete temperature stabilisation in the hose. We therefore suggest that you initially direct the jet of steam onto a cloth, until the jet of steam appears uniform.

NOTE: the pressure indicator (C) will go on and off while the appliance is in use. This indicates that the electrical resistance is operating to maintain constant pressure and should therefore be considered normal.

If you press the steam button (4) when the appliance is still under pressure, even if the appliance is turned off and unplugged, steam may be released through the hose. So when you turn off the appliance, press (4) until no more steam comes out of the appliance before putting the appliance away.
CONNECTION OF ACCESSORIES
- To connect the extension tubes (7) to the handle, screw the extension tube with the ring onto the handle (fig. 4).

- When the extension tube is connected to the handle you can connect the other tube (7), the reducer (5) and the big brush (8) to it as shown in fig.5.

- To release the accessory, hold the button (11) down and separate out the components.
- Check that accessories are tightly attached before using them.
- The lance (6) and small nozzle (12) tools may be connected directly to the handle as shown in fig.6, or connected with extension tubes by first connecting up the reducer (5) to the extension tube. When the reducer has been attached, you can connect the desired accessory and lock it in place by turning it in the direction of the arrow appearing on it (fig.6).


PATENTED SAFETY CAP / "WATER OUT"
This appliance has a safety cap to prevent the boiler from being accidentally opened if there is even minimal pressure inside it. Proceed as described below to unscrew it. An acoustic warning will sound when the water level in the boiler is low. Proceed as follows when the water level in the boiler is low:
- Turn off the appliance with the ON/OFF switch (B).
- Work the steam button (4) on the steam pistol (2) until there is no more steam.
- Unplug the power cord (D).
- Wait a few minutes for the boiler to cool down.
- Unscrew the safety cap (A) anticlockwise.
- Fill the boiler as described in point 1 of the PREPARATION section. If filling the boiler tank while the appliance is hot, add only a little water at a time, in case it evaporates instantly.
ADVICE FOR TOOL USE
PRECAUTIONS
- Consult the manufacturer's instructions before treating skins, special fabrics or wooden surfaces, and always perform a test on a hidden corner or on a sample of the material. Let the steam-treated part dry and check that steam treatment has not resulted in colour changes or deformation.
- Take special care when cleaning wooden surfaces (furniture, doors, etc.) and treated terracotta floors, as prolonged use of steam can damage the wax, polish or colour on the surface to be cleaned. Spray surfaces of this kind only briefly, or spray steam onto a cloth and then use the cloth to clean them.
- Always cover brushes with a cloth when cleaning particularly delicate surfaces (such as synthetic materials, lacquered surfaces, etc.).
- When cleaning glass surfaces in particularly cold weather, preheat the glass by spraying steam from a distance of about 50 cm.
- Spray plants from a minimum distance of 50 cm.
STEAM PISTOL (2)
You may use the steam pistol alone for special cleaning tasks without assembling brushes on it, spraying from the appropriate distance for the type of material and the type of dirt to be cleaned. The dirtier the object, the closer you must hold the steam pistol, so that steam temperature and pressure will be higher. Always wipe dirt off with a dry cloth or remove stubborn dirt with an abrasive sponge after spraying. Use the steam pistol to:
- treat stains on carpets and rugs before brushing them;
- clean stainless steel, glass, mirrors, and laminated and enamelled surfaces;
- clean hard-to-reach corners such as stairs, window frames, doorjambs, aluminium profiles;
- clean knobs on cookers and the base of faucets;
- clean shutters, radiators, and automobile interiors;
- spray houseplants (from a distance);
- remove odours and wrinkles from clothes. Add extension tubes to the steam pistol if necessary to reach hard-to-reach spots.
LARGE BRUSH (8)
Before you can connect the large brush to extension tubes, you must apply the brush attachment (8D) to the brush as shown in fig.7.

To clean floors, place the brush on a dry, clean cloth and move it back and forth without pressing down on it. When one side is dirty, turn the cloth around. Work the brush from side to side without a cloth to clean areas with dirt or deposits and the gaps between tiles. Use the steam pistol directly on hard-to-reach areas and stains, wiping them afterwards with the cloth. To clean washable vertical surfaces or wallpaper and ceiling light fixtures, cover the brush with a dry cloth and work in the same way as when cleaning floors. Terry cloth is particularly recommended (such as old towels). Vaporetto ensures maximum sanitisation and brightens up colours when cleaning synthetic or wool carpeting on walls or floors and rugs of all kinds. Use the brush without a cloth to bring dirt to the surface, then cover the brush with the cloth (8B) by locking it into the lever attachments provided (8A). When using the cloth, set the brush selector (8C) so that the frame under the brush is lowered, then go over the surface again to collect dirt. Fold the cloth over two or three times, depending how delicate your carpet is. Work quickly and without pressing down on the carpet, moving the brush forwards, backwards and from side to side without lingering too long on the same area. You can repeat this treatment as often as you like without damaging the surfaces. They will dry almost immediately. If your carpet is very dirty or is saturated with cleaning products, do not be too insistent; you will not obtain the desired results until you have used the Vaporetto a few times. To remove particularly stubborn dirt, treat the stained area directly with the steam pistol (from a distance of 5 - 10 cm) and rub hard with a cloth before proceeding with the treatment described above.
SMALL NOZZLE (12)
To connect up the small nozzle to the extension tubes, first connect up the small tool reducer (5) and then connect the tool directly to the reducer.
Use the small nozzle whenever it is impossible or inconvenient to use the large brush.
The small nozzle may be used on:
- upholstery fabrics (after testing on a hidden corner);
- velvet and leather (from a distance);
- automobile interiors, dirty windshields;
- small glass surfaces;
- tiles and other small surfaces.
When cleaning wood (door jambs, floors, etc.), do not spray directly onto the wood but cover the brush (whether large or small) with a cotton cloth folded over several times. When cleaning furniture, spray steam onto a dry cotton cloth then use it to clean. The warm damp cloth will eliminate dust, dirt and static electricity, so that the furniture will stay clean longer without use of harmful cleaning products.
The following two accessories may be applied to the small nozzle:
12A – Small nozzle cover: Fit the cloth over the small nozzle before cleaning the surface to be treated.
12B – Small nozzle squeegee attachment: apply the attachment to the small nozzle (without the cloth (12A)) as shown in figure 8.

Clean glass in 2 stages:
- Pass steam over the surface to be cleaned to dissolve dirt, by pressing the steam button (4);
- Pass the squeegee attachment over the surface without releasing steam to get rid of the dirt.
LANCE (6)
Before connecting the lance to the extension tubes, you must connect up the small tool reducer (5) and connect the accessory directly to the reducer.
You may use the lance to spray hidden corners which are hard to reach with the steam pistol. Perfect for cleaning radiators, door and window frames, bathroom fixtures and shutters, the lance is a very useful, irreplaceable accessory.
The following tools may be connected with the lance:
6A – Curved nozzle for lance: for reaching particularly hard to reach corners with its curved shape.
6B – Round nylon brush and 6C – Round brass brush: for removing deposits from very narrow surfaces such as stove elements, roller blinds, gaps between tiles, bathroom fixtures, etc. Chose the appropriate brush depending on how stubborn the deposit is.
To connect accessories 6A-6B-6C to the lance (6), simply connect the accessories to the tip of the lance and press gently (fig.9).

PUTTING THE APPLIANCE AWAY (fig.10)

- The brush can be stored on the back of the appliance with its two extension tubes assembled.
- The cable can be wound around the pins on the extension tubes.
- The hose handle fits into the appliance handle so that you can grasp it along with the appliance handle when carrying the appliance.
CARE OF YOUR APPLIANCE
- Before attempting any maintenance operation, make sure to always disconnect the appliance from the mains
- We recommend that the bristles of the brushes are allowed to cool down in their normal position after use, so as to avoid any misshaping.
- To clean the body of the appliance, simply use a moist cloth.

Documents / ResourcesDownload manual
Here you can download full pdf version of manual, it may contain additional safety instructions, warranty information, FCC rules, etc.
Advertisement


Need help?
Do you have a question about the Vaporetto 950 and is the answer not in the manual?
Questions and answers